As resource conservation and “healthy homes” become more important in today’s construction industry, the concept of “Passive home design” has taken center stage. Many of us have heard about this tag phrase, but don’t really understand it. As a builder, it is my job to stay on top of the latest and greatest trends in building technology, not only to produce a better, more durable tiny house, but to ensure a healthy environment for its inhabitants. So what exactly does passive design mean? The best definition I could find online comes from Your Home, an Australian government site providing resources for better home design:
Passive design’ is design that takes advantage of the climate to maintain a comfortable temperature range in the home. Passive design reduces or eliminates the need for auxiliary heating or cooling…
Perhaps another way to think about it, is that the design of the structure allows it to passively stay in a state of comfort, versus a highly mechanized building that has to “actively” keep the conditions comfortable. So, passive design originated in regard to larger buildings, both residences and commercial/civic. It is not a new term at all, in fact, prior to mechanical ventilation, any good designer knew and worked with the principles or proper orientation, designing shade for summer months but allowing full sun in the winter, thermal mass, prevailing winds, etc. These same principles still apply, however, in the age of building sciences and HVAC systems, passive design has also taken the form of high performance materials, air tight construction, and fresh air ventilation with energy recovery.
This might all be flying right over you head at the moment, but I will break it all down. First, we need to understand how passive design applies to tiny houses. These structures are much smaller, mobile, and can travel to different climates. Principles of thermal mass, orientation, and other won’t necessarily apply, so we have to focus more on the performance and health of the building. For the building to stand up to the elements, it needs to be water impermeable. To save energy and keep it comfortable whether in the depths of winter or peak of summer, it needs to be well insulated and airtight. Now, because we have constructed a hermetically sealed space and plan to live in it, we need to find a way to expunge dirty air and bring in healthy fresh air without wasting heat energy. These are really the underlying principles of tiny house passive design. How do we do all this ?
Isabelle Nagel-Brice, tiny house dweller and owner of atinygoodthing.com, wanted only the best for her tiny house that she began construction on in the fall of 2015. After extensive research, she partnered with a Colorado company known as Mainstream Corporation. Despite the slightly confusing name, this is a small company with a focus on passive design and bringing more advanced European products into the US market. Europe has always been ahead of the US when it comes to building science, but sourcing such products can be difficult. Enter Mainstream! These guys have done the legwork of researching various products, and finding ones that not only have outstanding performance properties, but that can be easily imported and sold at reasonable rates.
I’m going to focus on four main products that you can get from them to help you build a healthier, more energy efficient tiny house. The first is the Solitex Mento 1000 weather barrier. Tyvek and locally branded polyethylene weave fabrics have been the go to for over 30 years, and they are still good products, but the Mento takes it a few steps further. Not only do you get superior protection against water and air infiltration, but the fabric is highly breathable. Moisture rates in the house, the walls, and the atmosphere will constantly fluctuate, and what you don’t want to happen is moisture vapor getting stuck in your wall. This fabric will block liquid water from ever getting into your walls just like any other weather barrier, but it has a higher PERM rating, meaning it is going to ‘breathe’ better and allow water vapor to flow more freely. Compared to Tyvek, it is softer and slightly more forgiving when installing it. Stephanie and I decided to use it on our new tiny house build and are very pleased with it. You can also use it as your roof underlayment, although I would recommend the heavier Mento Plus for this application.
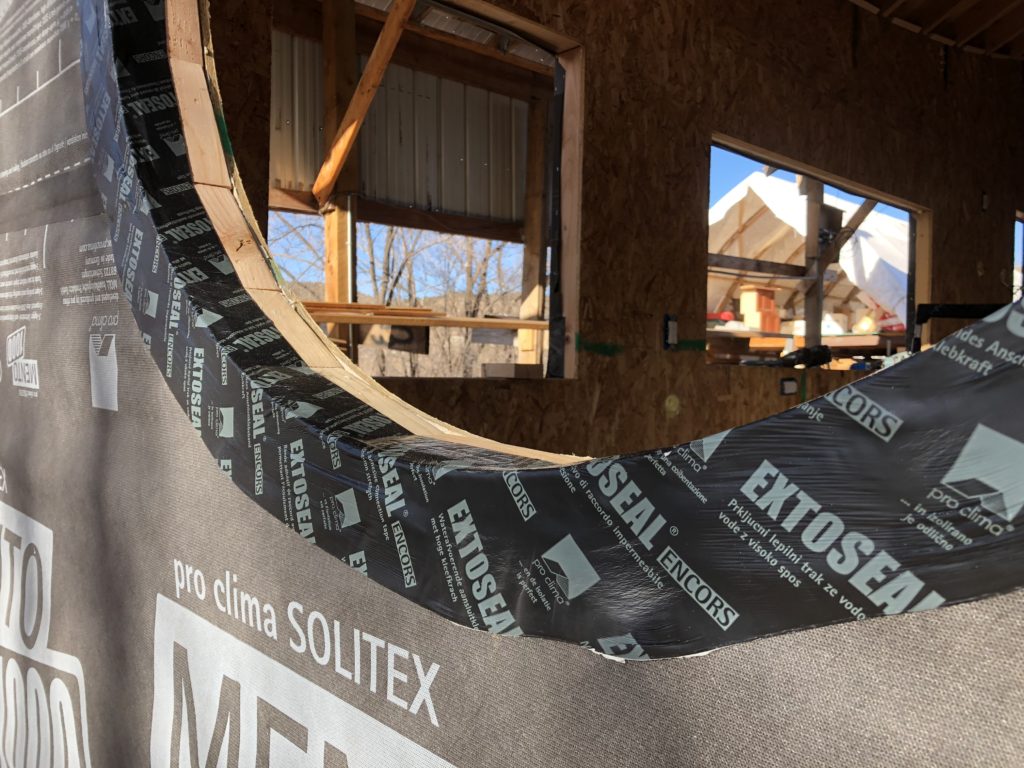
The next line of products to consider are the construction tapes they offer. My new house is a hybrid SIP wall/stick frame roof. Before installing the Mento wrap, they suggested that I tape all of my SIP seams, wall to trailer seams, and wall to roof seams, corner seams, etc with the blue Tescon Vana tape. This stuff is the bomb! Very sticky, very pliable, easy to apply, and it seals everything shut! I ordered 4 rolls and went through all of them! You’ll want to order a few rolls of the black Tescon Invis to tape the seams of your Mento weather barrier. I purchased one roll of 6″ Extoseal Encors to fashion my window sills, and a few rolls of the Tescon Vana 150 to tape my windows. You can just tell that this tape is never going to let go! I’ve worked with some “normal” window tapes from the big box stores, and I’ve always questioned whether the adhesive will hold over time. I don’t have these concerns with these tapes. To add icing to the cake, most of these tapes are designed to be breathable too, just like the Mento.
The third product I will mention briefly is the Intello Plus interior vapor retarder. This is a roll product that you would apply to your interior walls and ceiling prior to installing your finishes. It acts to keep the moisture from every day living from entering your wall cavity in the first place. Interior Vapor barriers have long been a discussion in tiny house construction. Those who believe it necessary typically use plastic sheeting, like a 1 mil drop cloth. This is cheap and easy, but not necessary the best option since it also does not let any moisture vapor that might get into the wall via other means from escaping. The Intello is considered “smart” because it knows when to block vapor completely and when to let some pass through. It’s basically a function of interior vs exterior temperatures and humidity. I chose not to install this product in my house because the EPS foam in my SIP’s is effectively a vapor barrier, as is the closed cell spray foam in my ceiling. I also live in a dry climate. Had I chose to install a batt insulation product such as fiberglass, Roxul, natural wool, blown in cellulose, etc. then I would have definitely opted for this product. Also, if I intended to live primarily in a very humid climate, I would definitely consider using this wrap.
The fourth piece of the puzzle that this company can help with is ventilation. After creating this perfectly air tight environment, you are going to cook, bathe, breathe, and perform other living activities that introduce moisture into the space. If you don’t find a way to flush out this stale moist air, your house is going to start having mold issues, and you might even start having health issues due to toxins in the air. Now, you could just crack a window and put a fan in it. During the nicer times of year, this isn’t a problem, in fact I recommend you keep as many windows open as possible! What about winter or summer though? If you are paying for energy to heat or cool your space, you don’t want to throw that money away, do you? Enter an Energy Recovery Ventilator (ERV), sometimes also known as a Heat Recovery Ventilator (HRV). Long before working with Mainstream, we were installing the Lunos E2 and even the Lunos Next for the largest builds, but these guys turned us on the to the Lunos eGO, a more compact unit with only one wall penetration instead of two, and also a little cheaper than the E2. Which one will suit your needs better depends on your design, but in general I would say 24′ and under, go with an eGO, and larger than this use the E2. For extremely large builds, you might consider the Next. They all operate on the same basis. There is a tube that goes through your wall. In this tube is a ceramic core. A small fan pushes and pulls air back and forth across the core in cycles. As conditioned air from the house passes through the core, the material collects the heat energy from this air. When the cycle reverses, fresh air from the exterior than passes through the core and recovers the heat energy. Brilliant, isn’t it? The cheapest unit starts at $795, not really that cheap, but it is hard to put a price on the health of your home and yourself. There are horror stories out there of people who did not ventilate their tiny home and ended up having to gut their walls to remediate mold and replace insulation. I’m sure this process ended up costing way more than $800!! If you cannot swing the cost of a Lunos up front, then please make sure you have some way of venting your house, even if that means cracking a window in winter time!
If you are a DIYer and are interested in upgrading the performance of your tiny house, please reach out to Isabelle or Cody at Mainstream. You can buy only the components you need, or for more convenience they have put together tiny house kits based on the size of you build that will include proper quantity and sizes. If you are a prospective customer of ours, we already encourage the use of these products and intend to make them standard on all of our builds by mid 2018. Below are a few pictures of these products in action on my new personal build! You are primarily seeing the blue Vana tape and Mento 1000 weather barrier. We have a Lunos eGO ready to install but won’t get to this phase of the build for a few more months.


Leave a Reply