Tiny Living in a Big World

  • About
    • Philosophy
    • The Tiny House Movement
    • How To Get Started
    • Delivery
    • Media
  • TINY HOUSES
    • Gallery
    • Features & Options
    • Shell Builds
    • Tiny House Size Limitations
  • Tiny Commerce
  • Tiny House Plans
  • Pricing
    • Financing
    • Contract Pricing Details
  • FAQ
  • Other Services
  • Contact

© 2025 RMTH

Privacy Policy

Terms & Conditions

16′ Foot Curved Roof Tiny House

May 8, 2016 By Greg Parham 23 Comments

curved roof tiny house exterior

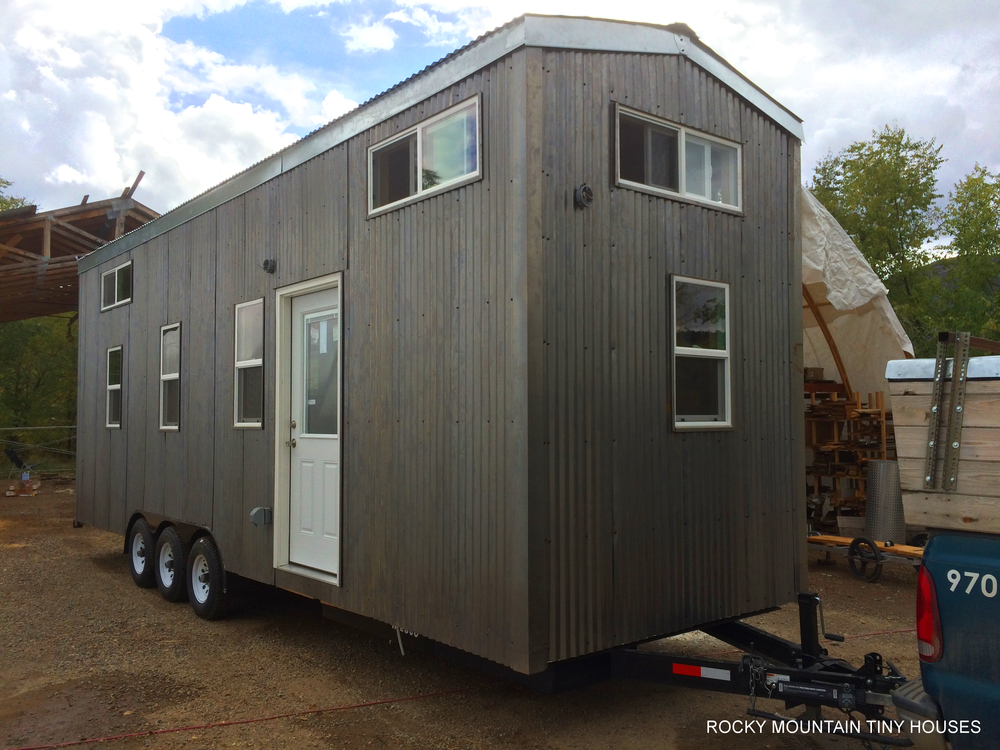
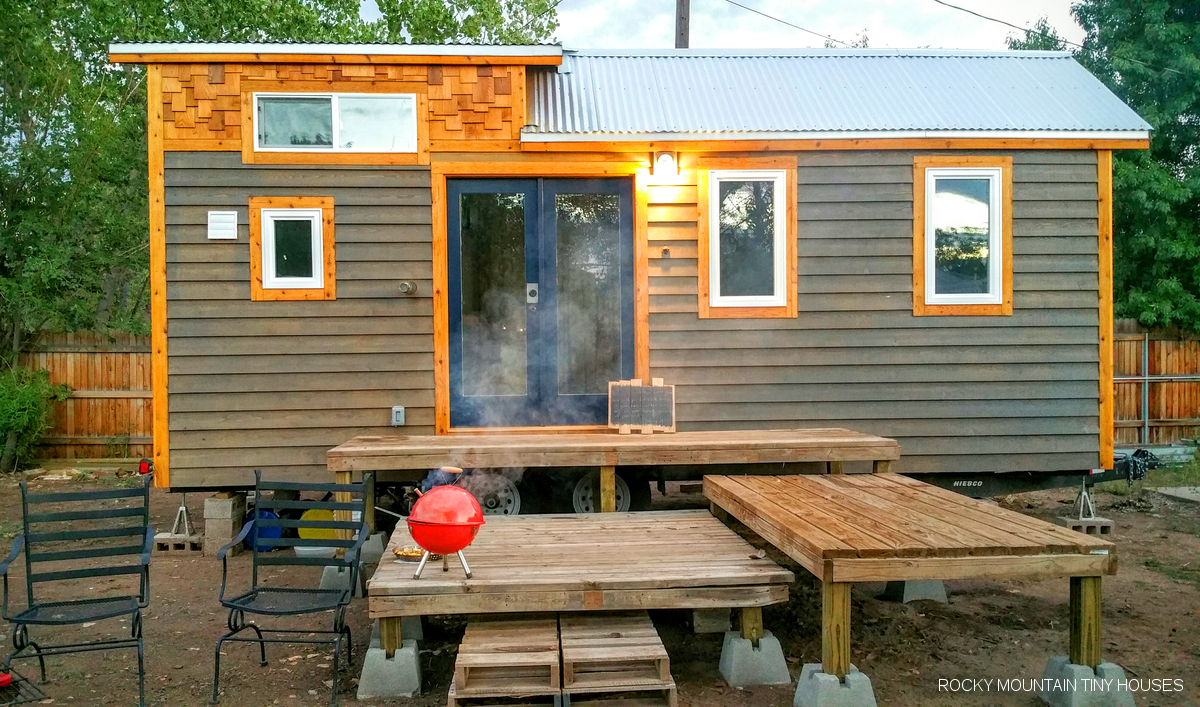
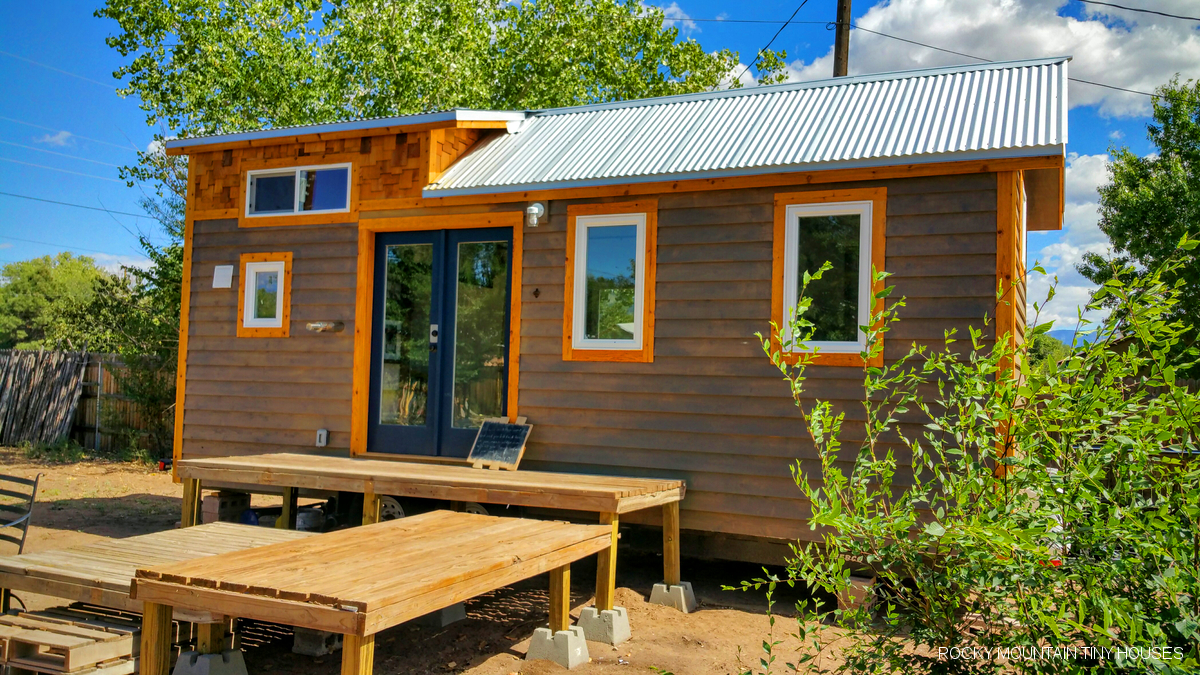
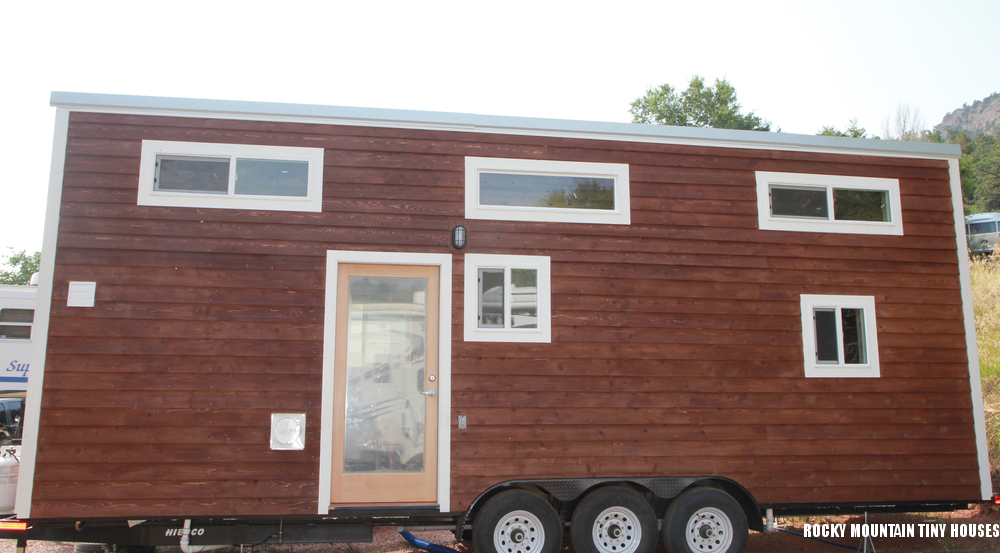
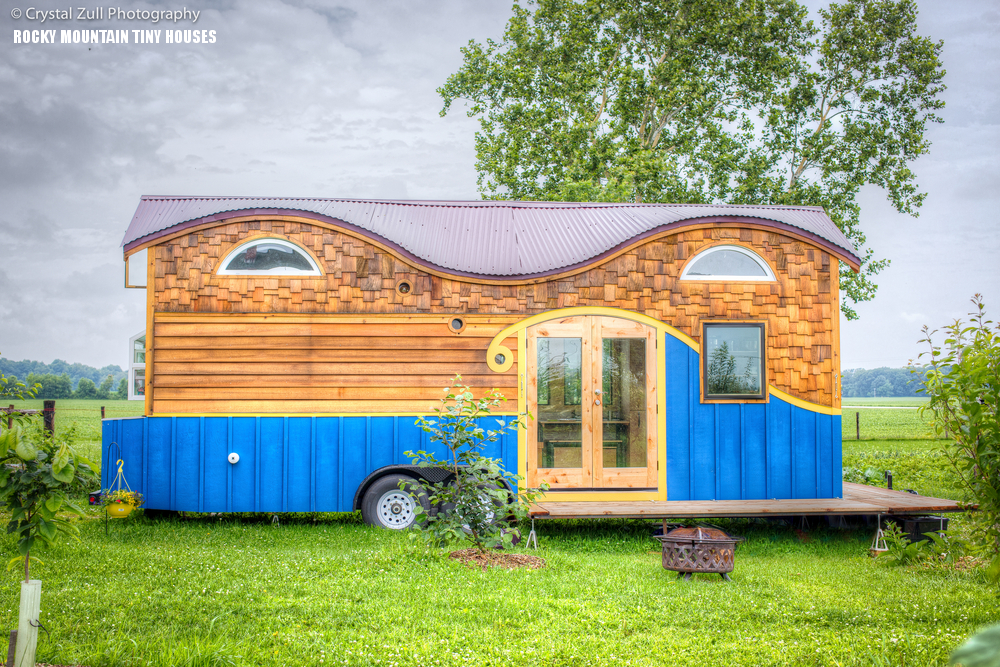
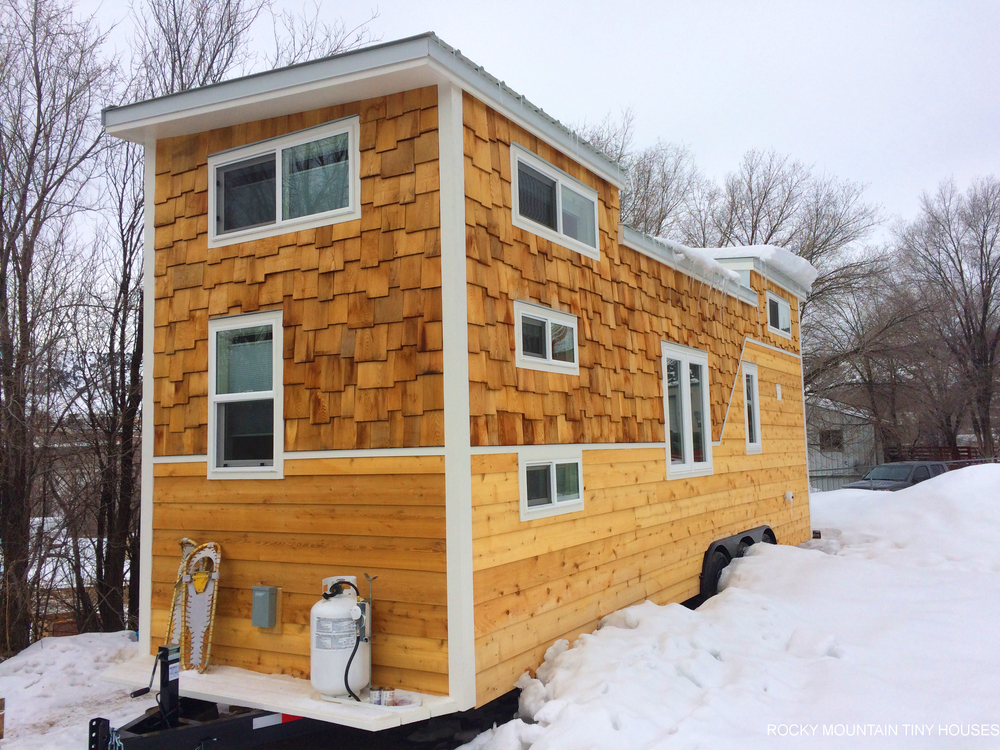
A lovely young woman from Georgia commissioned us to design and build this unique tiny house. Having seen and admired the features found in our Boulder and Front Range models, but also being really attracted to the curved roof line of the Leaf Version III tiny house, and of course wanting to customize the house to meet her needs, she put her trust in us to deliver a fantastic product.

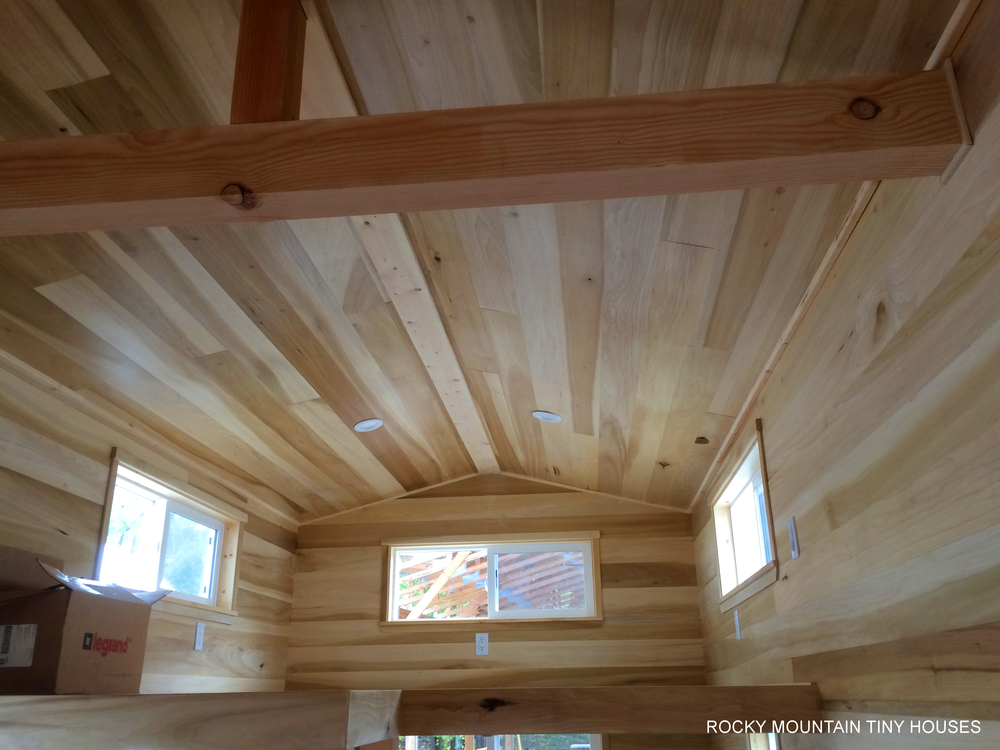
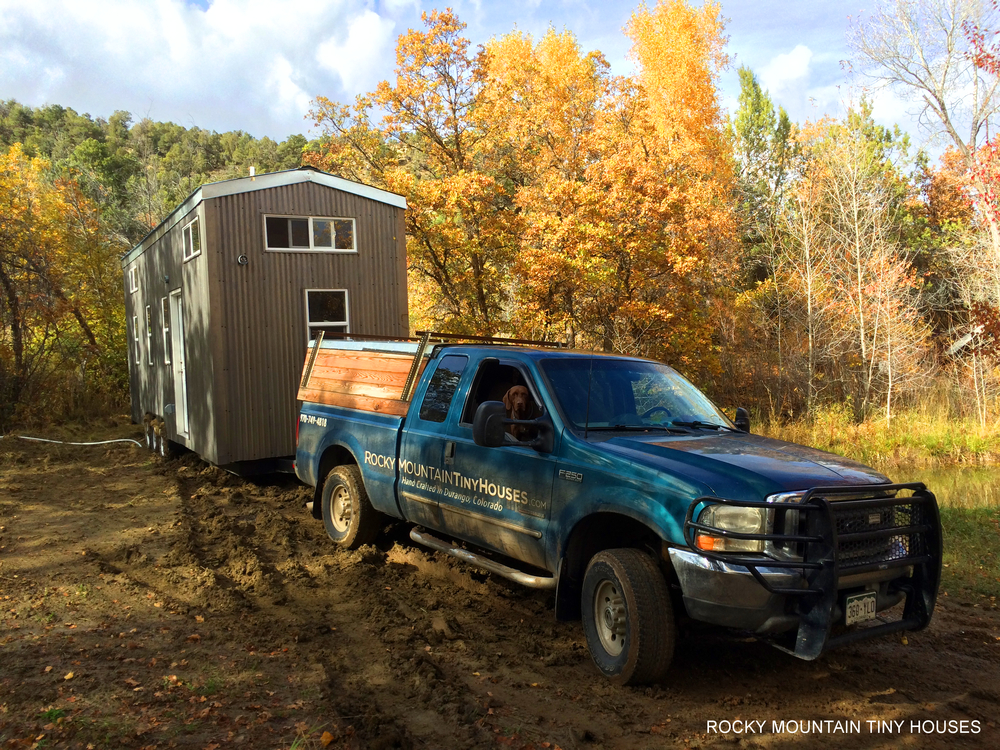
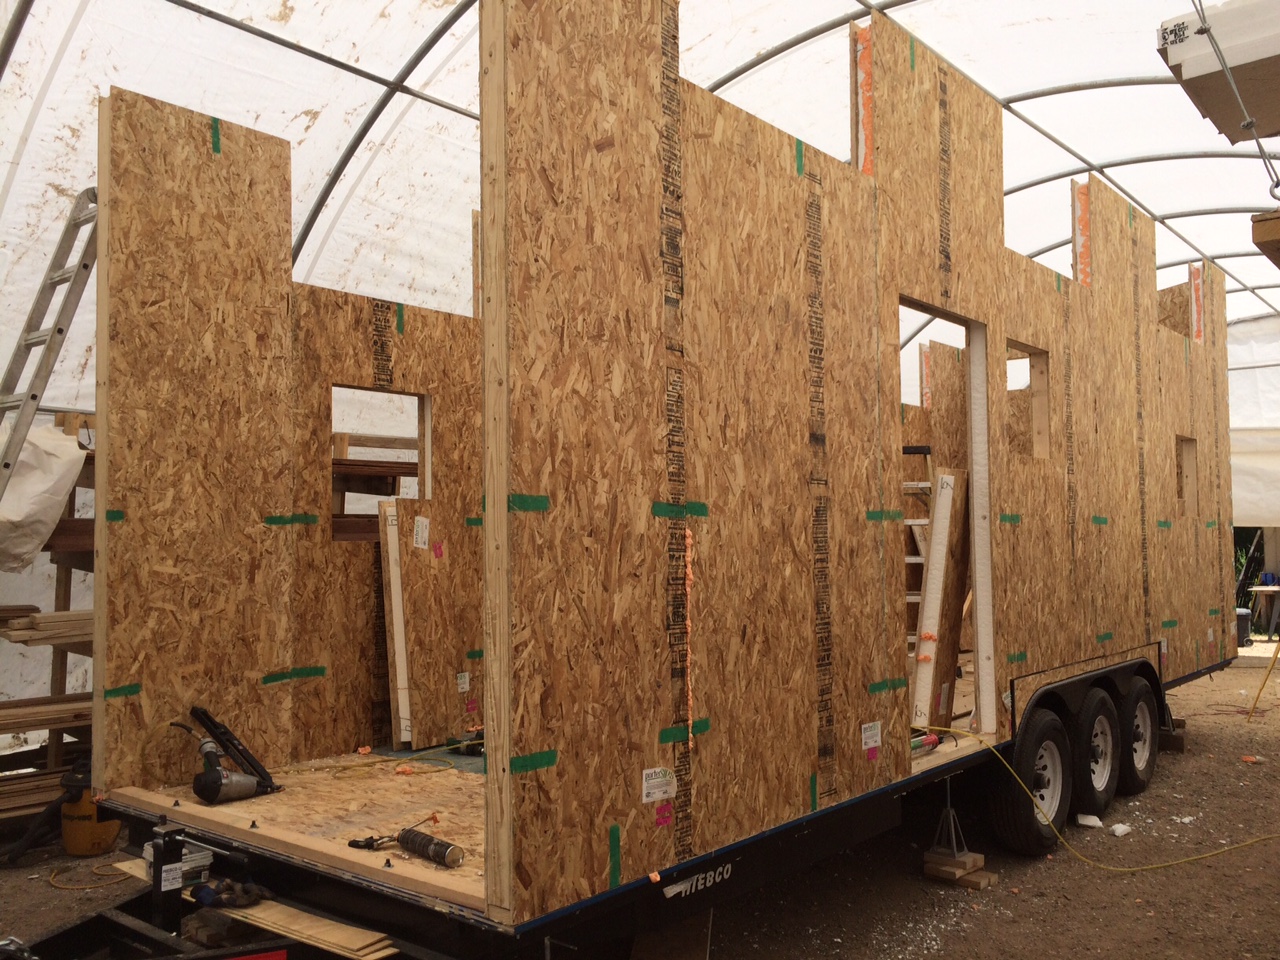
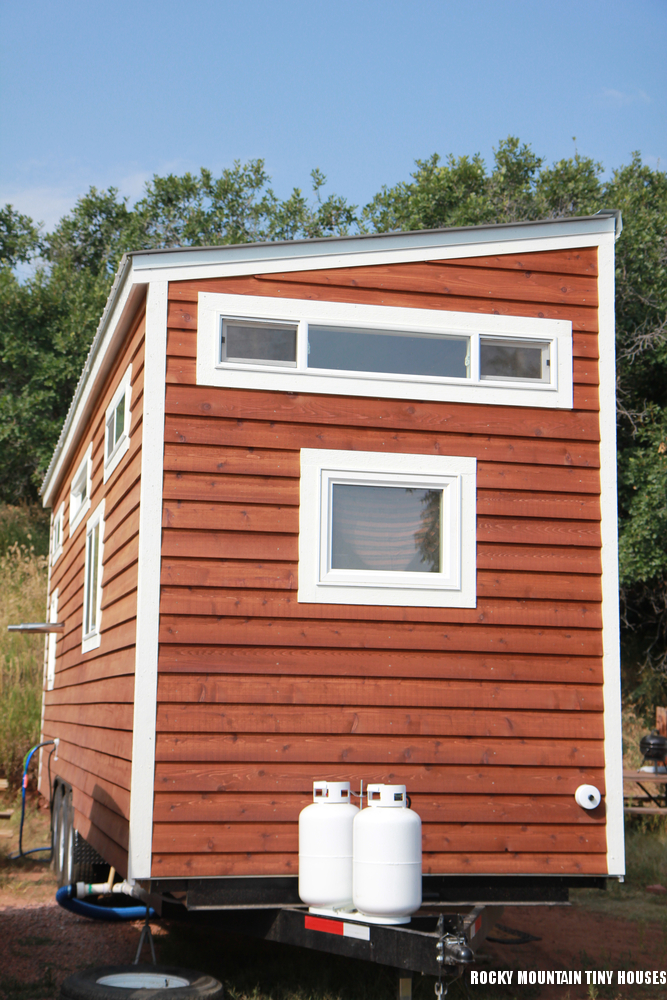
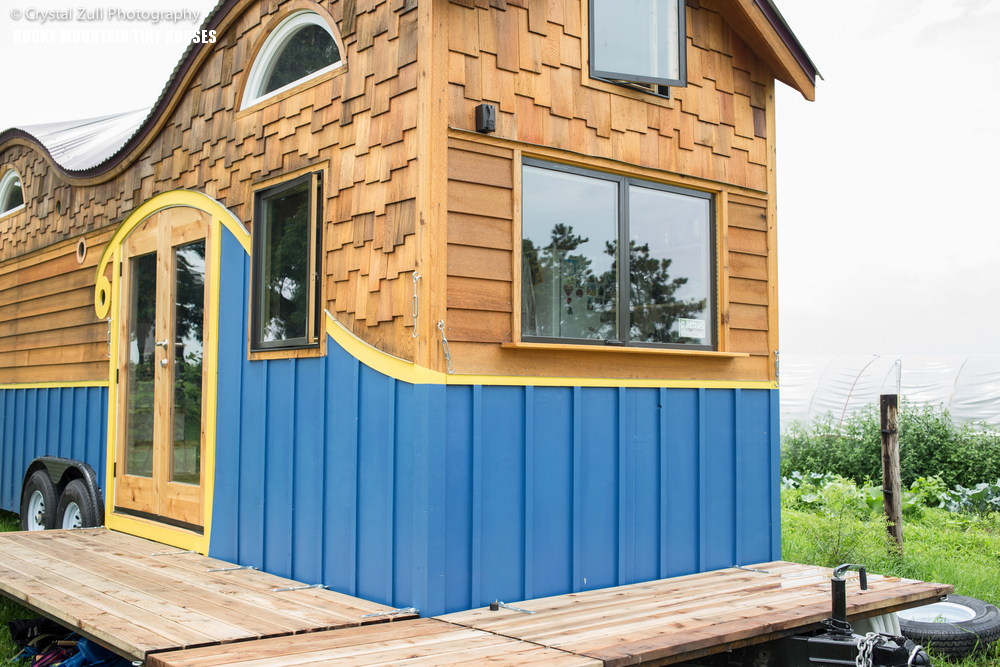
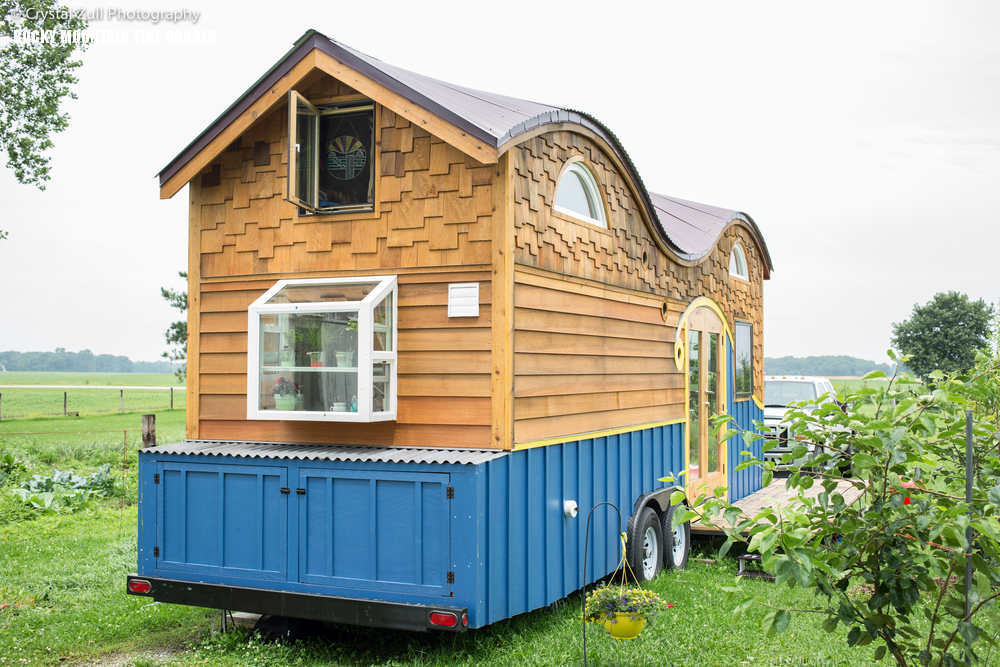
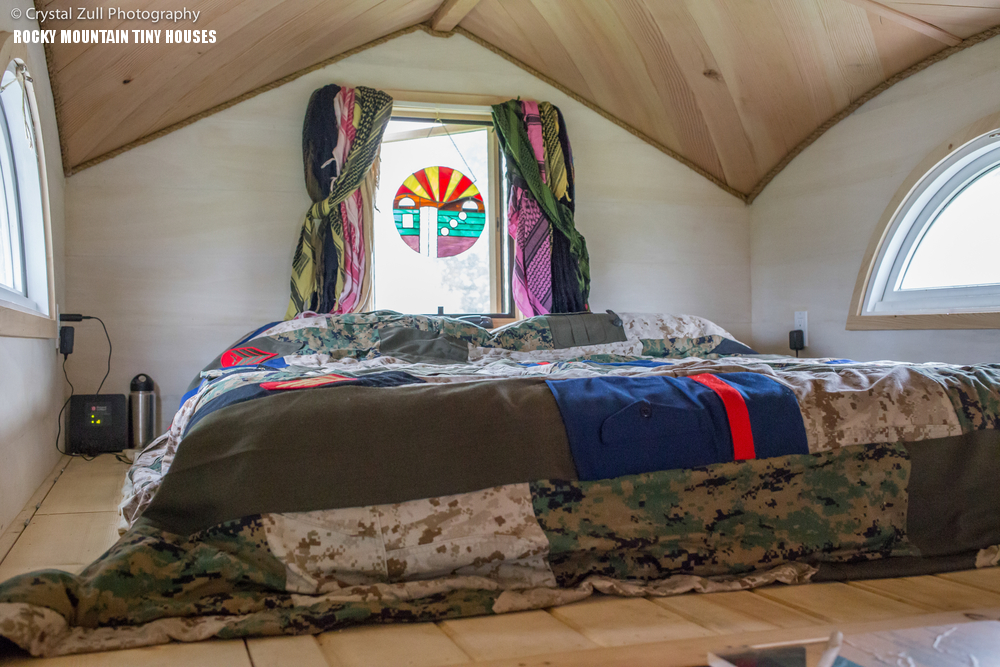
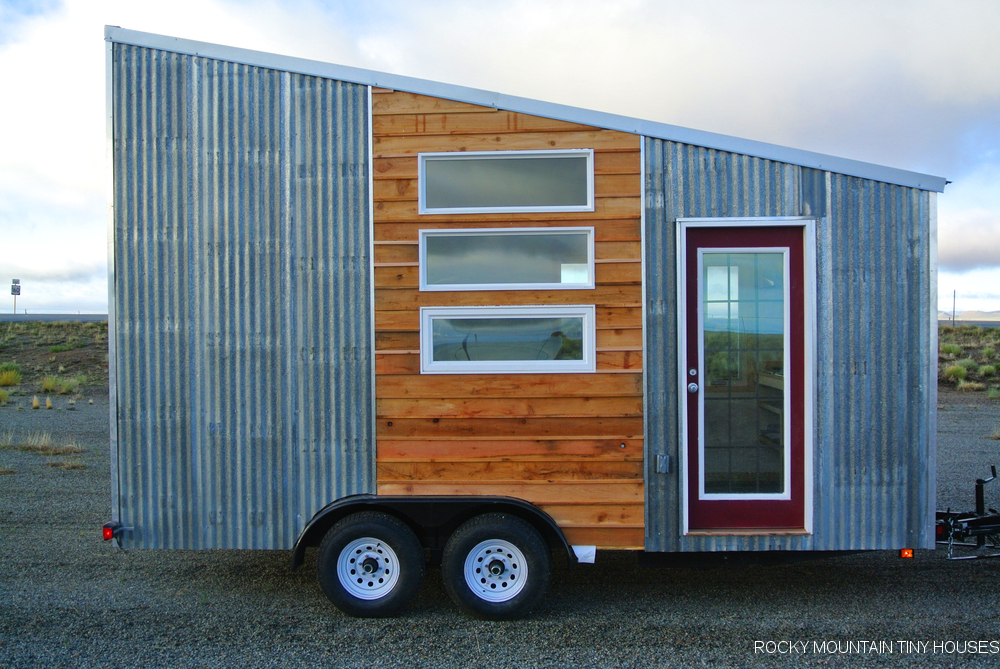
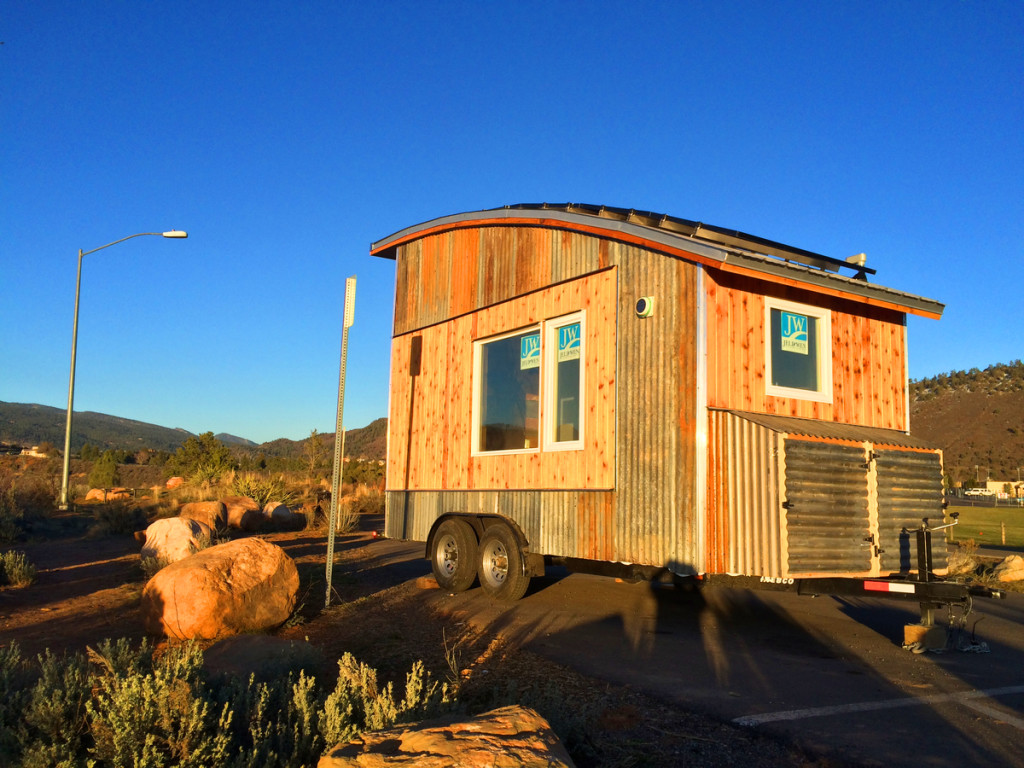
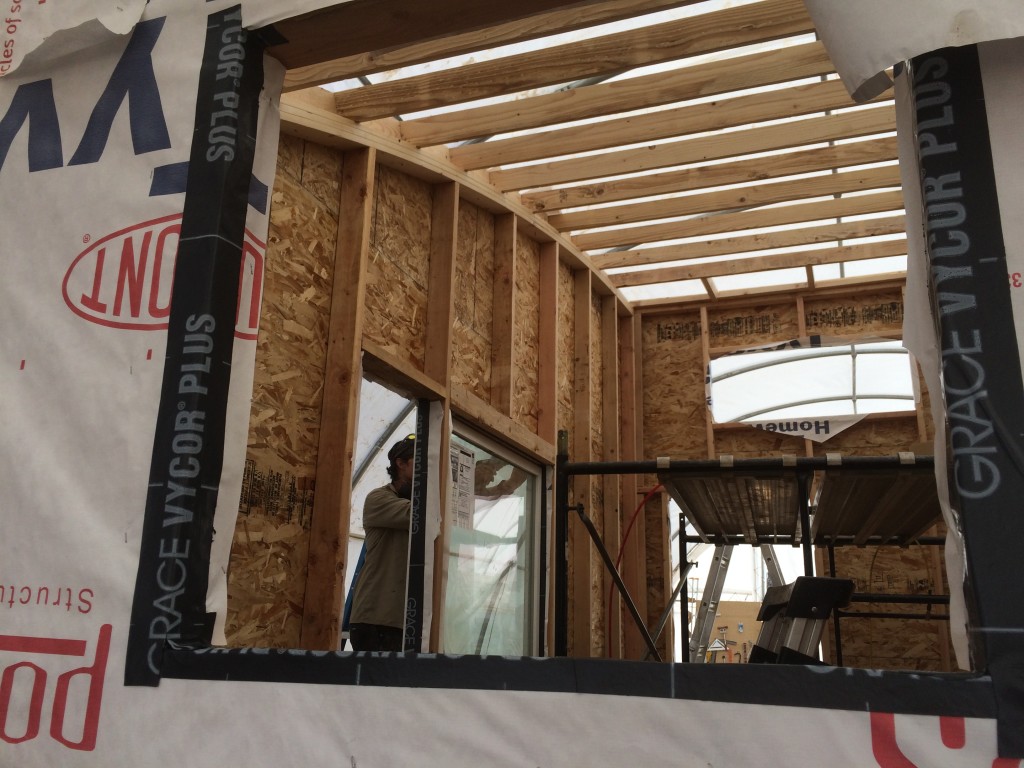
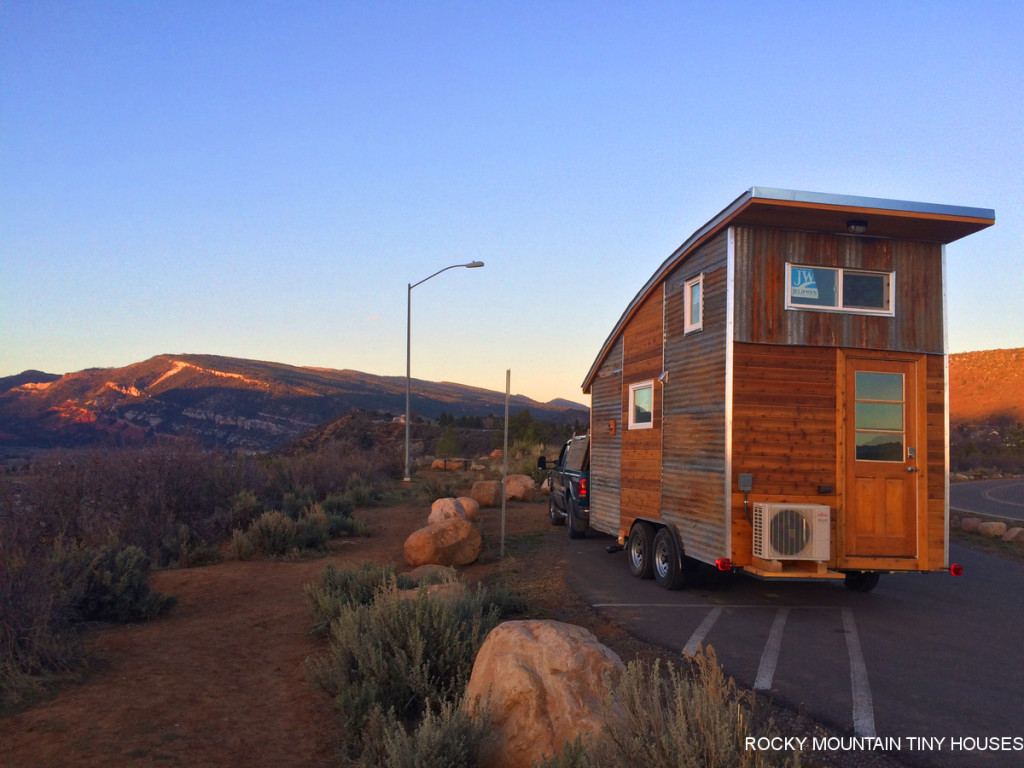
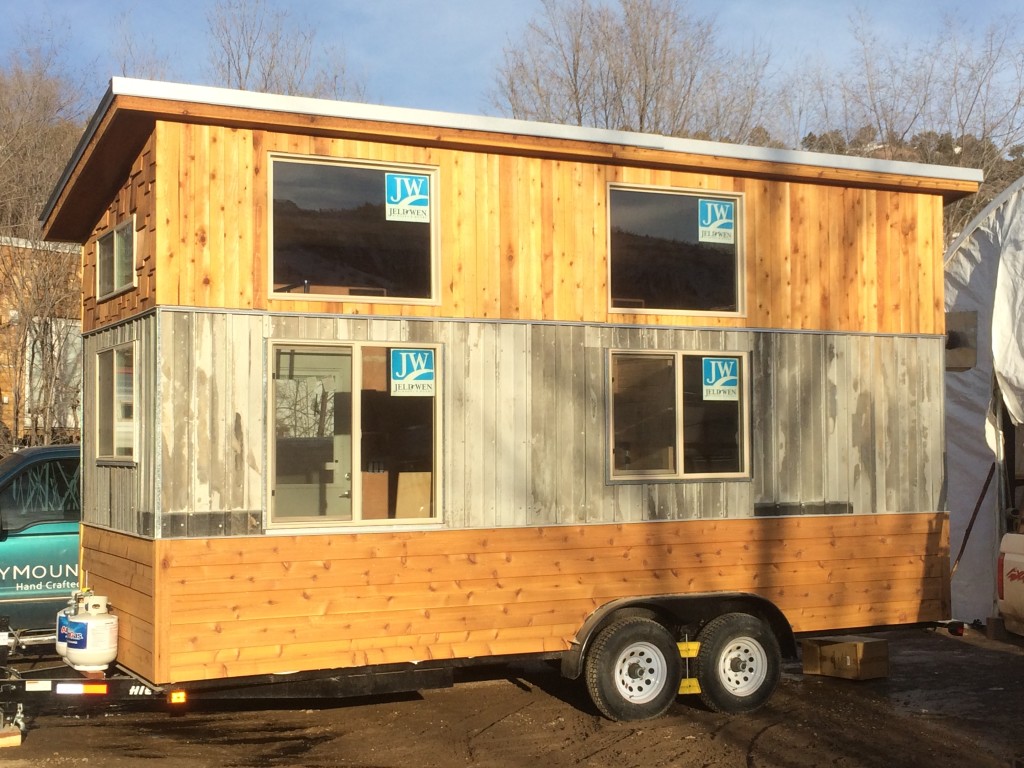
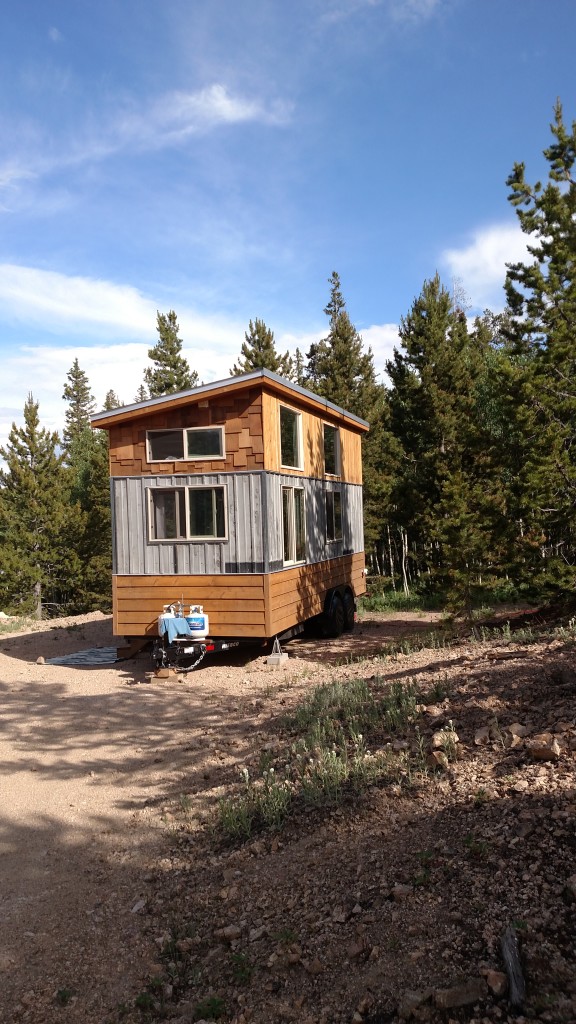
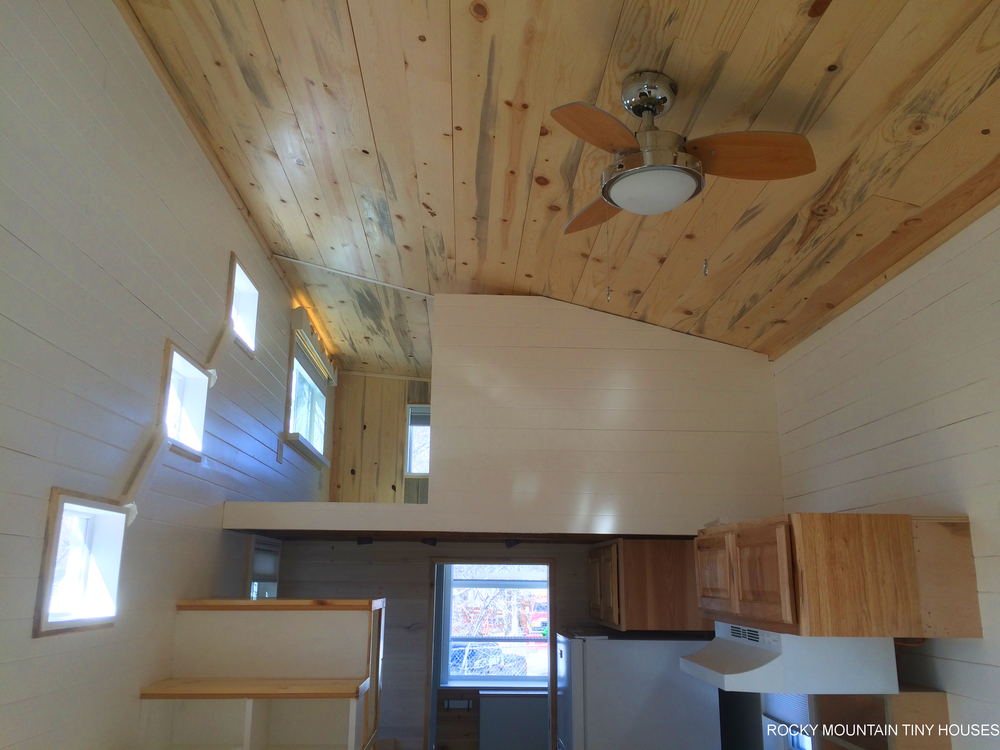
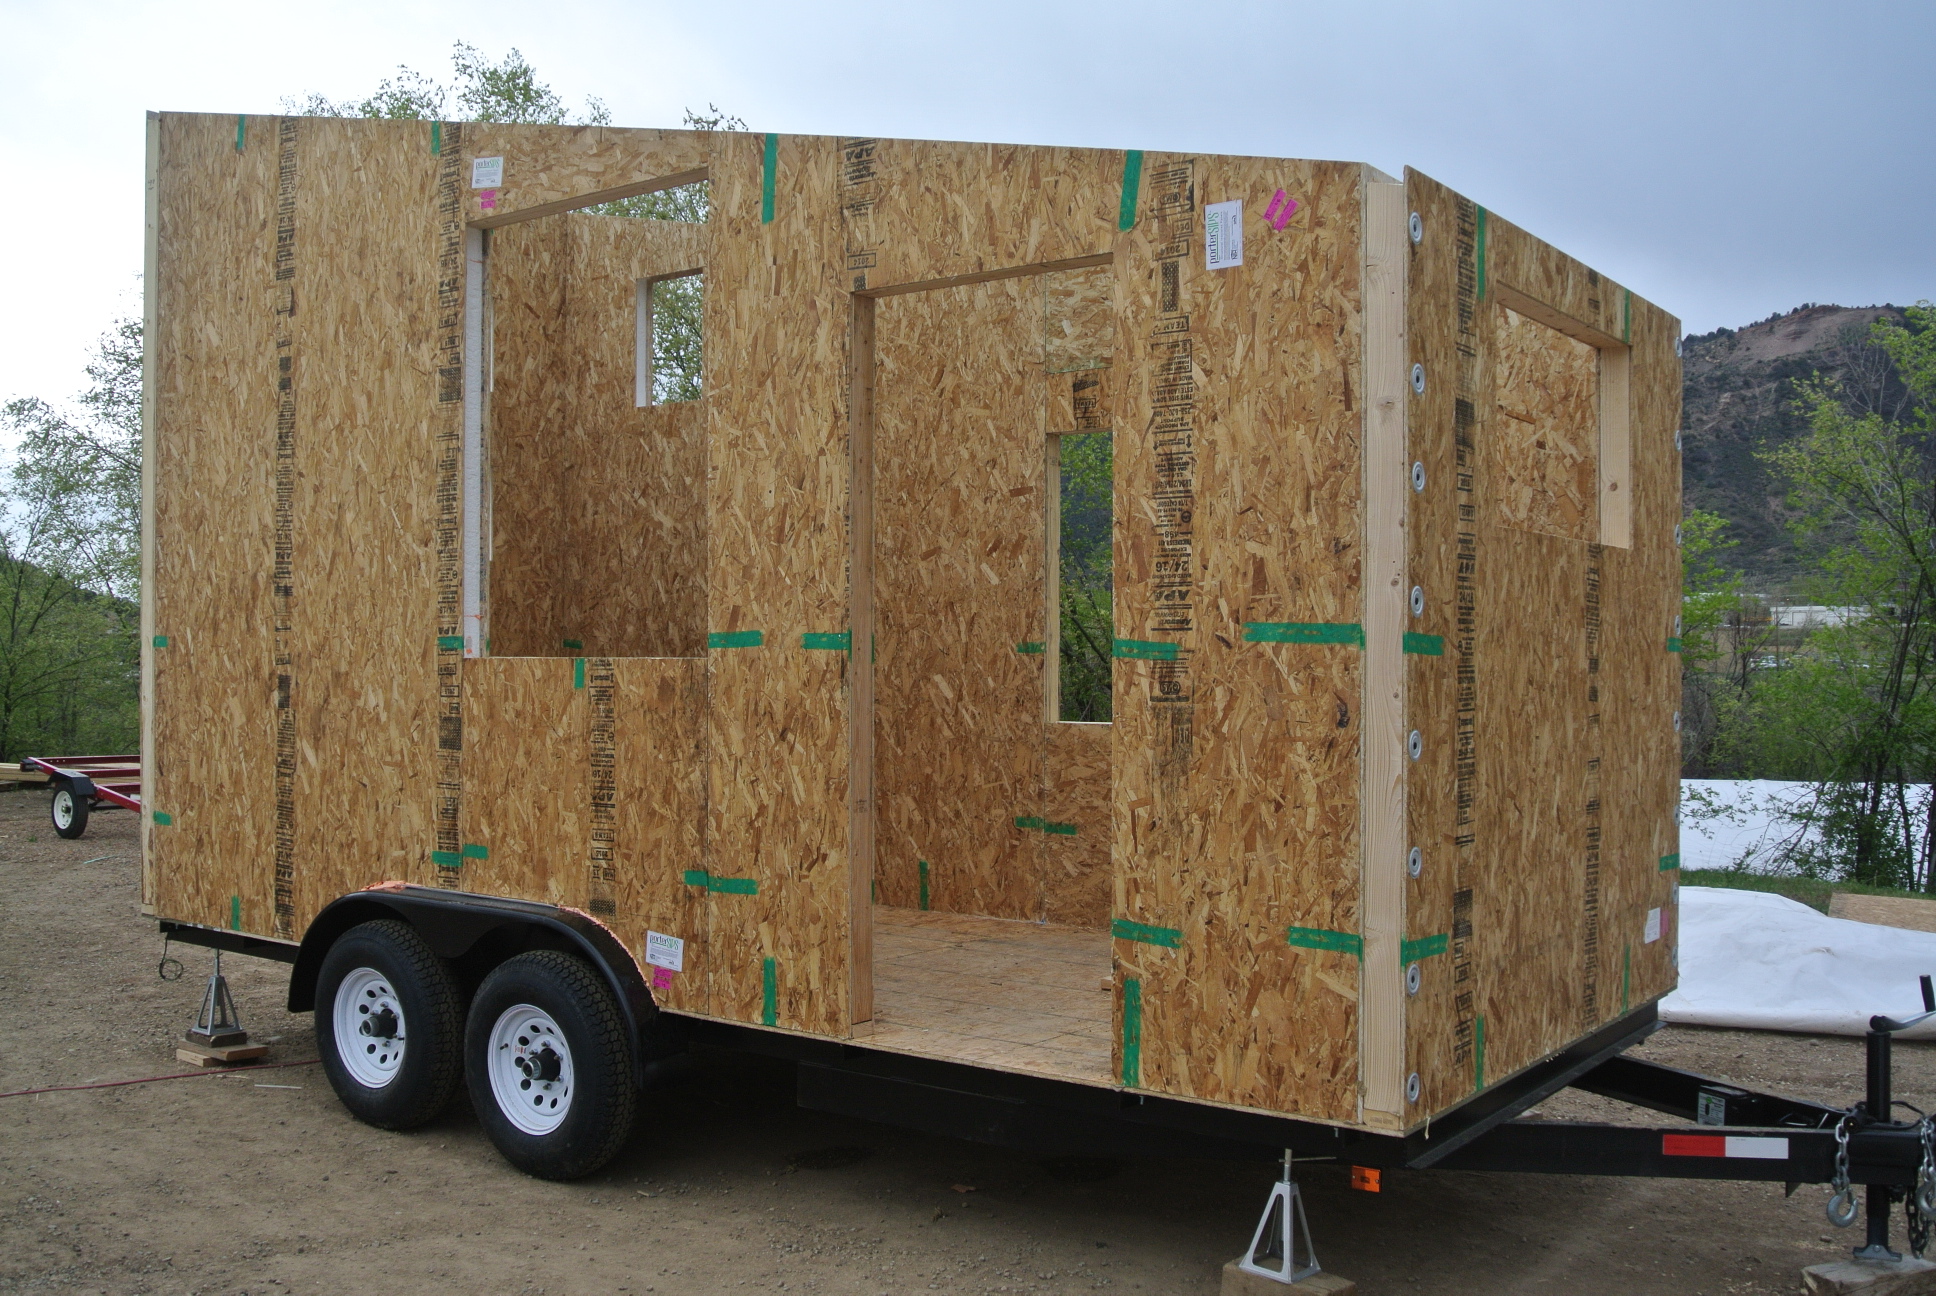
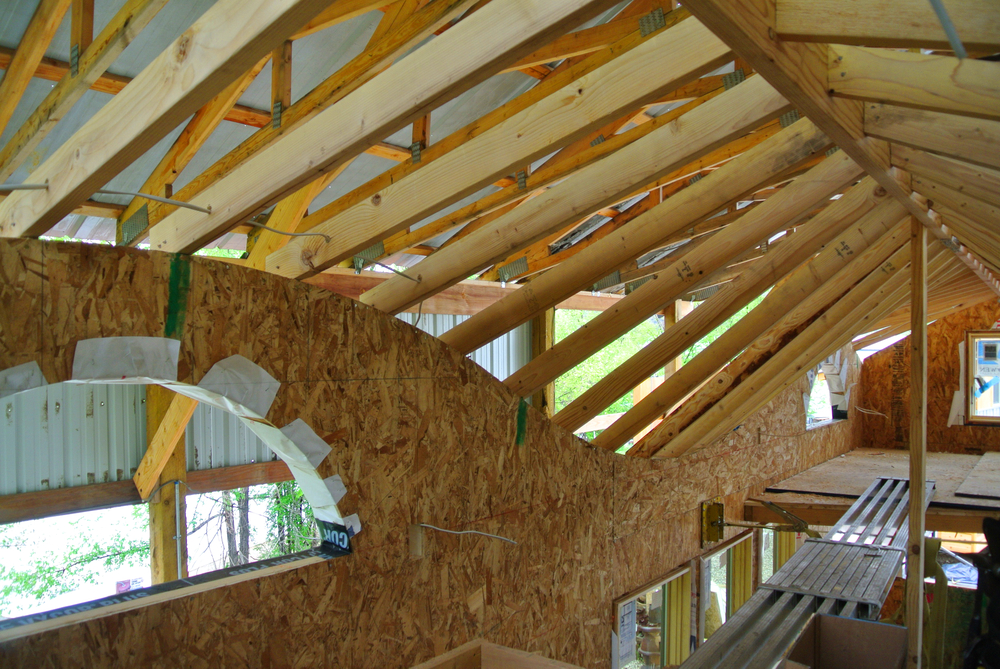
We start out with a custom 16′ heavy duty trailer chassis and stick frame the superstructure using advancing 2×4 framing methods. The curved top plate is easily attainable by laminating thin strips of wood together at precise geometric constraints. We applied a very similar reclaimed tin and cedar siding motif in rainscreen fashion. The radius of the curved roof was gentle enough to carefully bend standard pro panel roofing along the surface. Windows were strategically located to take advantage of our advanced framing methodology, optimize light and view, and coordinate with the floor plan.

tiny house curved roof framing

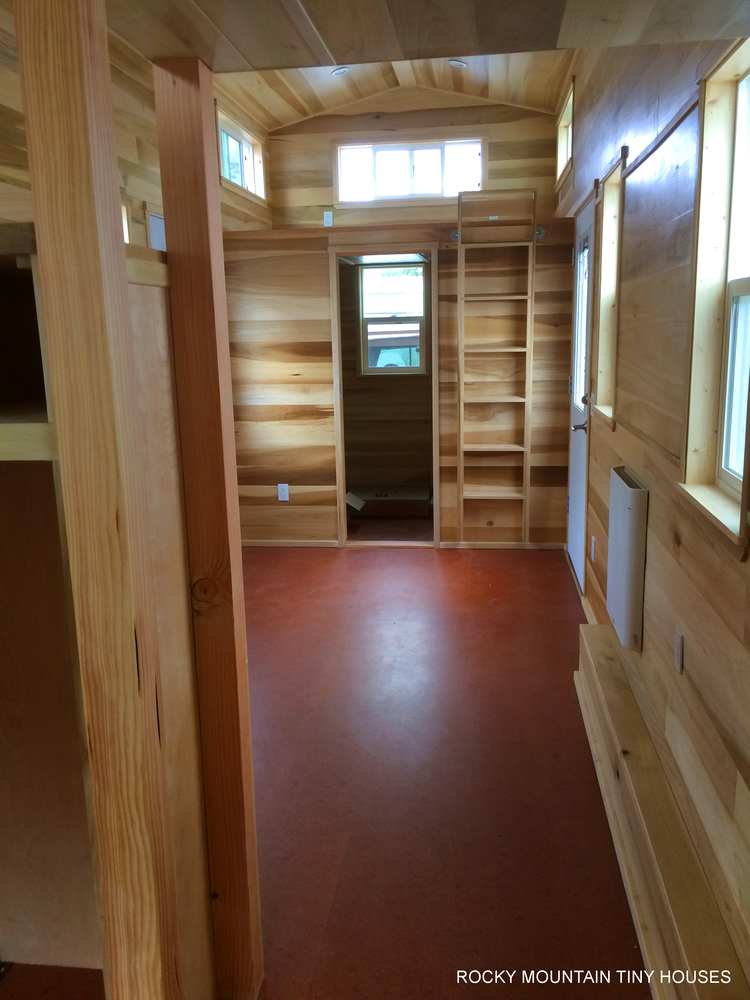
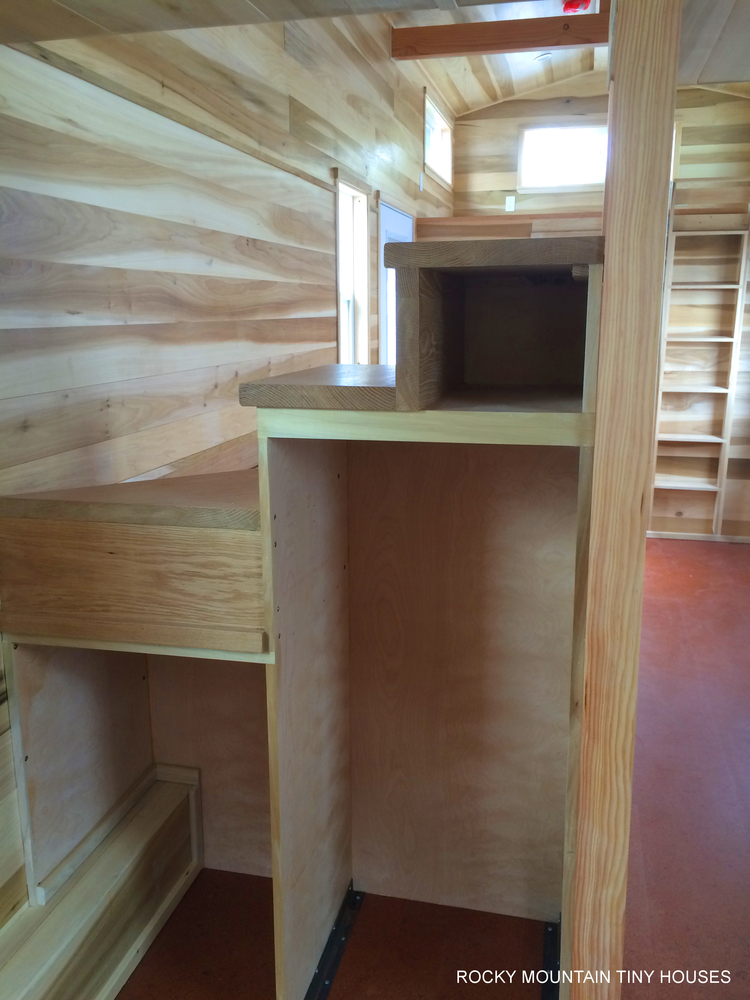
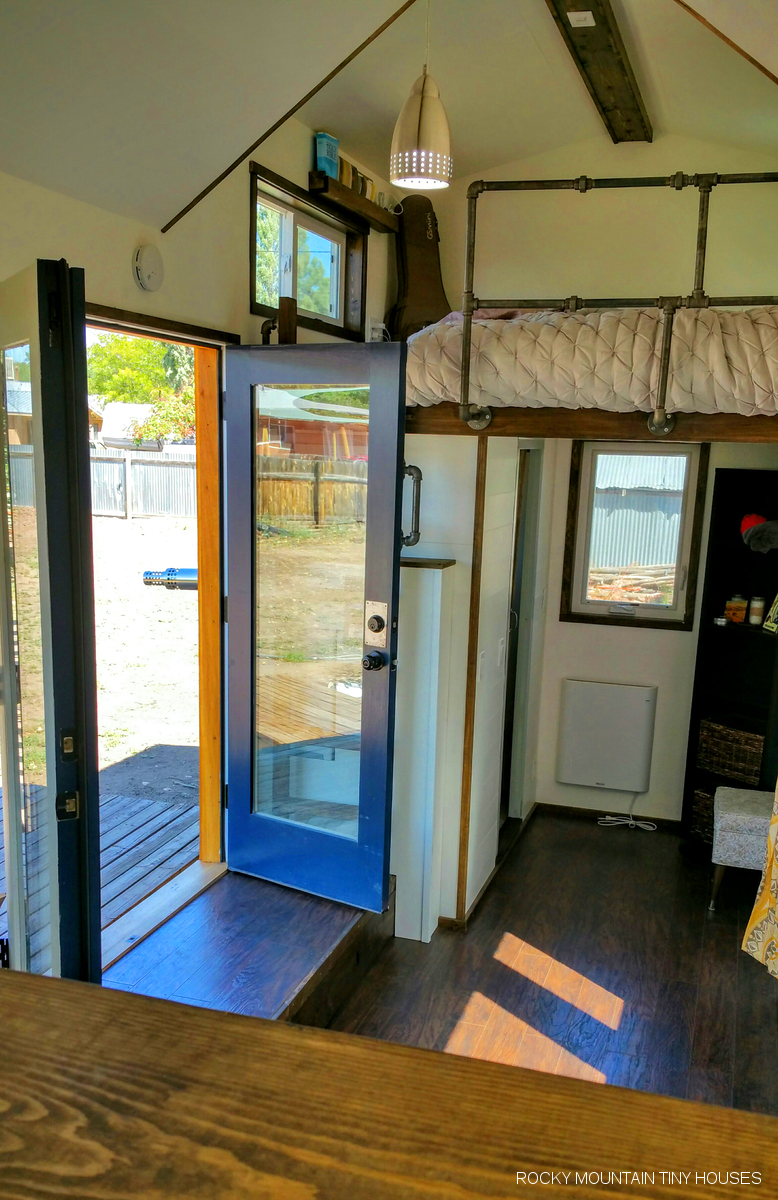
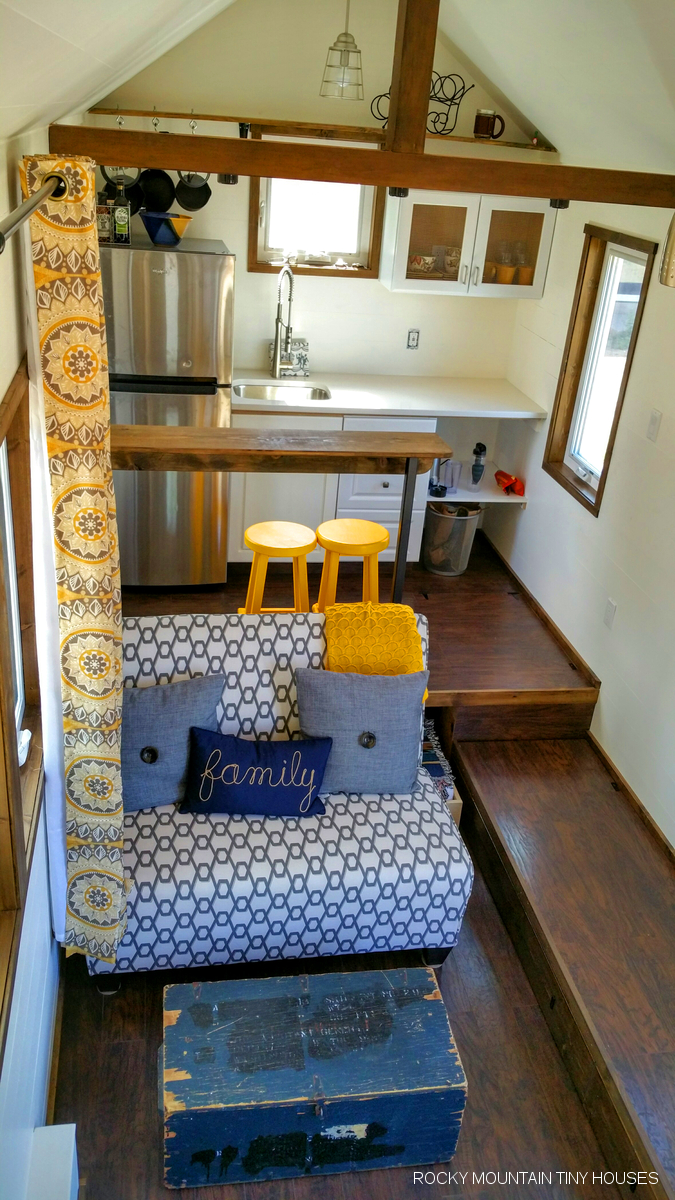
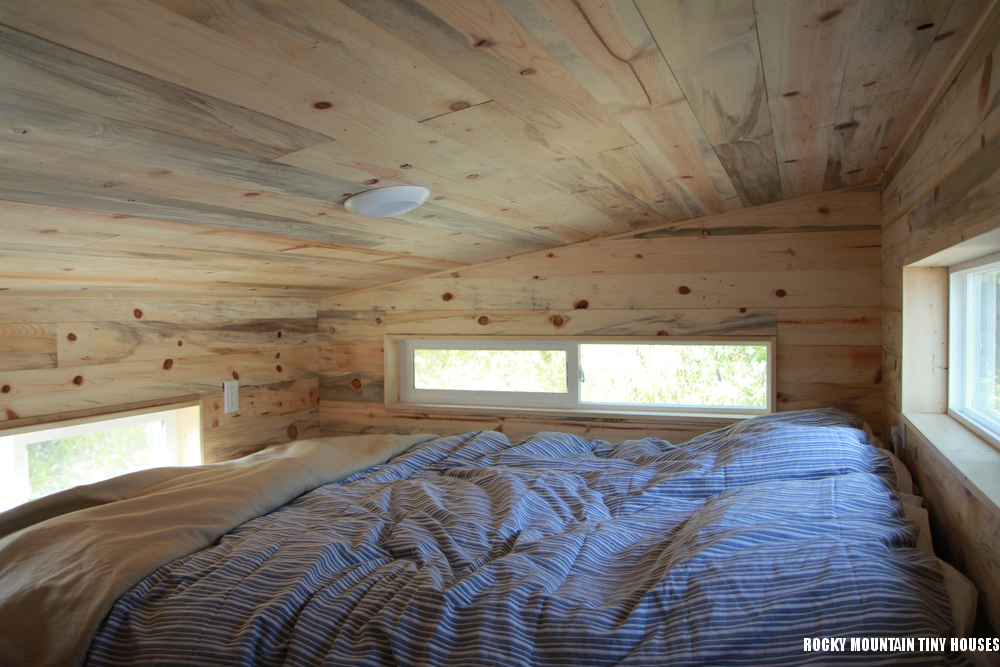
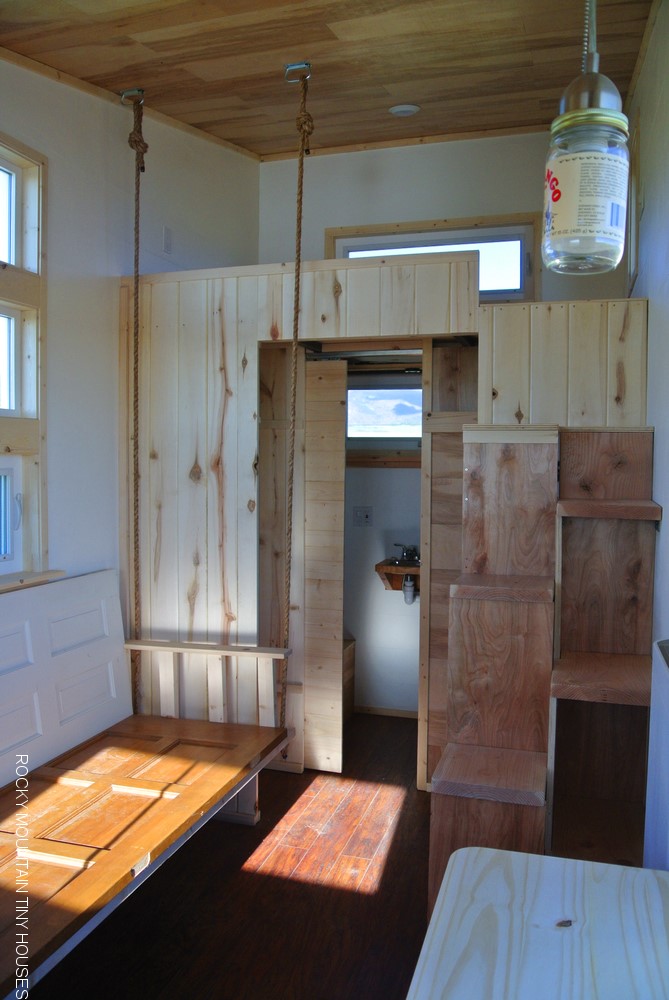
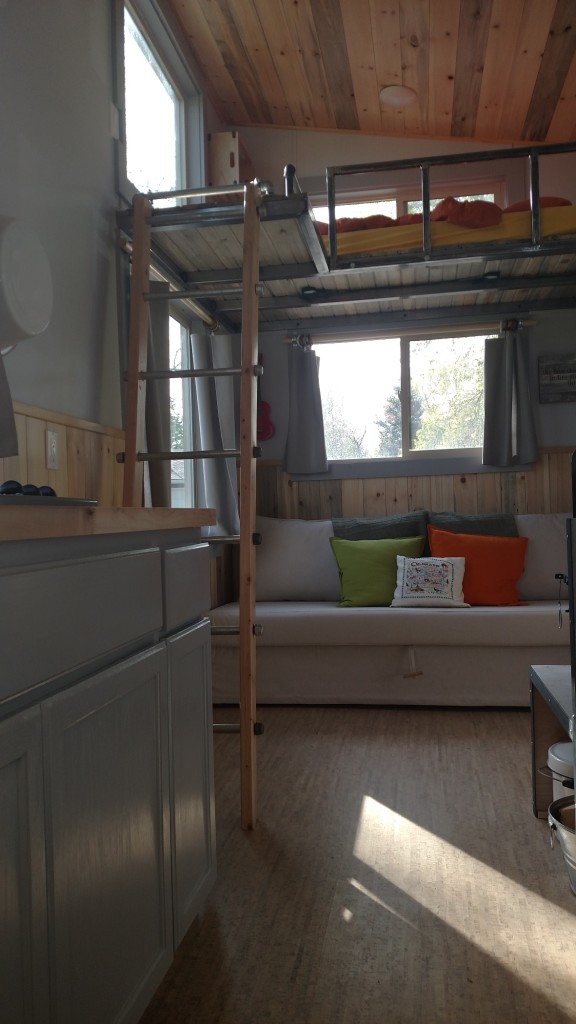
Speaking of floor plan, this house is unique, at least for a 16′ length, in that primary sleeping quarters is intended to be on the ground floor. The customer was able to do extensive research and locate a sofa bed that would not only double as a sofa and a comfortable bed, and easily convert from one to the other, but fit our tight space constraints and not break the bank. This single piece of furniture is the key to making this whole plan work!

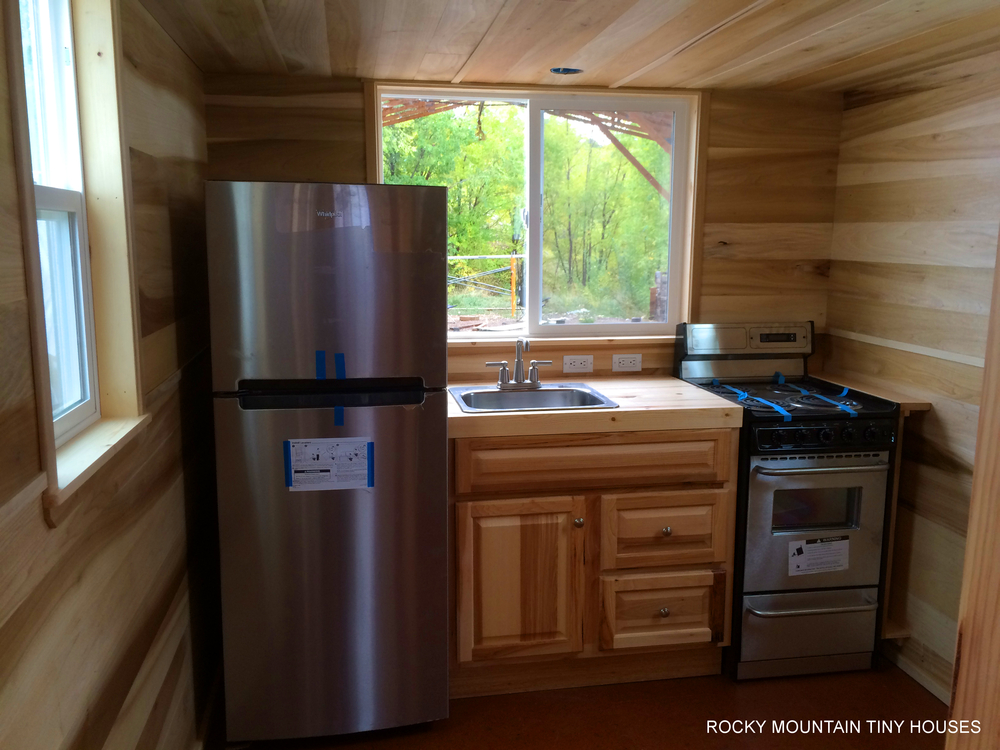
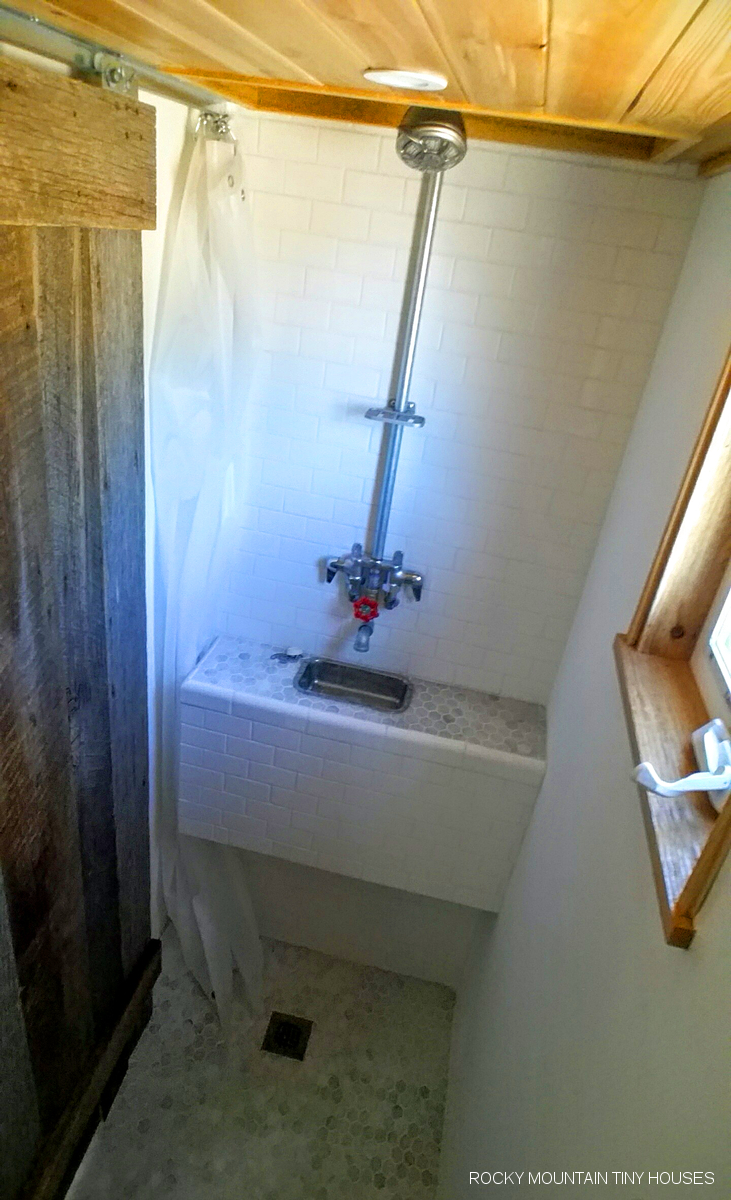
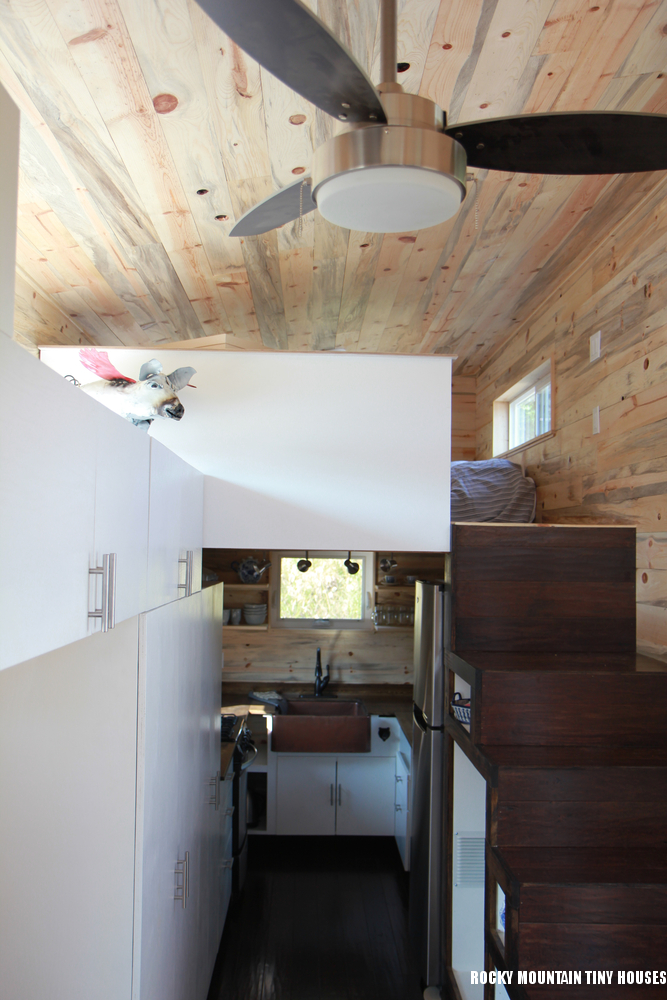
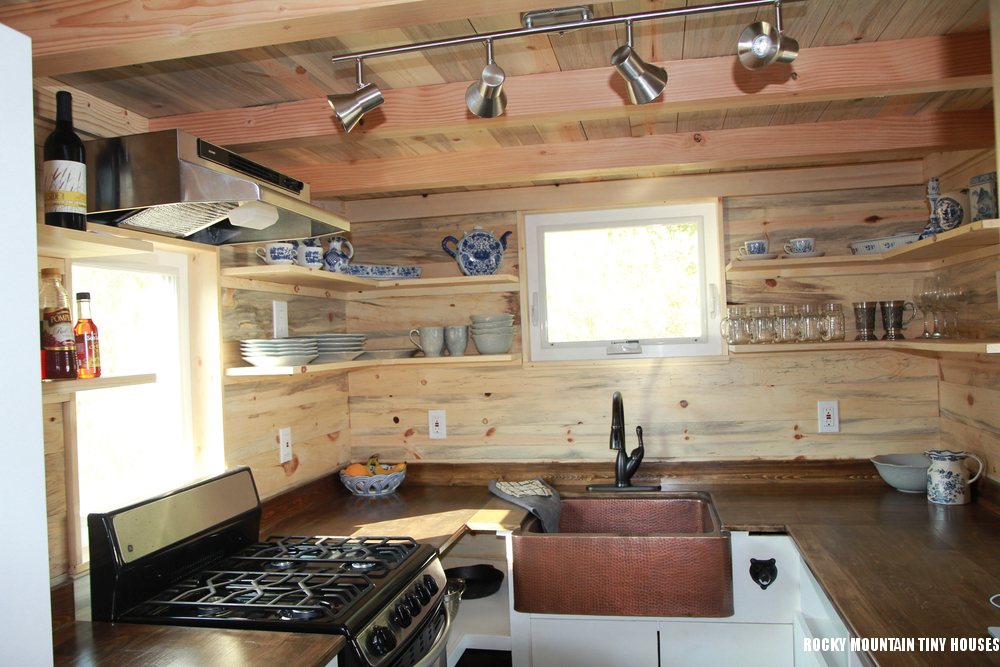
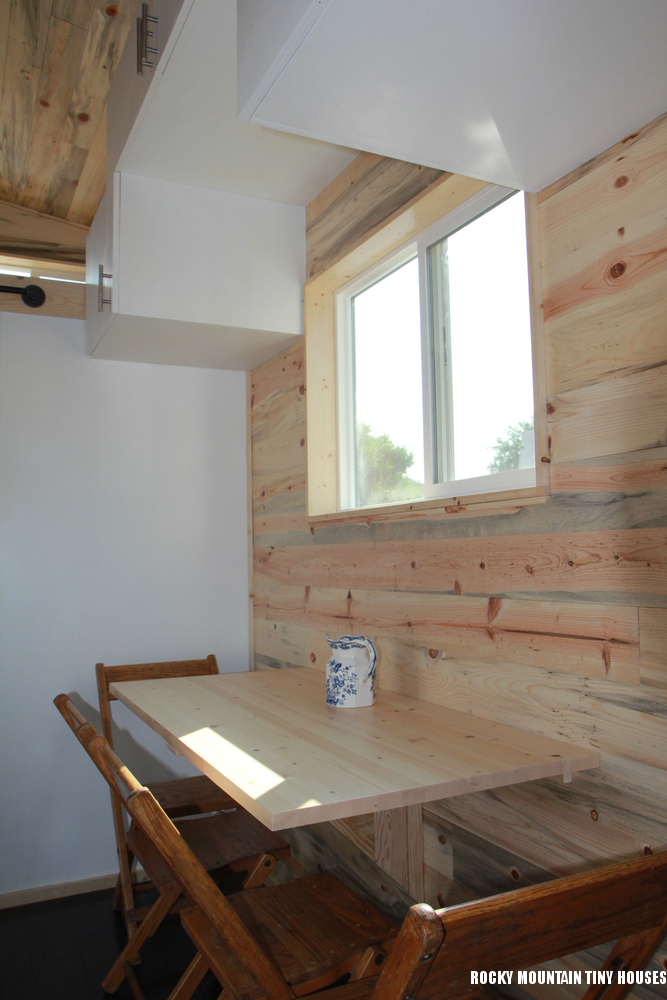
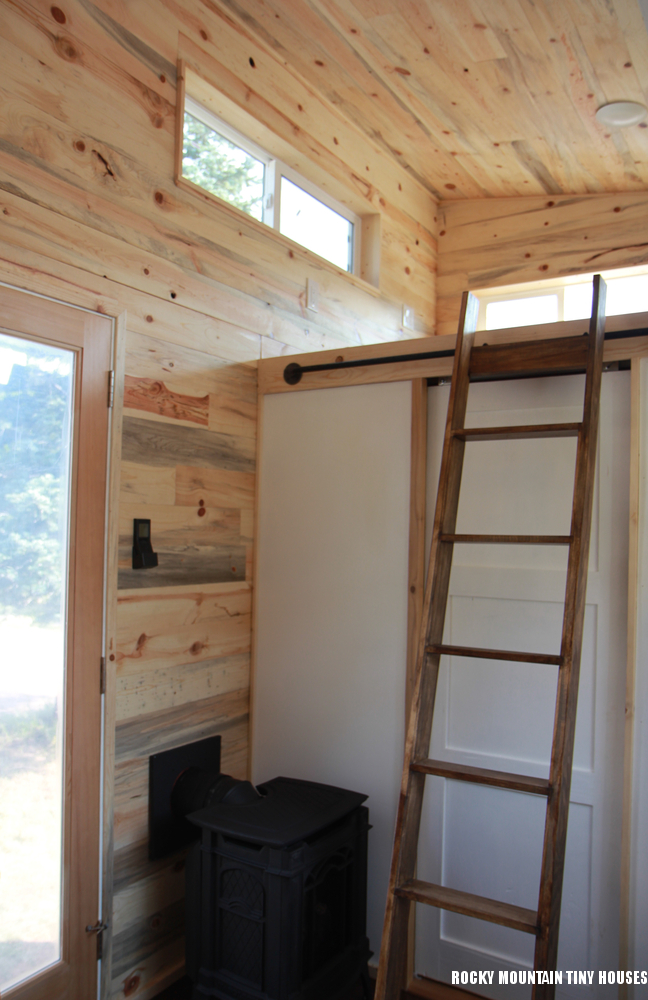
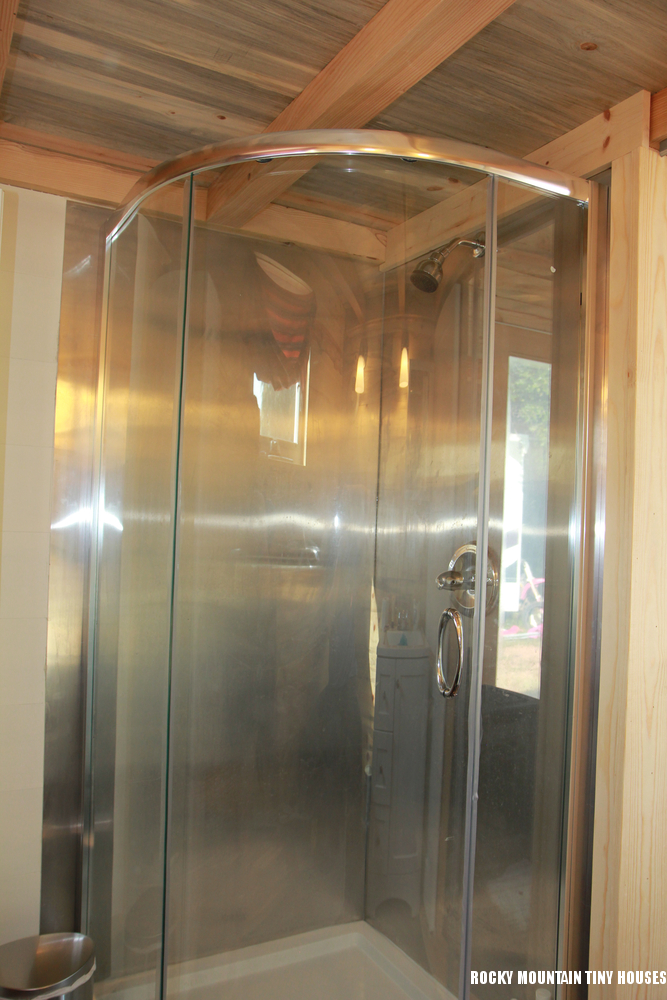
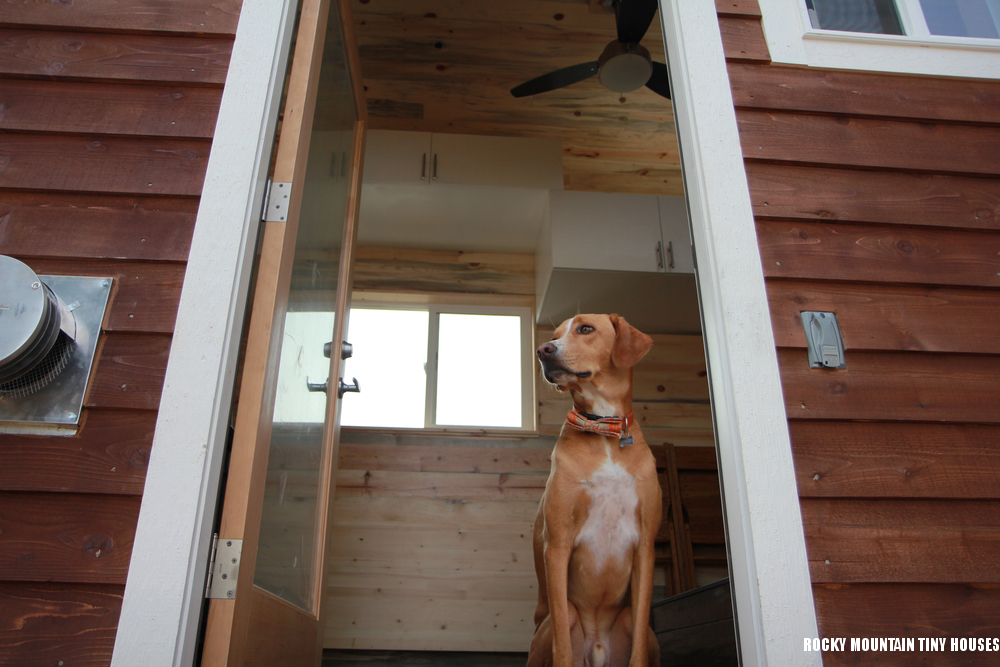
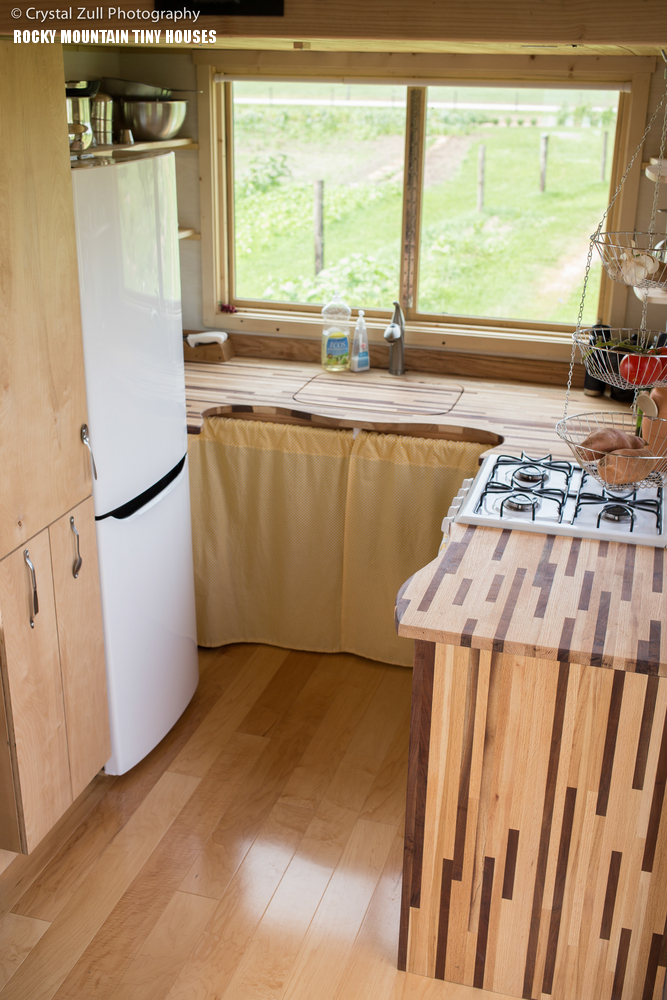
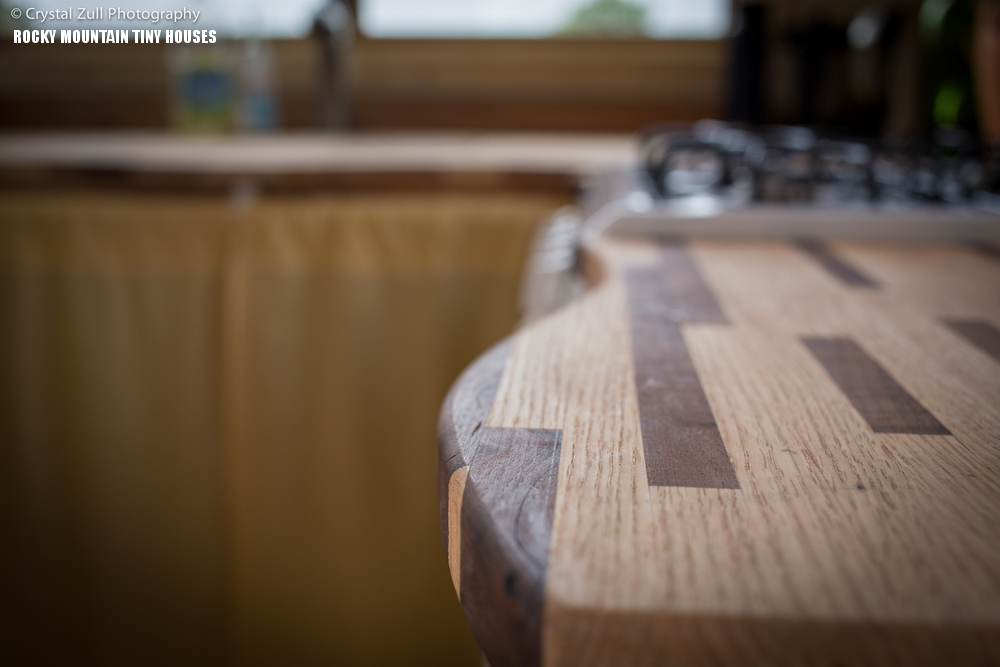
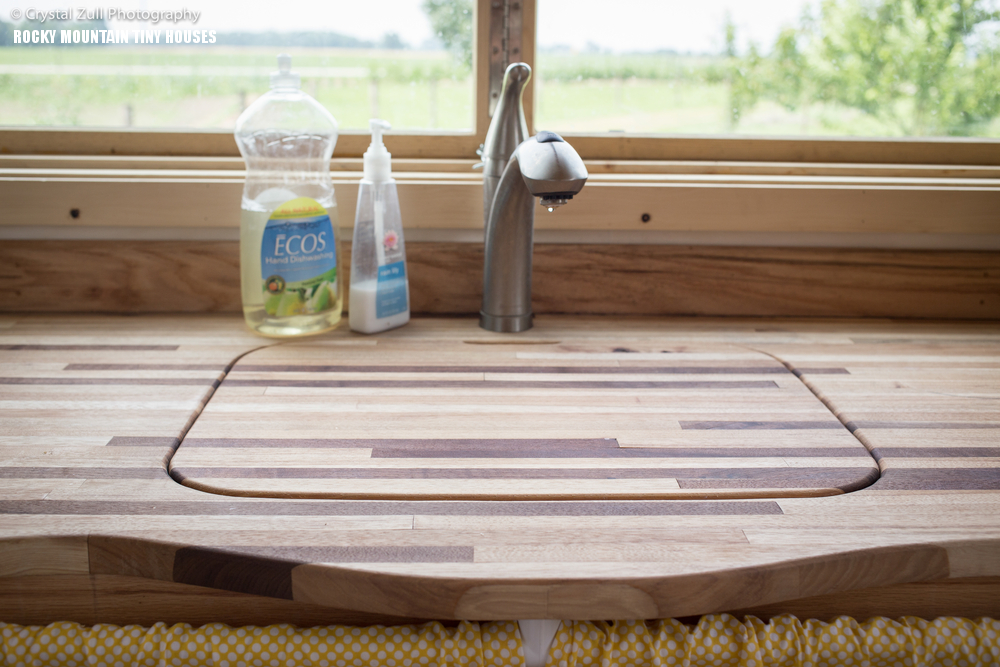
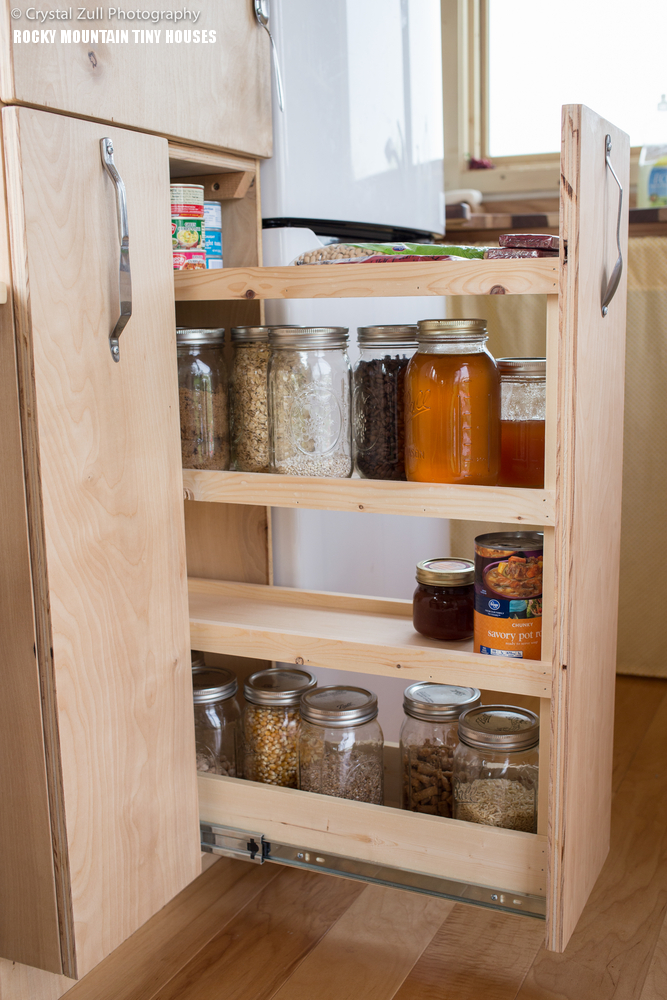
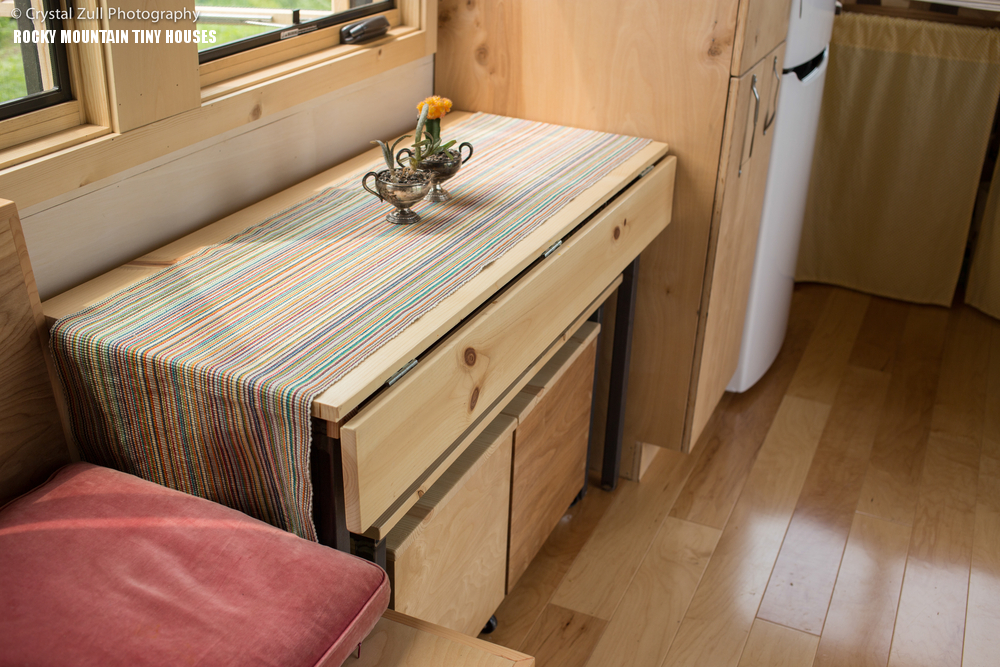
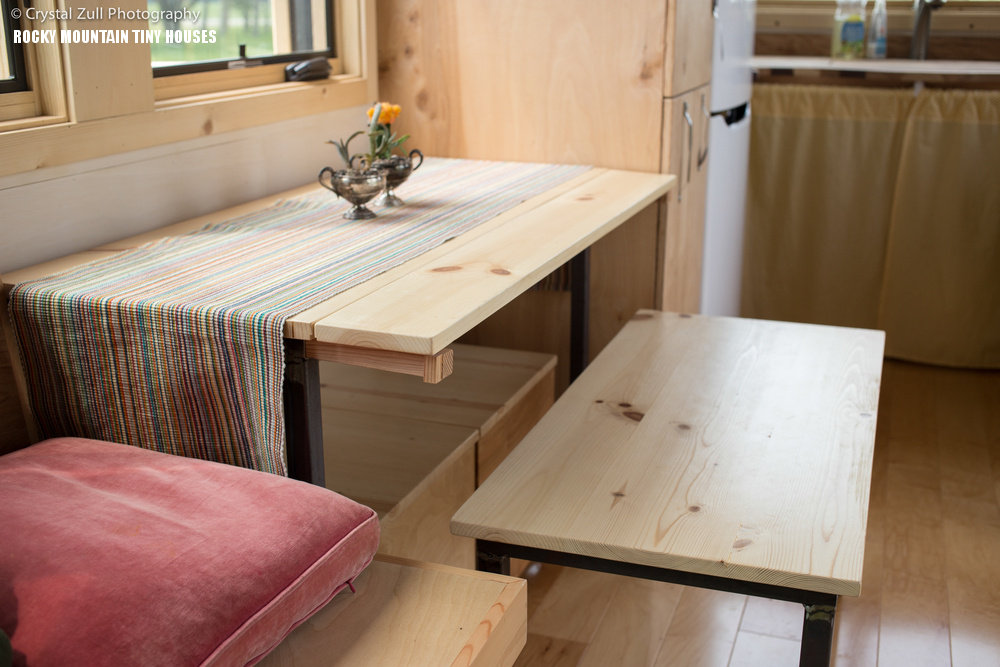
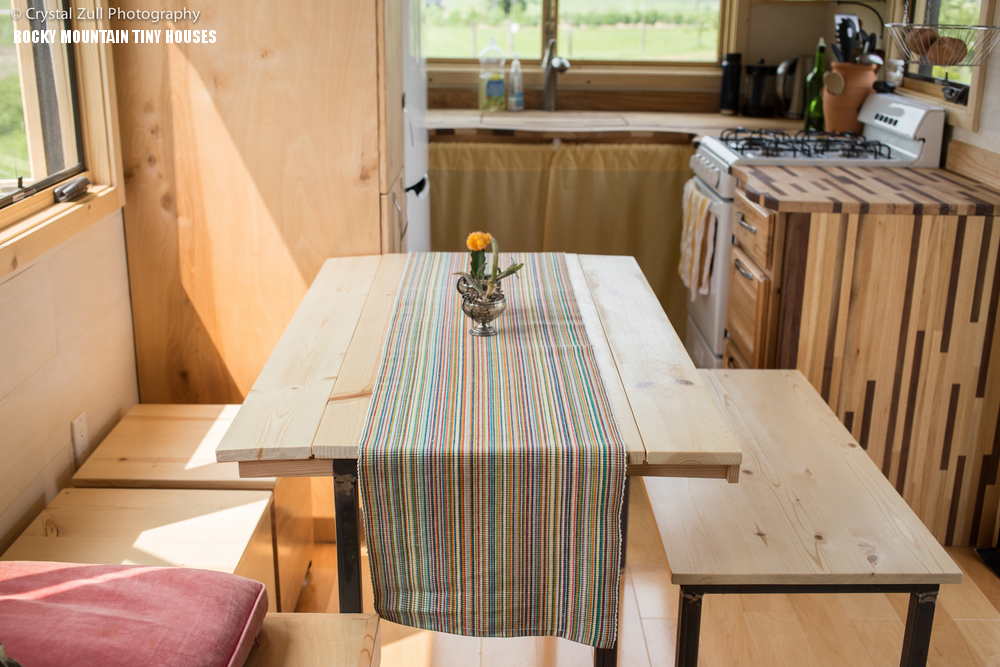
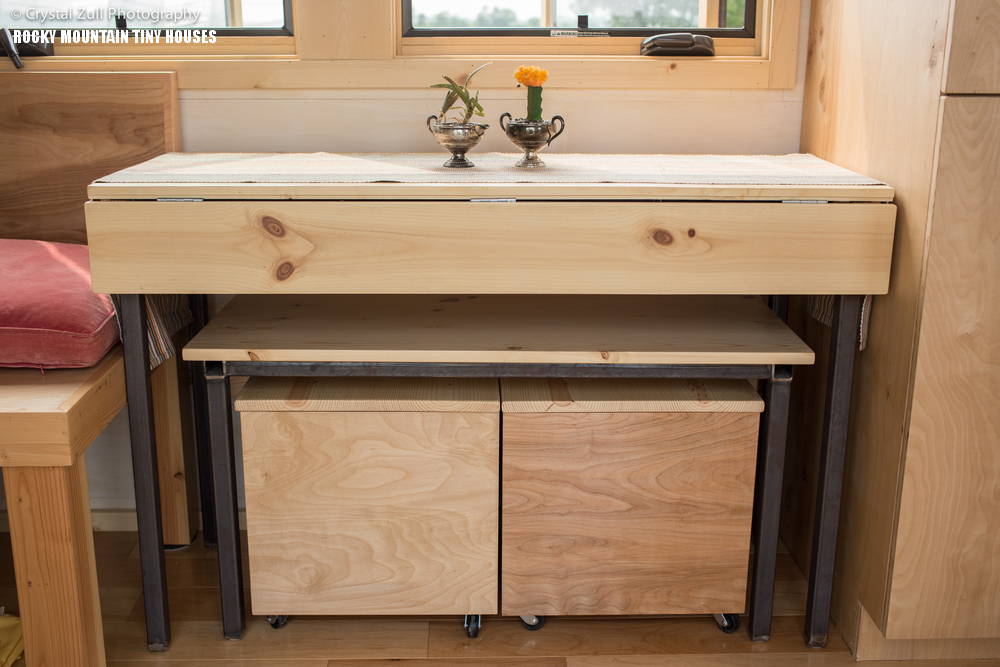
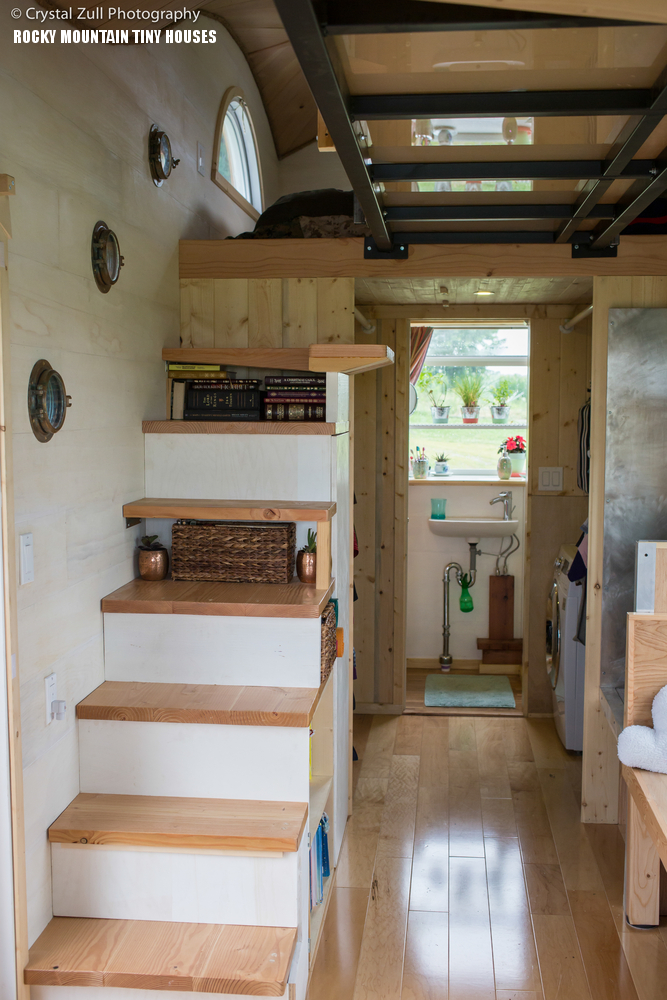
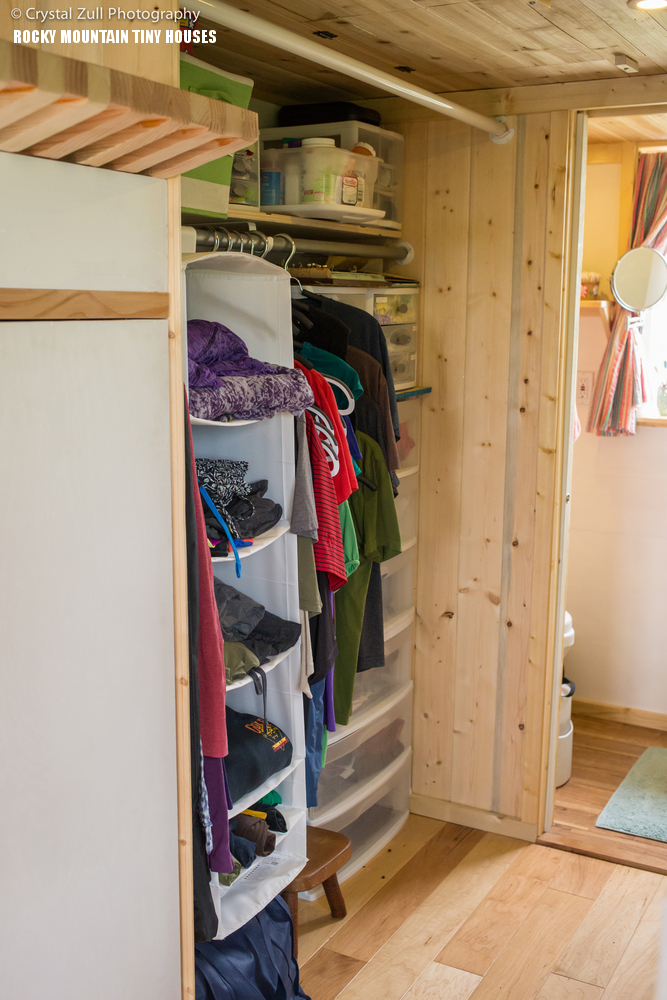
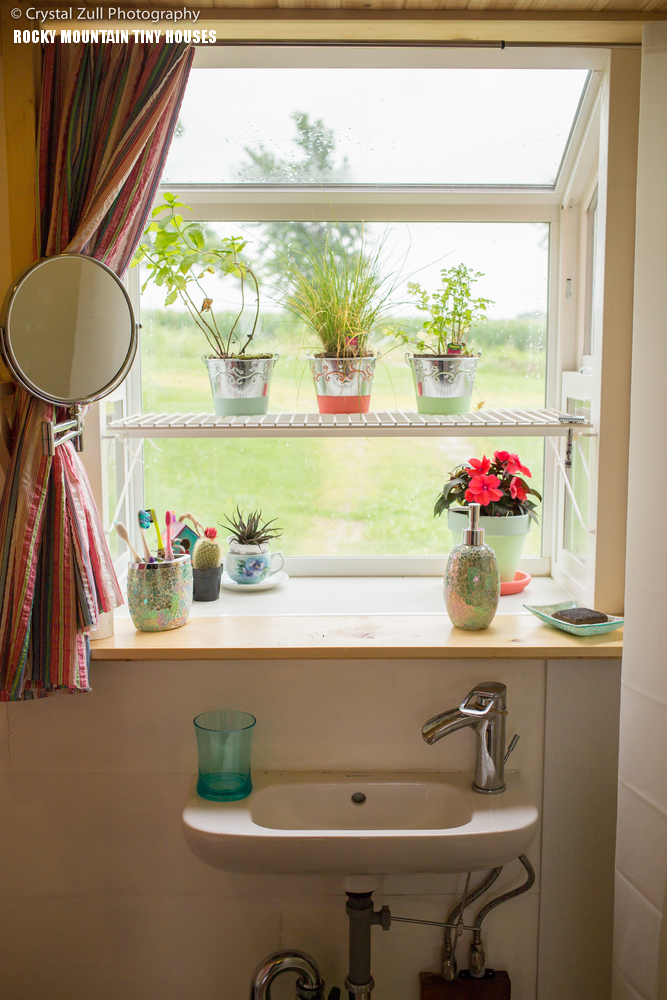
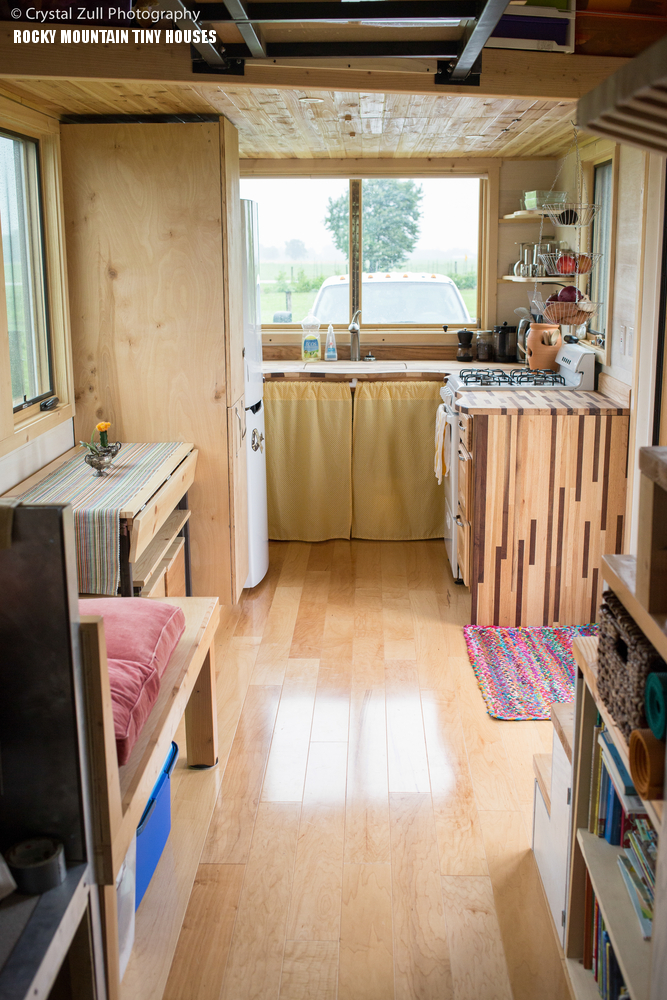
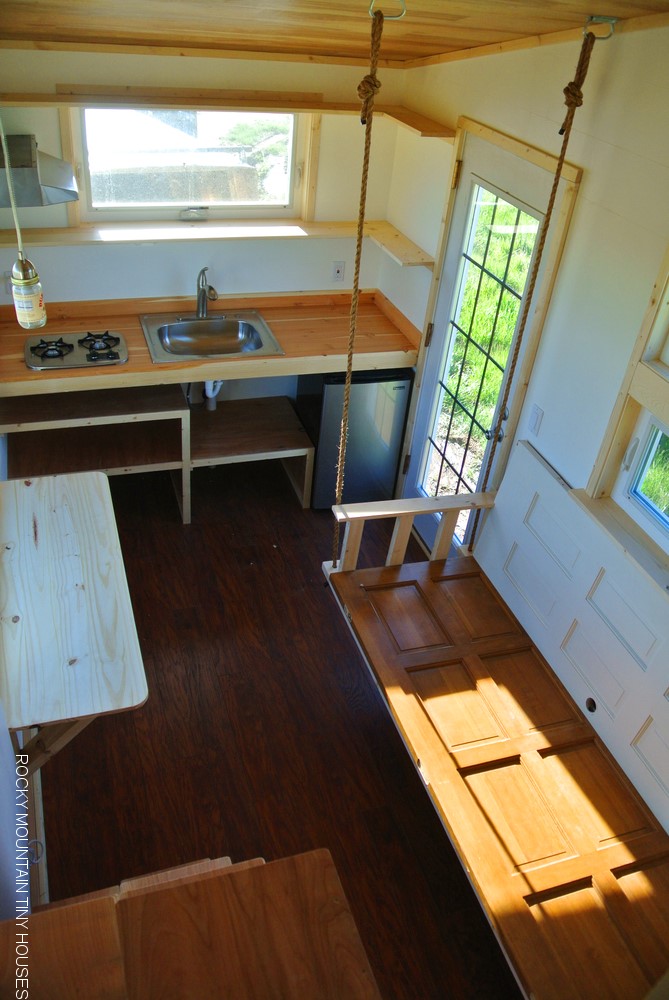
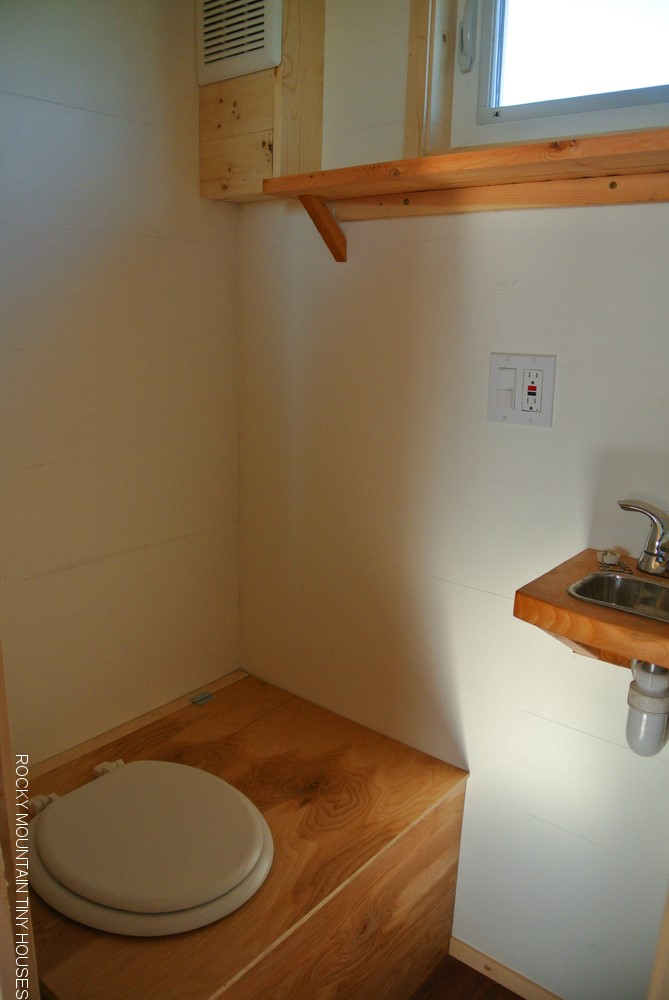
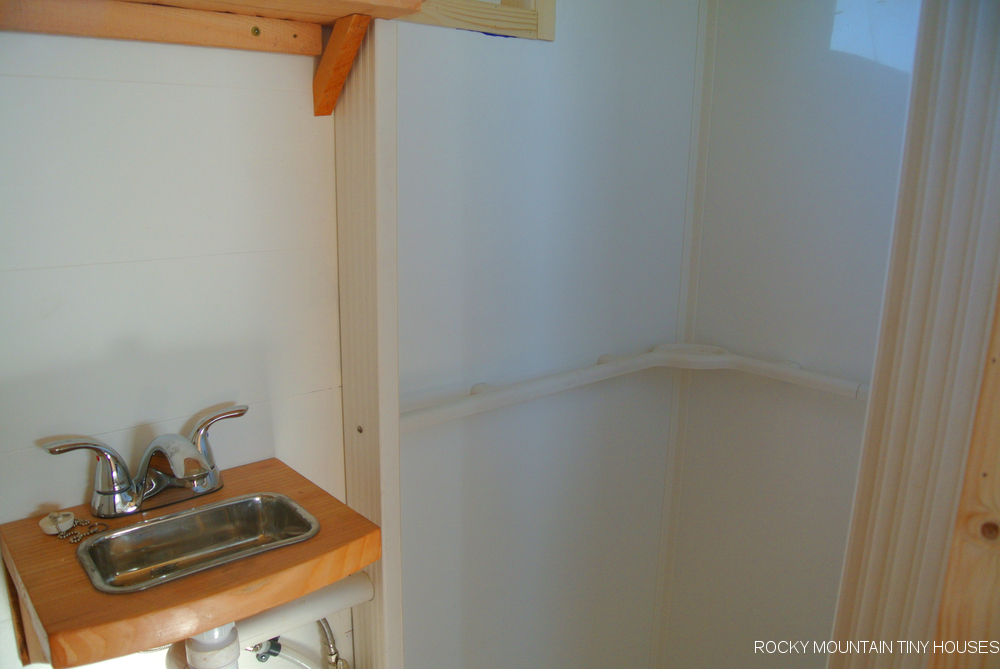
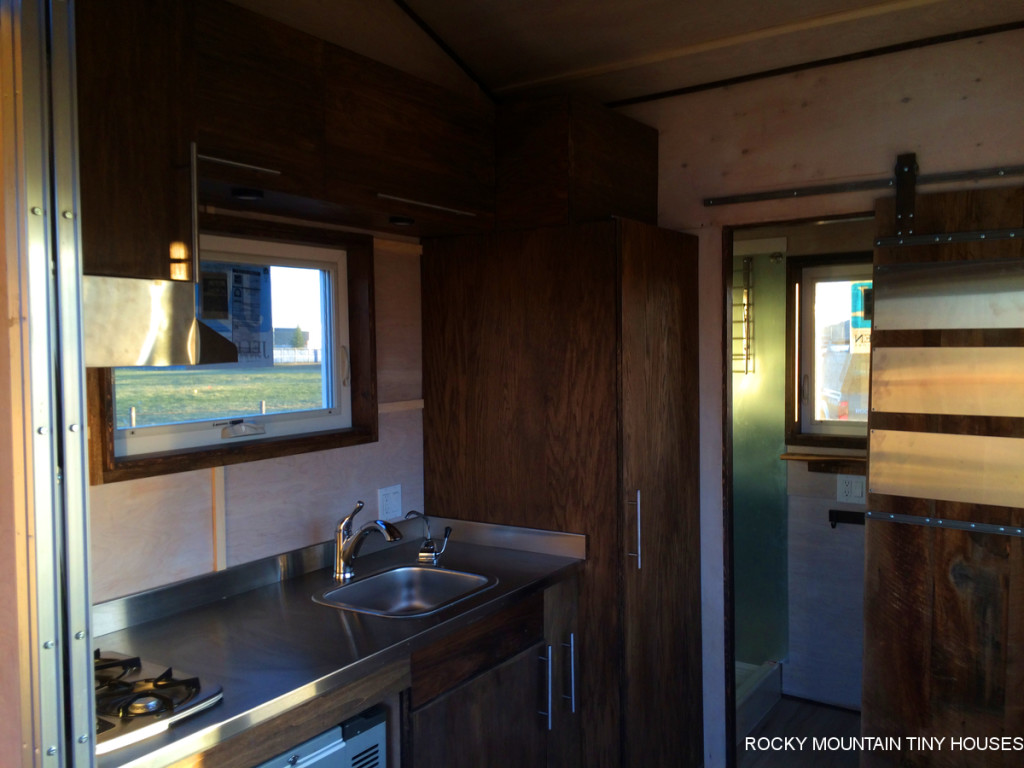
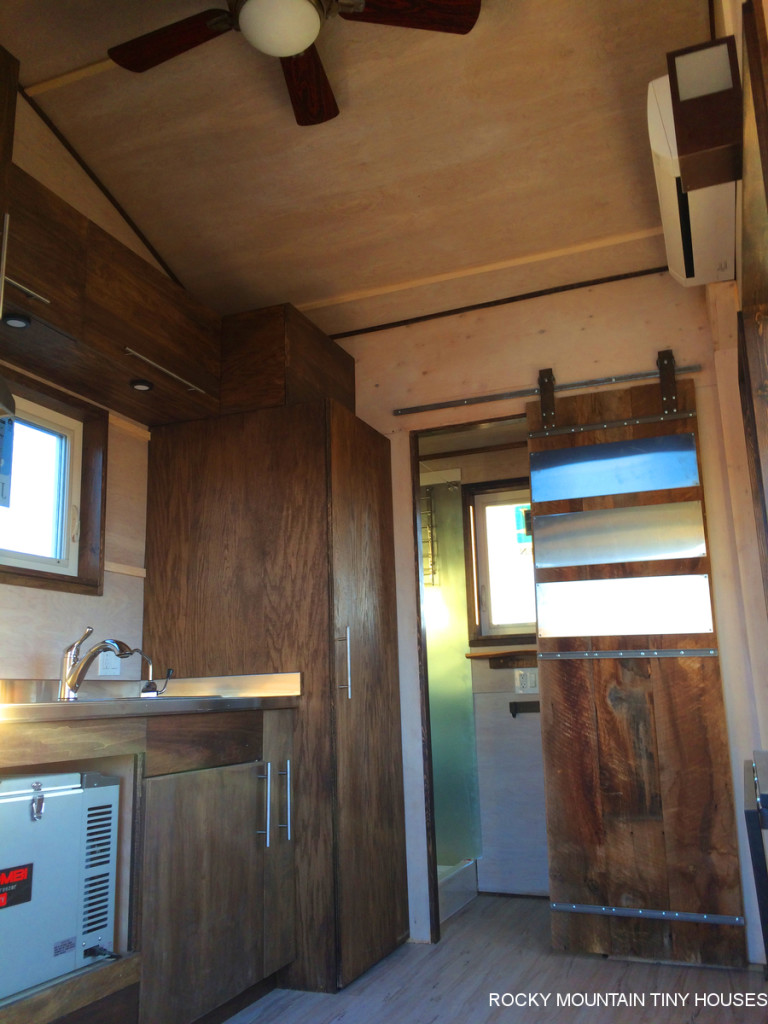
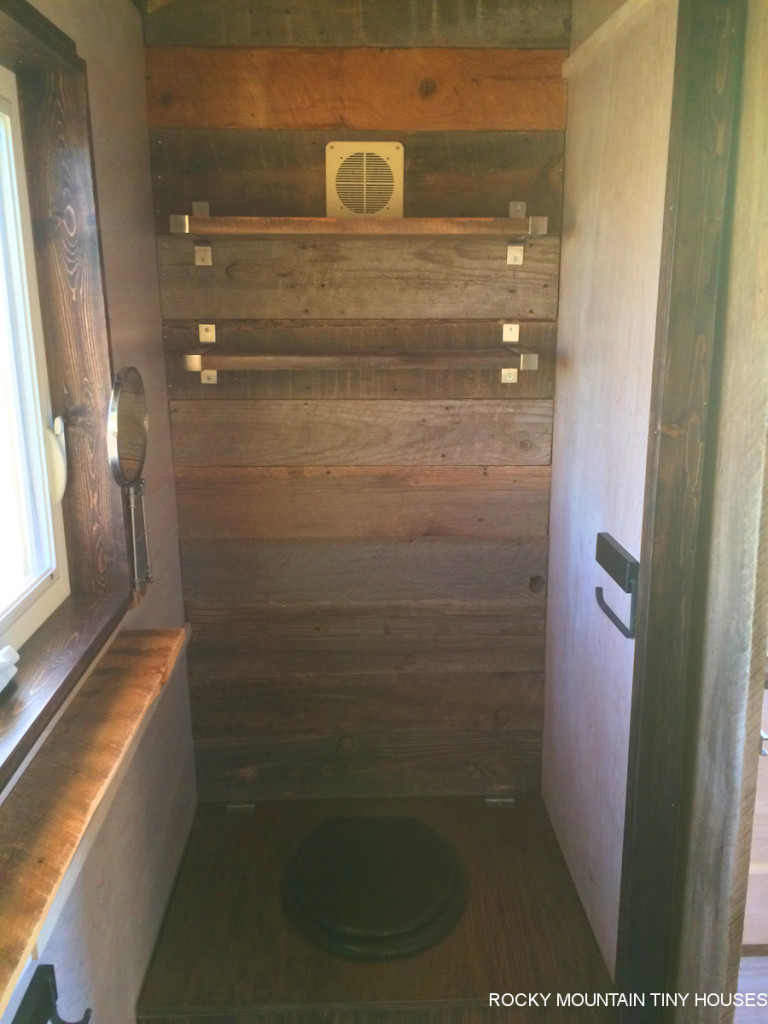
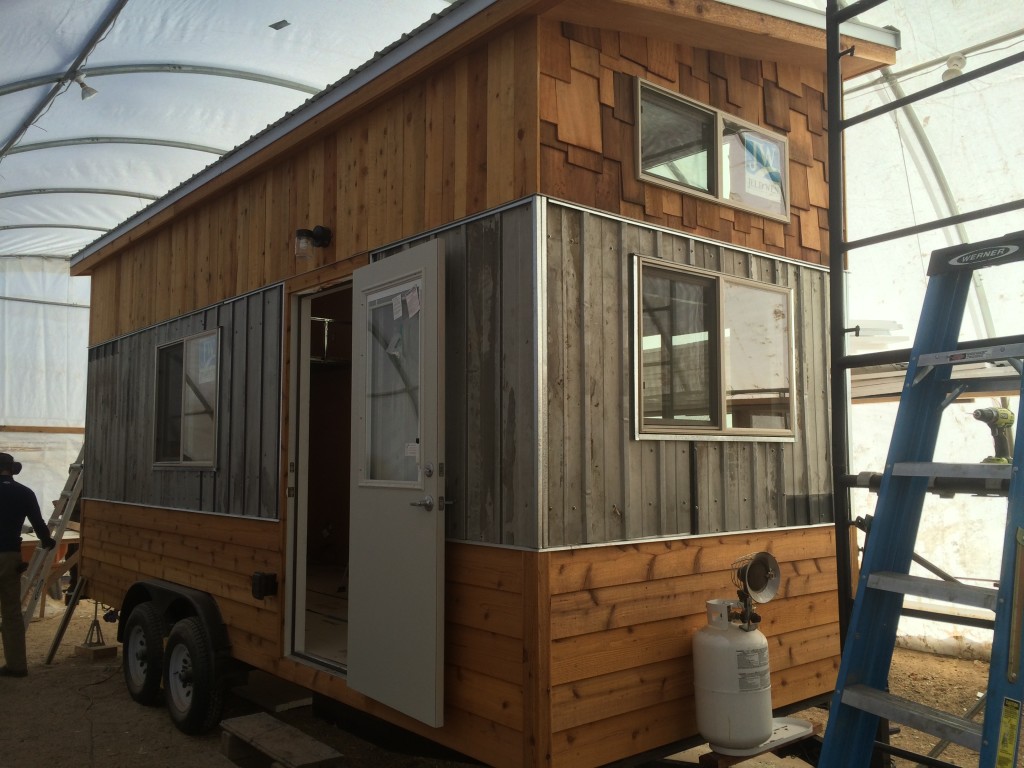
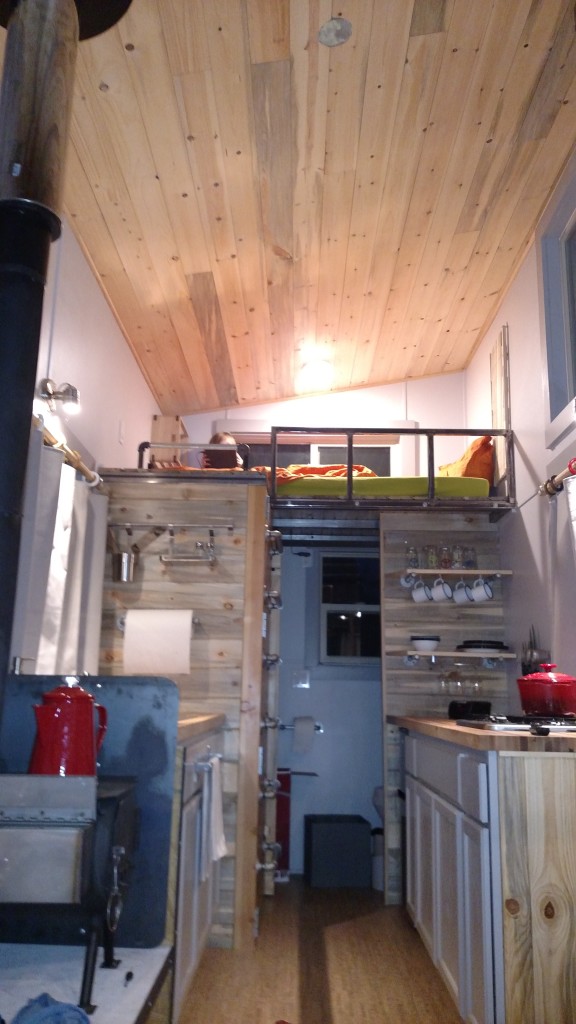
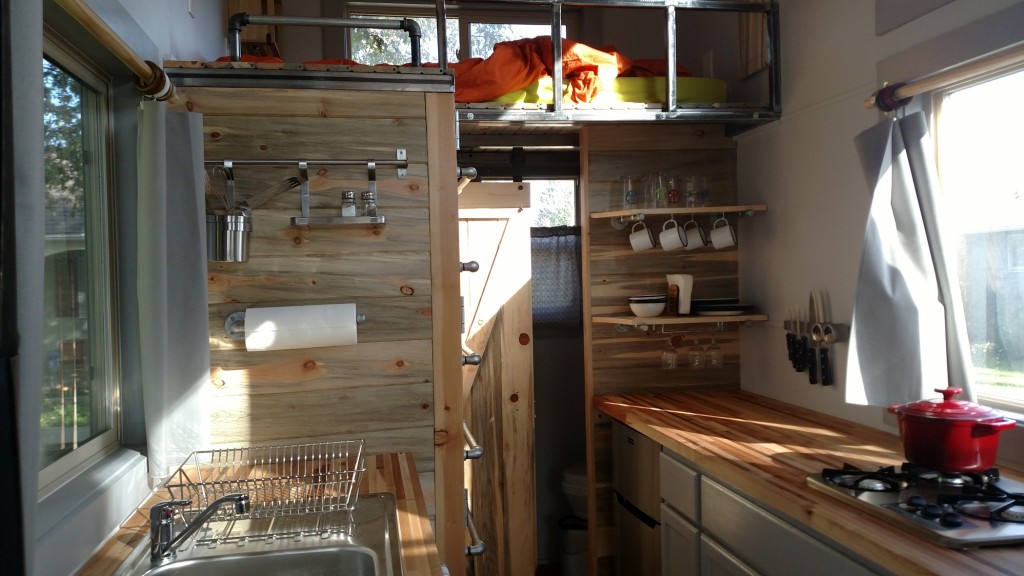
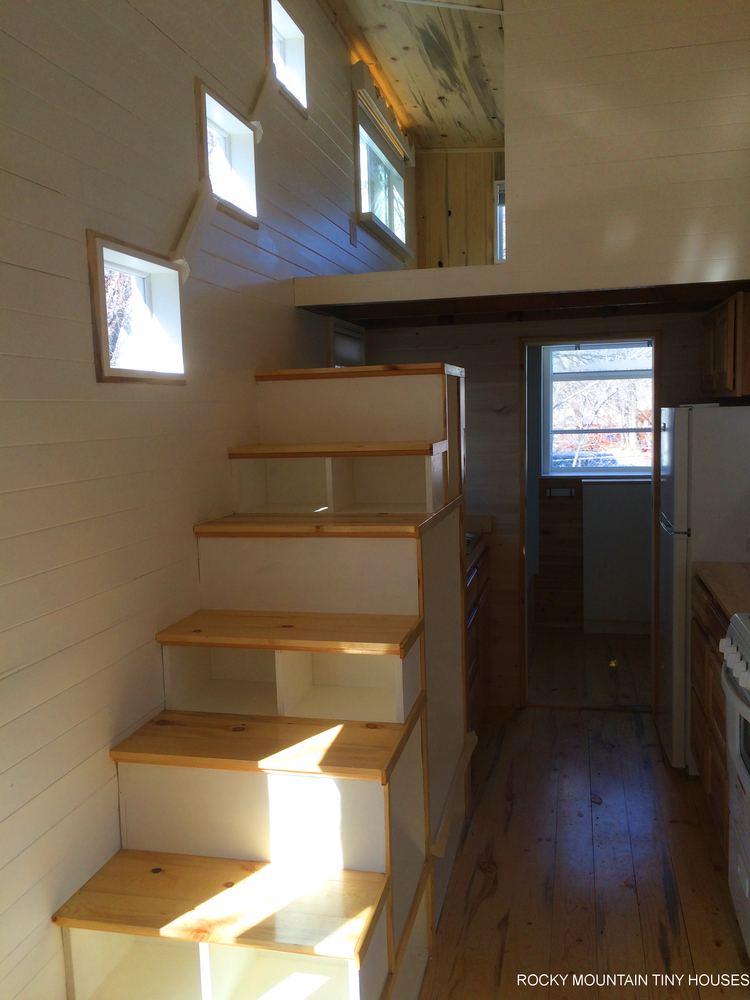
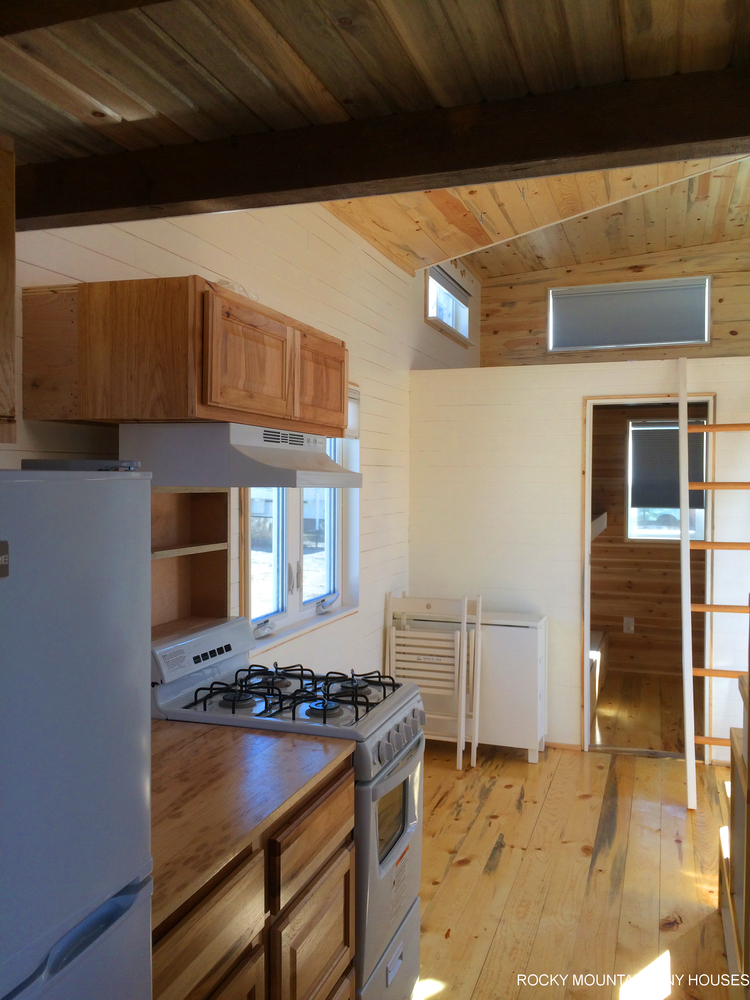
The bathroom with a 32″ shower and a composting toilet occupies the front of the trailer. It is accessed via a sliding barn door. Next to the bathroom wall is a built in closet, with a stainless steel counter space for the small but efficient kitchen area. The customer provided a unique three way chest refrigerator (12v dc, 110v AC 220v AC) that we mounted to a heavy duty slide out base for easy access under the countertop. A side pantry and ample upper cabinets, all dark stained, provide plenty of storage. Across from the kitchen is a large picture window with a narrow casement for airflow. This space is accentuated with a dining table that can be folded down to free up extra room.

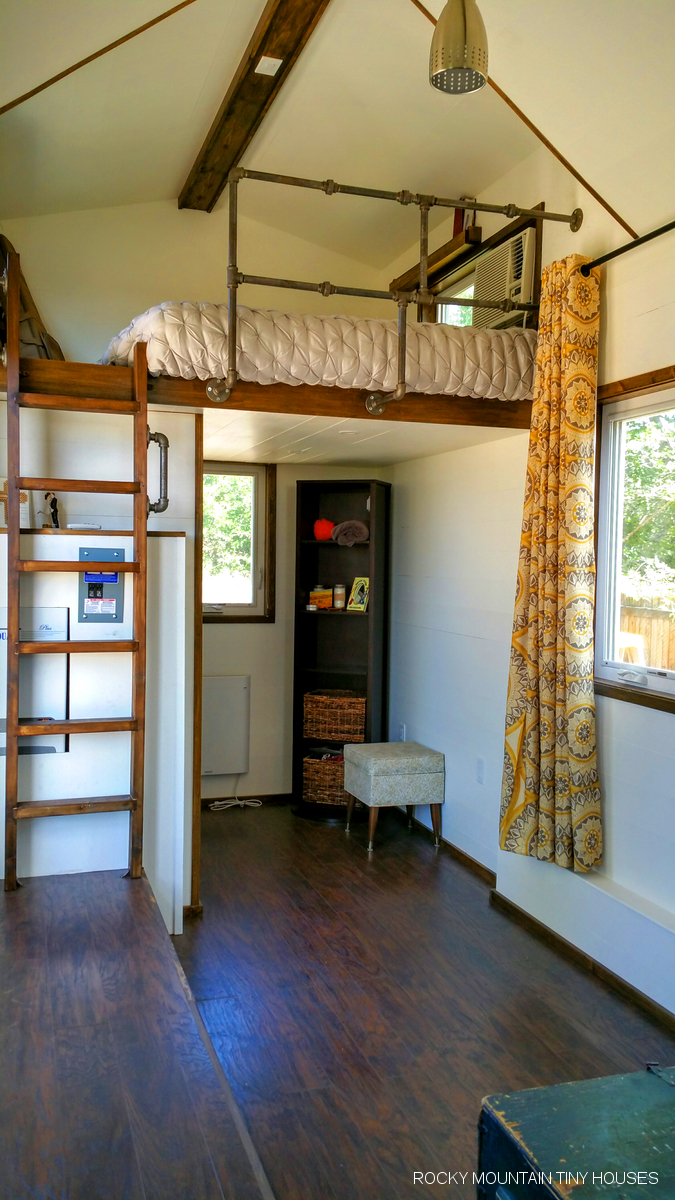
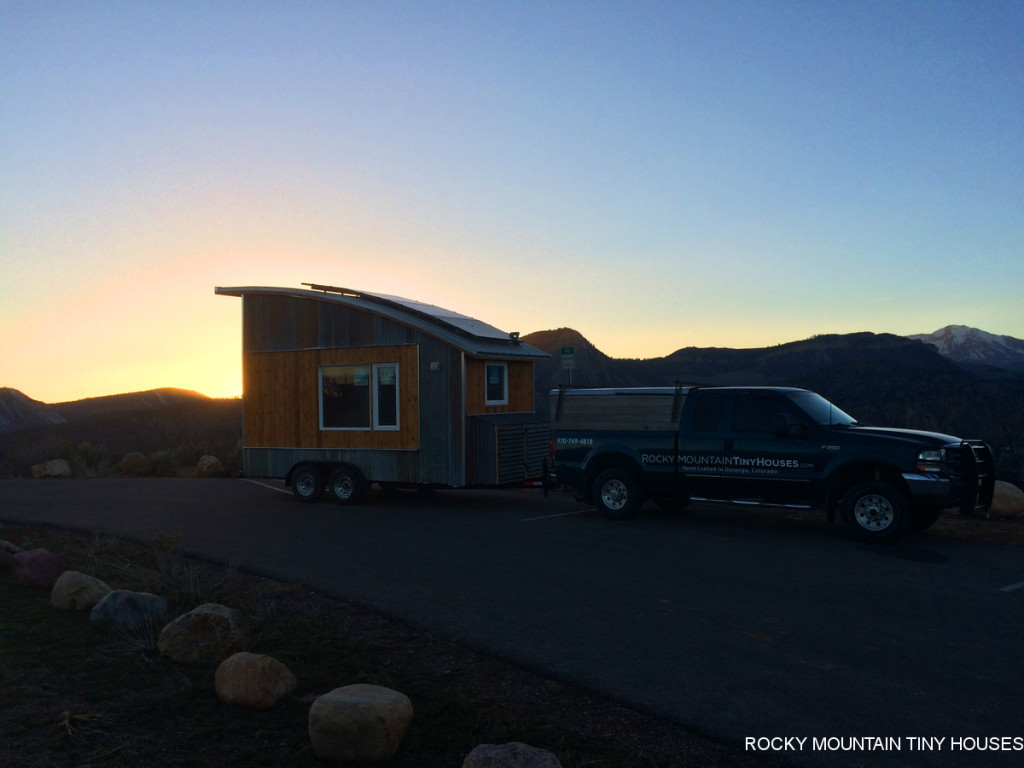
The house is outfitted with a 1400 watt solar system to enable it to be off grid ready. The Outback Flex power management system allows it to plug into the grid to charge the batteries and energize the house should the panels have insufficient sunlight or encounter other problems. All of the solar equipment lives inside a utility closet mounted on the tongue of the trailer, as well as the propane tanks that provide fuel for a two burner cooktop and on demand water heater. A 9k btu mini split system provides cooling and heating for the house.

curved roof tiny house interior

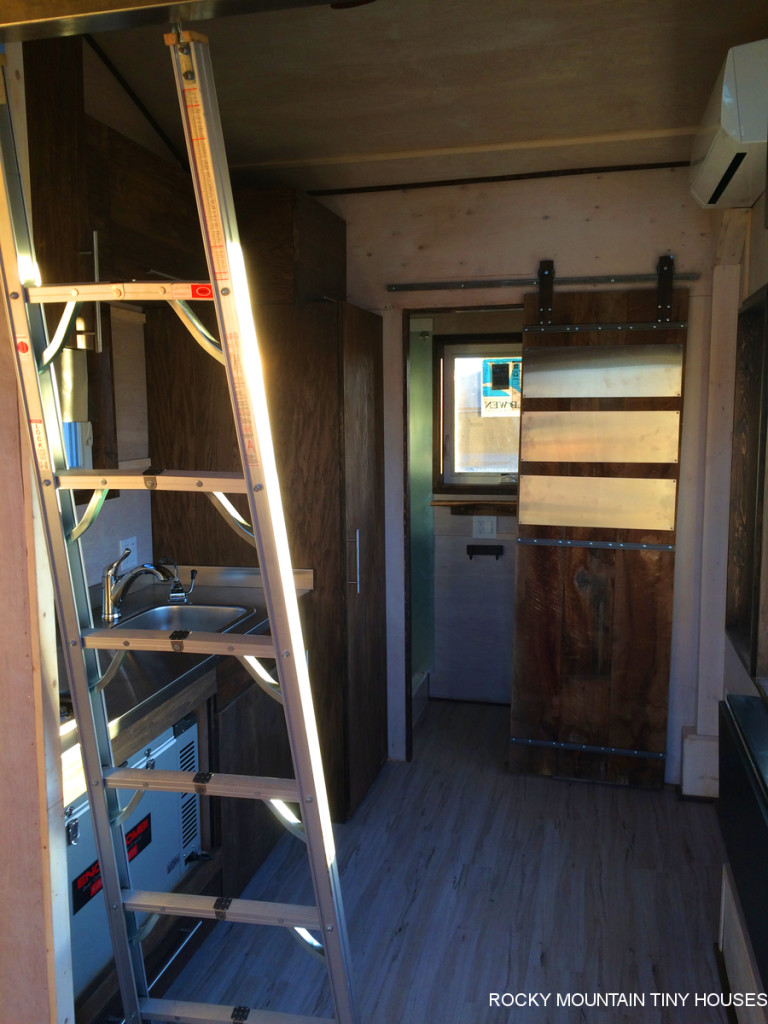
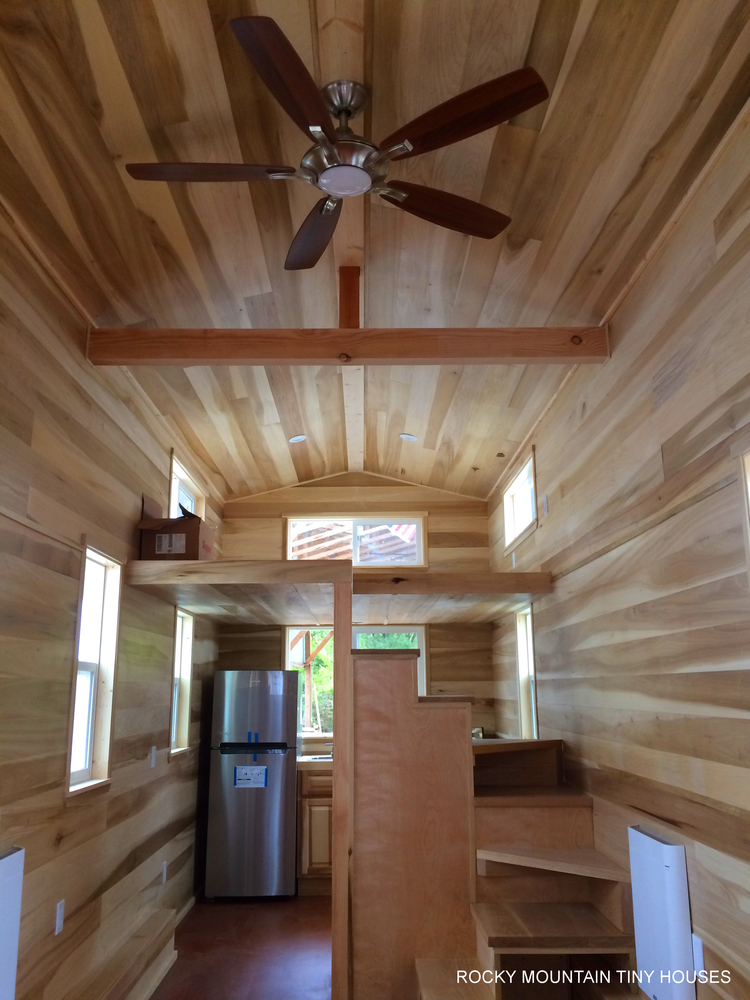
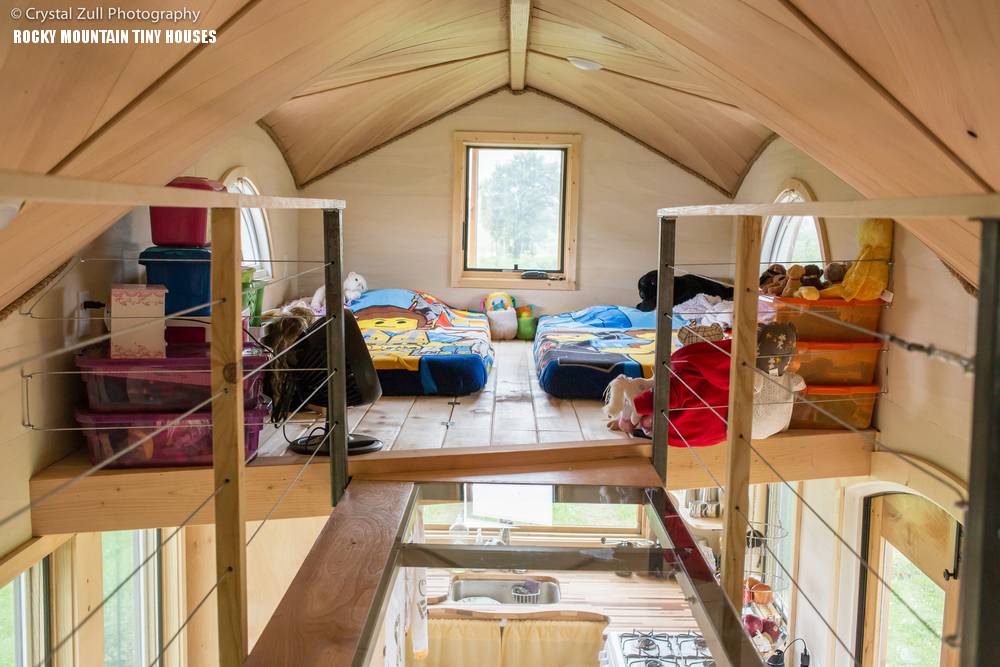
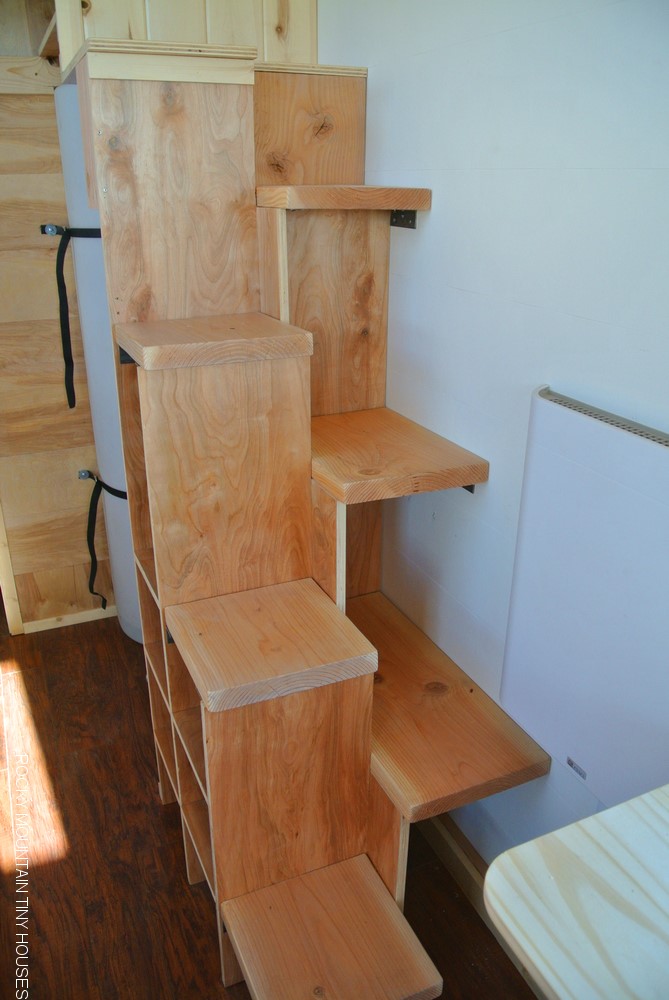
We installed 3 strips of stainless steel on the barn door to house the extensive magnet collection that the owner has. A collapsible aluminum ladder provides access to a storage/guest loft and hangs completely out of the way when not needed.

curved roof tiny house kitchen

curved roof tiny house barn door

curved roof tiny house bathroom

curved roof tiny house living room

curved roof tiny house sunset

curved roof tiny house profile

curved roof tiny house solar panels

Filed Under: Company News, Tiny House Design, Tiny House Plans

20′ Front Range Shell Build

March 15, 2016 By Greg Parham 7 Comments

An awesome family in Fort Collins commissioned us to build this 20′ Front Range model (aptly named!) to use as a vacation home up on some land they owned in the mountains. They had a limited budget, but were ready to put in some sweat equity to finish the house on their own, so we focused on what we could get complete within their budget and skill level. The result was a very well crafted and comfortable shell that they have since completed and could not be happier with.

The level of completion on our end is what I would call a 3/4 shell. We stick framed the structure on top of a custom trailer,  installed windows, metal roofing, siding, and an exterior door. The structure was then wired and spray foamed before receiving 1/4″ paint grade plywood walls. Cork flooring and beetle kill ceiling as well as a beetle kill wainscot round out the major interior materials. We fabricated and installed two L-shaped lofts from steel tubing and decked those with more beetle kill t&g. A small woodstove was installed for a heat source. The final step left in the budget was to install a closet and partitions for the bathroom area. Here are some photos of the house right before delivery.

Front Range tiny house shell

Front Range 20' shell

The customer was gracious enough to share some nearly finished photos of the house after a few months of working on it themselves:


20' Front Range Shell interior1

20' Front Range Shell int2

20' Front Range Shell int3

20' Front Range Shell woods

Filed Under: Tiny House Design Tagged With: 20' tiny house, colorado tiny house, colorado tiny house builder, custom tiny house, Front Range tiny house, Rocky Mountain Tiny Houses, Tiny House, tiny house shell

Wasatch 28′ Tiny House

March 1, 2016 By Greg Parham 43 Comments

Wasatch 28' tiny house exterior

We now have plans available for this design here!

Introducing the Wasatch, a custom 28′ tiny house for a family of four. The Wasatch Range in Utah extends from the Idaho border into central Utah, forming the western edge of the Rocky Mountains. Most of Utah’s population lives in the valley to the west of the range.

This is a stick framed structure with spray foam insulation built on a 18,000 GVW custom trailer. The house itself weighs 11,700 lbs dry. Wall framing is set at 8′ in width, it is almost maxed out on height at 13′-5″ .

Notable features of this house include beetle kill pine flooring and ceiling, a bedroom with bunk beds on the first level, a full size bathroom, a good sized kitchen, a large master loft with built in storage that doubles as privacy, a second loft to act as storage or lounge space, abundant light, and a few other clever details.

My photos didn’t come out very well, but there are a few at the bottom.  The video tour quality is decent. This build came in at about $76k with all the features included.

Wasatch 28' tiny house stairs

Wasatch 28' tiny house beetle kill


Wasatch 28' tiny house interior

Filed Under: Tiny House Design

SIPs vs Stick Framing For Tiny Houses

February 21, 2016 By Greg Parham 17 Comments

SIP tiny house

As one of the few builders capable of offering SIPs (structural insulated panels) as a construction method for tiny houses, I naturally get asked a lot of questions about the differences between SIPs and traditional stick frame. At long last, I found some time to sit down and write this post! I will say up front that either method, properly executed, will yield a well crafted, well insulated, sturdy tiny house that will serve its intended purpose for years to come. What ultimately drives our decision on which route to go will depend on timing of the project, anticipated climate where the house will be parked, and the shape of the tiny house. Major factors to consider are strength, weight, fabrication, insulative value,  design flexibility, electrical, plumbing, finish out, freight, and overall cost. For reference, we use EPS (expanded polystyrene) SIP’s and are comparing them to optimum value 2×4 framing with spray foam insulation.

Strength

SIP’s are hands down the strongest most rigid method of construction. So strong, in fact, that we typically use less steel in our trailers since after the walls are bolted to the trailer, the whole house becomes a composite part of the trailer structure. We can not only save a little weight in the trailer, but increase our head height a little since in shorter trailers we can use 4″ tall main frame members instead of 6″, or 6″ members instead of 8″ for longer trailers. Stick framing with a properly installed spray foam is also quite strong. Not far behind SIP’s if you ask me. If you are comparing to batt insulation or even hand stuffed rigid board, SIP’s are way stronger. As far as weight, it is a wide misconception that SIPs are lighter than stick frame. Compared to advanced framing methods that minimize framing lumber, we are finding SIPs to be about 5% heavier. Despite the absence of internal studs in SIPs, the fact that there is 7/16″ OSB on both sides contributes to the extra weight. I will say that some SIP manufacturers can use a MgO skin that can be finished like drywall, eliminating the need for a finish layer on the inside, which might make weight more even, but in the end, the 5% added weight on standard builds is not noticeable.

Insulation

The EPS foam used in SIP’s typically rates at about R5.5 per inch. Better than a lot of other products, but not as high as some of the spray foam products that can reach 7.1 per inch. The main difference is the lack of thermal bridging though. 2x lumber is normally rated at R1 per inch, so anywhere you have a framing member is a potential spot for heat transfer. In stick framing, you can negate this issue by adding a layer of 1/2″ or 3/4″ foam over you sheathing, but you are increasing your wall thickness and adding cost, time, and complexity to your build to the point where SIP’s would be a more cost effective option. The SIP industry likes to use a term called effective R-value, or overall R-value. This measures the R-value of the envelope as a whole, not just the per inch characteristics of the foam. By these measures, SIPs  clearly out-perform stick framing. I will point out that we are talking about tiny houses here, not large 2500 sq ft houses where energy efficiency is more important. Smaller spaces are easier to heat and cool by their very nature. I will say that SIPs make a lot of sense for people going to be parked in very cold climates, and by this I’m talking about Montana, Minnesota, Canada, Alaska, places in Colorado parked above 10,000 feet, and perhaps some place like the Adirondacks where nightime lows can reach -40F or lower. In milder climates, either system will perform great. In warmer climates such as the south, you will find SIP’s help keep the house a little cooler, but it’s my opinion the difference is small.

Fabrication/Erection

DSC_3065cSIPs are manufactured in a facility and shipped to site. All of the panels are cut to size and shape including all rough openings. Those with little experience cutting complicated roof shapes will find this attractive. Additionally, the panels are very straight, and as long as care is taken to layout sill plates square and parallel, you will have a structure that is very straight and easy to finish out. A good framer picks straight studs and rafters, but the reality is lumber is still a variable product and you inevitably end up with small variations that need to be accounted for in the finish out stage. With a good crew of 3 people, a typical SIP shell fully insulated can be erected in three days or less. By comparison, stick framing can take 5-10 days to get an insulated shell. I will note that use of a crane or forklift is not absolutely needed, but is very helpful in placing the roof panels when using SIPs. Otherwise you will need lots of manpower to hoist them up. We have access to a forklift and can lift large unbroken panels up easily. For those without this capability, you can request to have panels cut in smaller sections but this adds to the complexity when splicing the panels together. One good benefit of SIPs is that you will have a solid substrate to attach interior siding, cabinets, shelves, built-ins, tv mounts, you name it. You will not be searching for or be limited by studs spaced 24″ apart.

Flexibility

Its always best to have a very clear plan and remain with it whether you are using SIPs or stick framing, but there is some flexibility built into SIPs if you need to make changes down the road, such as enlarging, shrinking, or even relocating rough openings. There are some rules you cannot break when it comes to making cuts across splines, cutting openings more than 4′ wide, or cutting openings that are within 12″ of the top plate height. These are all things the manufacturer can educate you on should you need to make modifications. One other thing to consider is tiny house shape. SIPs are flat panels, they cannot be bent or rounded, although you can cut curves out of them. If you have a design that incorporates any kind of warp, twist, or spherical aspect, it will need to be stick framed. You can do hybrid versions such as we did on the Pequod design. The walls were pre-cut to the wavy shape and we stick framed the roof on top of them.

Pequod tiny house SIP

Electrical

Running wires in stick framing is a bit easier and allows for a little more flexibility when placing boxes and routing wire, but with the proper skills and tools one can still fish wires in SIPs without too much hassle. The trick is knowing how to utilize the grid of chases that are pre-cut into the panels. Chases are typically cut 12″ and 44″ horizontally above the floor and every 48″ vertically. Custom chases can be specified ahead of time if you know your electrical plan to a T. If you don’t, it’s ok. Using a hot ball and hot rod you can create your own runs to intersect with the chases. One of the trickiest parts to wire is transitioning from wall to ceiling. Proper prep work drilling holes in the right spots and making sure panels align correctly goes a long way in aiding this nuance, but you are allowed to hack the panels up a bit if need be and spray foam over the holes you cut out as long as wire is deep in the foam and not close to either surface.

Plumbing

Unlike electrical wires, plumbing pipes cannot be easily run through chases. We run all plumbing on the inside of the walls. This means you have to get creative in hiding pipes behind cabinetry and built ins, and sometimes building a baseboard chase to run them in. Or, if you don’t care, leaving them exposed. This does have the added benefit of having full access to your fittings should one ever fail. Of course, you can do this with stick framing as well, but given the choice most people will run pipes in the walls to avoid hiding them. It does help if you can clump all your plumbing fixtures close together, but we have successfully hidden pipes on 28′ builds where the kitchen is on one end and the bathroom is on the other.

Freight and Overall Cost

Because the SIPs we use come from another part of the country (Michigan to be exact), freight is a huge expense to factor in. Some other factories closer to Durango are starting to come online, but for the time being we are sticking with Porter SIPs because their product holds the most certifications and guarantees in the industry currently. This is where timing comes into play. A typical truckload can transport about 6 tiny house packages. If we can get at least three customers lined up for an order, then freight costs are manageable and make sense when compared to the cost of stick framing. Otherwise, one or two projects on one truck is going to be a bit pricey and we are going to be biased towards stick framing unless the customer is really just wanting to use SIPs. From a builder perspective, assuming we can keep freight down, the cost to erect a SIP tiny house is about the same as it is to stick frame and spray foam one. The product itself cost more upfront, but this is canceled out in labor savings. For a DIYer not placing a value on their time, SIPs are going to cost more.

Fresh Air

If you choose to build with SIPs or go the spray foam route, it is important to provide fresh air for you tiny house because it is going to be sealed very tight. This can be as simple as keeping windows open, or as complex as installing a heat recovery ventilator (HRV). You might even consider doing these things if you are building a tiny house that is not very tight and “breathes” well. Fresh air is critical for the health of the house and its inhabitants.


Filed Under: Tiny House Components, Tiny House Design Tagged With: SIP tiny house, SIPs, SIPs vs stick frame, structural insulated panels, tiny house construction

Wood Stove Options for Tiny Houses

January 25, 2016 By Greg Parham 35 Comments

Of all the ways to heat your tiny house, a woodstove is perhaps the most nostalgic and off grid way to do so. I’ve already discussed the pros and cons of using a woodstove as a heat source, the purpose of this page is to educate those interested in utilizing one of the various current options on the market that are suitable for use in tiny house based on size and heat output. In this fast paced developing trend, units are likely to enter the market that I might not know about. If you are aware of any woodstoves that I do not have listed below, please contact me to share. Please note I am not making any warranty as to the performance or safety of any of these units: this will completely depend on proper installation, use, and maintenance. Woodstoves can be dangerous in any type of structure if not used properly, so please do your due diligence and be safe! This is not a post about how to install woodstoves in your tiny house. There are simply too many options and too many different types of tiny houses, so please consult with the manufacturers and/or local professionals

Dickinson Marine Newport Solid Fuel

newport solid fuel heater
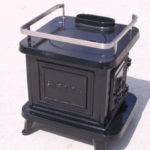
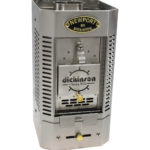
This unit represents the smallest of the small solid fuel heaters that are commercially available. As such, it will probably only heat the smallest of spaces, say 80 sq ft and less, depending on climate and how well insulate your tiny is. I do mention it because it might be the best option for some. If you live in an area that doesn’t have harsh winters and only need heat a few nights out of the year, this might be a good way to go. It is designed for 20-25′ long boats and requires 3″ chimney parts.

Colorado Cylinder Stoves: Mesa Package

colorado cylinder stove tiny house
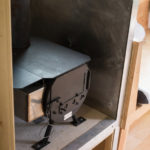
After several hours of research looking for a woodstove that I could source quickly, affordably, and was small enough for my 16′ tiny house, I chose
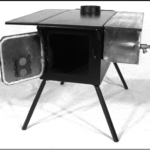
 this model. I am by no means saying it is the best out there, but it gets the job done. If you order one from this Colorado company, make sure to tell them you want the custom tiny house version. They will use a 5″ flue size and heavier gauge steel that will last longer and hold heat longer. Cylinder stoves are traditionally used in cowboy tents. They are meant to pack away small and be light enough to be carried by horses, so lighter gauge metal is normally used with the understanding that use is not full time, only intermittent.

Four Dog Stoves

four dog tent stovesThese stoves are very similar to the cylinder stoves, with the main exception being they are rectangular instead of cylindrical. For those on a weight budget, they offer titanium models that weigh in at only 11 lbs for the package! However, it would take some tinkering or customization to safely pass the pipe through a wall or ceiling since these are exclusively designed for tents/tipis. This company is based in Minnesota and have been making tent stoves for 25 years now, so they know a thing or two about heating small spaces in cold places!

Fatsco PET and Tiny Tot

tiny tot woodstove tiny houseThis rather obscure company out of Michigan produces very small (as little as a 8 1/2″ diameter footprint) units that can burn wood or coal and fit in very tight spaces! Prices range from $230-$400 and weights range from a paltry 13 lbs to a still respectable 55 lbs.


Antique Pot Belly

potbelly stove tiny house
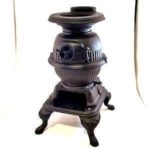
You can find these little treasures floating around in antique shops and sometimes on ebay. They were typically used to heat train cars and other old timey structures. Due to their antique status, expect quite of bit restoration work to getting them in safe working order. Also, they are designed to burn coal, so if you plan on burning wood, expect to be processing small pieces and filling it often.


Cubic Mini “Cub”

mini-cubic_black tiny house
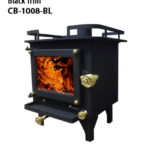
This Canadian manufactured unit has a footprint of only 11″x12″ with a claimed weight of 27 lbs. It utilizes secondary burn, but is not yet certified. At $315 US, it would seem to be a really good purchase if it does what it claims.  They manufacture a slightly larger unit called the Grizzly for those with larger houses.

Dwarf Stoves
Based in Hayden, Idaho, tinywoodstove.com offers the Dwarf Stove in three different sizes: 3kW, 4kW, and 5kW, and a stove sizing calculator to help choose the right one for your project.  All Dwarf models have three separate air controls and an insulated firebox for efficient burning, top and rear exit options, and a large fire viewing window for ambiance.  I personally have an older 3kw Dwarf in the San Juan build and can say that I absolutely love it and feel it is one of the better values for a tiny house sized woodstove.

Gray Wood Stove Tiny House

Marine Stove Sardine, Little Cod, and Halibut

Sardine wood stove tiny house
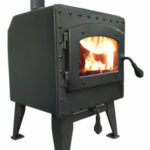
Perhaps the most charming of all models available fit for use in tiny house, theses stoves also have the longest lead time, sometimes up to a year from date of order. Keep this in mind if you plan to purchase one. The Sardine is the smallest unit with a footprint of 12″x12″. The Little Cod is slightly larger at 18″x14″ and features enough cooktop surface for two pots, white the Halibut is their largest unit at 21″x16″

Salamander Hobbit and Pipsqueak

Hobbit stove tiny house
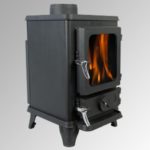
These small and DEFRA approved woodstoves make excellent choices for tiny houses based on their dimensions and heat output. They are based in the UK with only one US distributor, so sourcing one might take a while.

Vogelzang Lit’l Sweetie

vogelzang lit'l sweetie tiny house
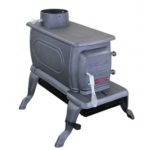
This cast iron model is the smallest and most affordable unit made by this company, but it’s slightly on the larger side for tiny house scale at 11″ wide by 25″ deep. Normally around $275, you are likely to find it stock in local stores like Ace, True Value, Tractor Supply, etc., but they can be easily purchased on as well.

Jotul 602

jotul 602 tiny house
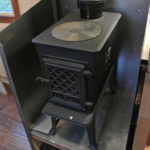
Deemed the most popular woodstove ever made with over 1,000,000 units sold and counting, this high quality
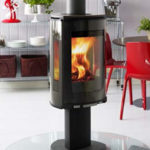
 cast iron unit from Norway is a good option for larger tiny houses. We installed one in a 30′ build with good results. It is very heavy and pricy, but is EPA certified and has a lifetime warranty.

Jotul F-370

Jotul f370 tiny houseThis elegant woodstove carries the same quality as the 602, but with a modern flair and greater visual appeal. It requires a footprint of 18″x19″ and is 46″ tall so keep this in mind when space planning. It also weighs 340 lbs!


Morso 1410 and 1440

morso 1410 tiny house
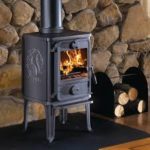
Sometimes called the “squirrel stove” because of the squirrel relief on the sides, this classic beauty will have no problem heating a tiny house.  It has a 16″x18″ footprint and weighs in at 215 lbs. This unit is EPA approved, but like the Jotul is heavy and expensive. The 1440 model is similar in size but works off of convection rather than radiant heat, meaning clearance to combustibles is reduced, a feature that is beneficial to those with very tight space constraints.

Unforgettable Fire Kimberly
kimberly_stove
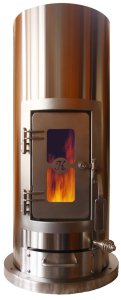
I used to think this was a good option, but after installing one in my house with very poor results, I can no longer recommend it, especially for the $4k price tag. I only post it here for educational purposes. I think the only reason I would put it in a tiny house is for people living at lower elevations with milder winters and who want an ultra modern aesthetic.


Filed Under: Tiny House Components, Tiny House Design

Bayfield Tiny House

October 29, 2015 By Greg Parham 26 Comments

Bayfield tiny house exterior

This spacious tiny house was commissioned by a local gentleman, now living in it just down the road in Bayfield, CO. He was looking for a no frills, tall, roomy, yet well crafted space to call his own. The house sits on an 8×28 triple axle trailer rated at 15,000 lbs. The dry weight is 11,000 lbs. Since it was not anticipated the house would ever move that much, we maxed out the peak height at 13′-6″ and carried the 3/12 gable roof pitch across the entire structure for lots of interior volume.

The exterior siding is entirely rusty corrugated metal. Over time, it will develop a warm rusty hue and begin to blend into the site where it is parked next to brown/red dirt, gambrel oaks, and other deciduous trees.

The interior is almost completely clear coated poplar t&g that we had milled locally. The exception being the floor, which uses a red tinted natural cook product. The stair treads are solid red oak too. The effect, while clean and minimal, is quite stunning.

bayfield tiny house interior

Bayfield tiny house cork flooring

The kitchen is a very basic Pullman style layout featuring a 10 cu ft stainless fridge, a mid size single bowl sink, a few drawers, and an electric 20″ stainless range. The owner doesn’t cook much or have many kitchen gadgets so this arrangement will be than adequate for his needs.

Bayfield tiny house kitchen

Opposite the kitchen wall is some closet storage underneath the stairs.

Bayfield tiny house closet

The main loft is accessed via these winding stairs and will fit a king size mattress no problem. with this roofline , it is the tallest sleeping loft we have yet to build.

bayfield tiny house master loft

The secondary loft is accessed via a ladder that stores vertically straight when not in use, but hooks on at an angle for safer climbing while in use. Another unique feature of this floor plan is that it has two entry doors directly opposite each other. The owner plans to build decks on either side of the house so he can have both a sunrise and a sunset deck to enjoy the lovely Colorado views.

Bayfield tiny house parking spot

While this tiny house is not particularly complex, it is larger than average and features very nice woodwork on the interior. Expect similar builds to be around $63k finished.

Filed Under: Company News, Tiny House Design Tagged With: bayfield tiny house, rocky mountain tiny house, rusty metal tiny house, simple tiny house, tall tiny house

24′ Albuquerque Tiny House

October 5, 2015 By Greg Parham 58 Comments

Custom 24' Tiny House exterior

We are pleased to share the latest completed tiny house to leave our shop, a custom 24′ build that was delivered to a newly wed couple in Albuquerque, NM. The shell is constructed of Structural Insulated Panels (SIP’s) which are then finished out with gray stained cedar lap siding, natural stained cedar shakes, and galvanized corrugated roof on the outside and white tongue and groove on the inside with walnut stained accents/flooring.

This unique design centers around a set of French Doors that sit on the wheel well. You enter on a platform that is about 12″ above the main floor. Below this platform are pull out drawers for storage. On the left side of the platform is a ladder that climbs up to the sleeping loft that fits a queen size bed. The portion of the roof also has dormers on both sides for increased head height and airiness.

20150924_114154-3


On the right end of the lower platform is a higher platform that the kitchen is situated on. Beneath this platform is a full size bed that pulls out for guest sleeping. The small couch hides the end of the bed and rolls out of the way when needed. On the portion of the platform where there is dead space, we installed trap doors for even more hidden storage. A simple drop-leaf bartop with seating for two or three separates the kitchen space from the living area.

Custom 24' Tiny House living room


At the back of the trailer is a wet bath with some very nice tile work, a sliding barn door, and a customized exposed shower faucet that doubles as the sink spout. You cannot see from the photos, but there is a Nature’s Head composting toilet opposite the shower wall.

tiny house tile bathroom wet bath

Next to the wet bath is a nook that will serve as storage for time being, until a baby comes along and then it will be used for a baby crib!

custom 24' tiny house living room

All in all it is a simple layout with lots of volume and nice finishes, designed with an expanding family in mind. The design came almost exclusively from ideas the customer gave us, we just took these ideas and tweaked them a little bit to properly scale the components and make construction a little easier. For anyone interested in a similar build,  expect final costs to be in the $51k-57k range depending on desired features and finish out.

Albuquerque Tiny House


Filed Under: Company News, Tiny House Design Tagged With: 24' tiny house, custom tiny house, door over wheel wells, french door tiny house, platform storage, SIP tiny house, tiled wet bath

Custom hOMe Tiny House Build

August 25, 2015 By Greg Parham 19 Comments

custom hOMe build exterior1

We are pleased to announce the recent completion of a custom hOMe build. For those of you not familiar, this is a very well known design by Andrew and Gabriella Morrison. You can view the original hOMe and learn more about the design on their website: http://tinyhousebuild.com/

A newlywed couple in Colorado Springs contacted me back in the Spring to inquire about this project and whether or not we could customize it and still stay within their budget. Absolutely! I have actually been wanting to build a tiny house from someone else’s commercial set of plans, not only to see how they do things, but to spare me the process of having to generate plans from scratch. This was the perfect opportunity!

The most notable differences from the original are:

  • Built with Structural Insulated panels instead of stick framed! Very straight, strong, and better insulated.
  • Interior beetle kill pine instead of drywall
  • dark stained cedar lap siding instead of t&g
  • copper apron sink
  • curved glass shower enclosure
  • modified cabinet layout to accommodate customer’s needs
  • cabinets built in-house instead of Ikea to save weight and be custom fit
  • small 18″ dishwasher installed in the kitchen
  • fold down dining table
  • dry weight of 11,900 lbs instead of the estimated 17,000. easier towing!

We were able to complete this custom 28′ build for $74,000. For those who like the original design and would like to save a little money we could complete this build in stock form for closer to $68,000 using either SIP’s or stick frame with Spray foam insulation. Please note that you will still have to purchase the plans from the Morrison’s at tinyhousebuild.com prior to contacting us. The prices above do reflect the cost of these plans, however. Enjoy the photos below!

custom hOMe tiny house stairs

custom hOMe tiny kitchen

custom hOMe tiny dining

custom hOMe tiny extra loft

custom hOMe tiny shower

custom hOMe tiny sleeping loft


hOMe tiny house SIPScustom hOMe tiny exterior 2

tiny house guardian


Filed Under: Company News, Tiny House Design Tagged With: 28' tiny house, beetle kill pine, custom tiny house, hOMe tiny house, modern tiny house

The Pequod Tiny House

July 15, 2015 By Greg Parham 120 Comments

Pequod tiny house exteriorMeet the Pequod, our most elegant and complex build to date. This is a larger tiny house that we built for a family of four currently residing in Indiana. At 26′ long, this house weighs 11,500# dry and maxes out at 8′-6″ wide and 13′-6″ tall. It uses a drop axle trailer chassis that makes towing a little trickier, but adds 4″ of headroom in the lofts. The wavy shape of the roof is a function of maximizing heights in the lofts, lowering ceiling heights elsewhere, and aiming for a “whimsical” design aesthetic. While pure and simple in theory, in reality it proved to be very challenging and time consuming to execute. In fact, this house was so challenging to build, that it sells for quite a bit higher than our normal priced houses.  For those curious, if we were to build a replica of this house it would sell for $80,000. A build such as this is the best of the best, and design/quality of this caliber is not cheap. Key components of this elegant build include the following:

  • Structural Insulated wall panels
  • spray foamed stick framed roof
  • custom milled clear vertical grain Douglas Fir ceiling, kerfed, warped, and twisted to fit the complex three dimensional shape of the roof
  • handmade archtop French Doors and handmade operable arched windows in the lofts
  • solid brass antique porthole windows
  • full size high quality bottom freezer fridge unit
  • custom designed pantry with pull out shelves for canned food storage
  • LG combo washer/dryer
  • 20″ range
  • custom crafted hickory and walnut countertops
  • welded steel catwalk with plexi glass flooring
  • large garden window in the bathroom
  • custom built movable couch and dining table/bench/ottoman sections
  • stairs with integrated storage
  • Burgundy colored metal roof
  • three layered cladding including painted board and batt, clear grain cedar lap siding, cedar shingles, and a custom “schwoopty” shape designed by the customer
  • woodstove package
  • aluminum clad wood windows
  • birch hardwood flooring
  • integrated storage in the loft plenums
  • LED lights throughout
  • an accordian window in the kitchen to access the
  • wrap around fold down deck
  • plentiful closet storage space for two adults and two children
  • outdoor utility closet on rear
  • Nature’s Head composting toilet
  • custom 36×32 shower
  • hidden storage for valuable belongings
  • custom made hardware and trim details

The photos do the rest of the talking.

Pequod tiny house folding decks

Pequod tiny house garden window

Pequod tiny house kitchen

Pequod tiny house countertop Pequod tiny house sink countertop

Pequod tiny house pantry

Pequod tiny house dining area compacted Pequod tiny house benchj

Pequod tiny house table setup Pequod tiny house dining room

Pequod tiny house living room

Pequod tiny house parents closet Pequod tiny house kids closet

Pequod tiny house bathroom

Pequod tiny house living room view

Pequod tiny house master loft


Pequod tiny house catwalkPequod tiny house curved ceiling catwalk

Filed Under: Tiny House Design, Tiny House Plans

Boulder Tiny House 2.0

May 27, 2015 By Greg Parham 17 Comments

Rocky Mountain Tiny Houses 18' Boulder

A young woman living in Boulder commissioned us to build a custom “Boulder” model tiny house this spring. She really like the aesthetic of the original Boulder but wanted to change a few things. We went with an 18′ trailer and decided to construct the shell from SIP’s rather than stick frame it. We also installed an off grid water system with 50 gallons of water storage and a Shurflo pump. Eventually the house will be powered by solar panels.

Other notable differences on the interior include a hanging couch that was inspired by the 12′ East Austin build, dark hardwood floors, aspen partitions instead of barnwood, and a large built in work/dining table. The house was designed for an off grid compost toilet, but a regular flush toilet will be installed since the tiny will be parked at Wee Casa in Lyons, CO over the summer to be rented out at this location. The toilets will again be switched out when the owner moves the house to its more permanent location.

The original 16′ Boulder base model starts at $35,000 and can be customized to meet your needs. An 18′ model would start at $37k and a 20′ trailer will start at $39k. Plans for all three lengths in both stick frame and SIP construction will be available for purchase online sometime in spring 2017.

Rocky Mountain Tiny Houses 18' Boulder living room

Rocky Mountain Tiny Houses 18' Boulder interior

Rocky Mountain Tiny Houses 18' Boulder stairs      Rocky Mountain Tiny Houses 18' Boulder bright

Rocky Mountain Tiny Houses 18' Boulder toilet      Rocky Mountain Tiny Houses 18' Boulder shower


Filed Under: Company News, Tiny House Design, Tiny House Plans

« Previous Page
Next Page »
  • Facebook
  • LinkedIn
  • Pinterest
  • YouTube
Rocky Mountain Tiny Houses 18' Boulder
FRONT RANGE TINY HOUSE
Pequod tiny house exterior
Pequod tiny house countertop
Pequod tiny house catwalk
custom hOMe build exterior1
custom hOMe tiny kitchen
log cabin tiny house kitchen
Custom Tiny House Plans
Colorado Tiny House
Colorado Tiny House
tiny house custom wood countertop
tiny house towing
tiny house towing
steampunk light fixture
Mandy Harris
Austin Tiny House Kitchen
Mandy Harris
Tiny House barn door
Mandy Harris
Funk East Austin Tiny House
Mandy Harris
Austin Tiny House interior
East Austin Funky Tiny House Exterior
Mandy Harris
Boulder Interior
Boulder Interior
Boulder Tiny House front
Boulder custom light
Boulder tiny house porch lights
Rocky Mountain Tiny Houses Boulder side
Durango tiny house in winter
Durango Office
Durango Office
Durango Bookshelf
Durango Bookshelf
Durango Detail
Durango Detail
Shower Detail
Shower Detail

Tiny House Updates

  • 28′ Bandelier
  • 20′ Hermosa Tiny House
  • The Beatle 22′ Tiny House
  • 10×32 Hill Tiny House
  • Emerald Lake 10×32
  • Spring ’24 Update
  • 2024 Update!

Tiny House Magazine

RMTH was recently featured as "Builder of the Month" in issue 32. You can purchase this issue, or any other issue, by clicking here

Oh Yeah

​Tiny House Blogs

Advertisements