 Before I get into the nitty gritty, the first order of business is thank yous, and there are quite a few, so bear with me.
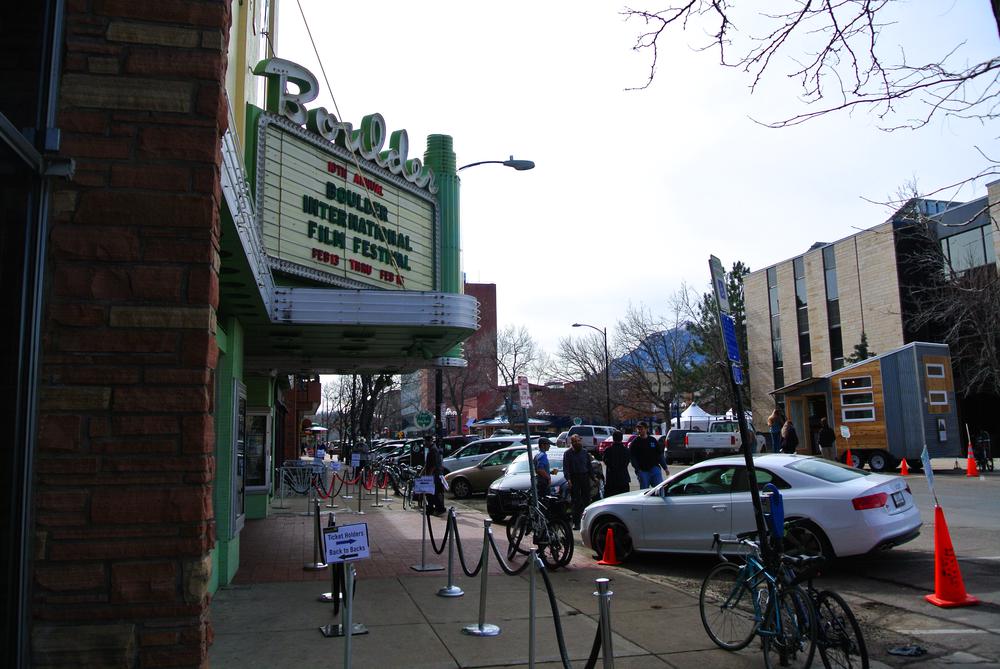
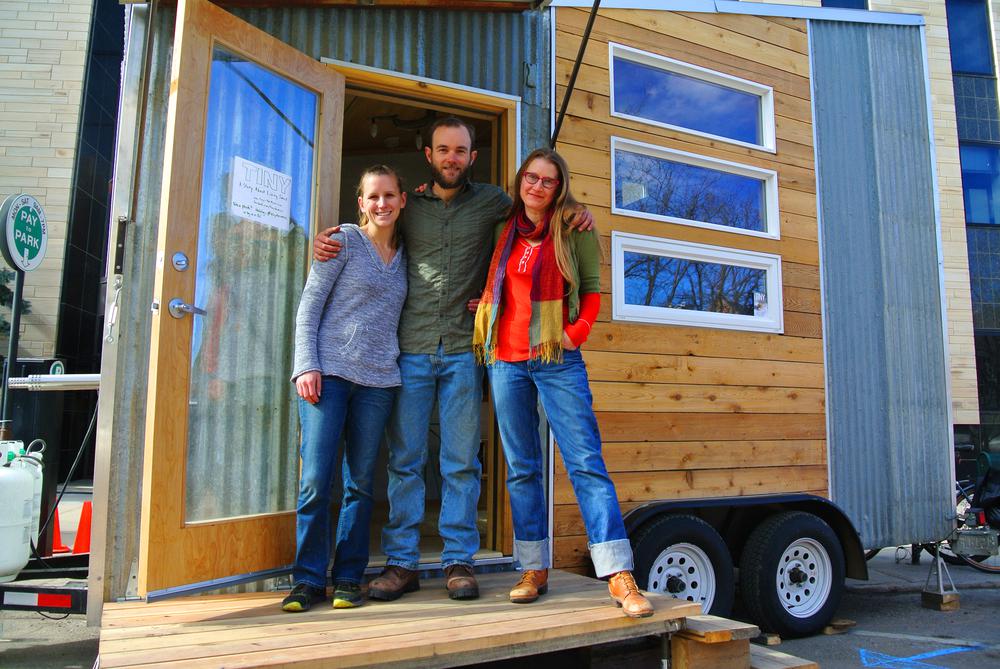
First off, thanks to Christopher Smith and Merete Mueller who made the film TINY: A Story About Living Small. This film was one of many great films being screened at this year’s Boulder International Film Festival (hence called BIFF) . I was invited by Chris and Merete to bring a house to Boulder on behalf of BIFF, so many thanks to everyone at the festival who had a say and pulled all the strings to make this event go down. Special thanks to Crystal Gray, who, in addition to being my main contact, pulled through in my greatest moment of crisis
Next in line are the wonderful ladies that traveled with me from Durango to help with all the setup work, staging, distribution of literature, and answering a plethora of questions asked by hundreds of people- Emilie Monson and Heather Nyman. I am helping Emilie with the design and build of her tiny house, and she actually put in quite a few hours on the Boulder model, so it was only fitting she got to be involved with this trip. Heather was part of the Snowdown Parade float a few weeks back, really wanted to buy the Boulder, and also was up for an exciting roadtrip, so she jumped all over the invite. I simply could not have accomplished alone what we pulled off as a team. Thank you ladies so much!
Next would have to be John and Chris Spitzer. They unconditionally welcomed us into their comfy house when the truck broke down just a few blocks away on a cold windy night. They were crucial in getting the truck to a repair shop and getting the tiny house to a safe place for a few days. They were also great people to hang out with and talk about tiny house ideas. I cannot begin to express how grateful I am for ALL that they did for me and the ladies.
A huge huge thanks to Jill and Danny, some long time friends of Emilie, not to mention some damn fine people who were critical in helping us get the truck fixed the first time it had hiccups ensuring that we made it to Boulder on time in the first place!
Thanks to the Denver Film Society for allowing us to bring the house to the TINY screening in downtown Denver. Thanks to Sam Palmer-Dwore, a fellow architecture scholar and soon to be tiny house builder for letting us crash at his place after the Denver screening and giving me a safe place to park the house until the truck got fixed.
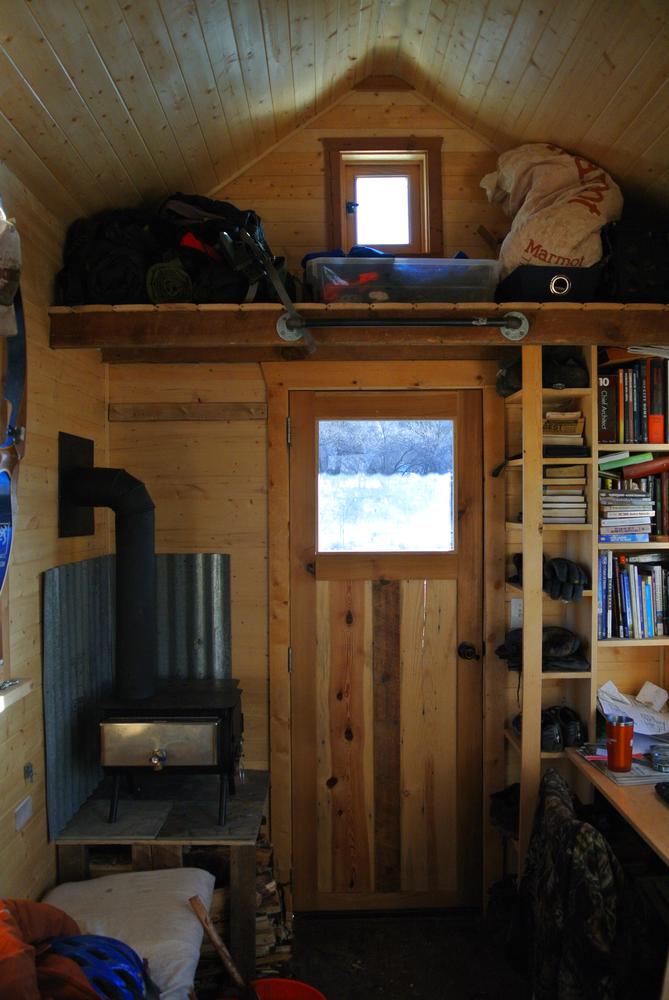
Thanks to Urban Market of Durango for supplying the furniture and accessories that we used to stage the house and warm it up a bit.
Thanks to Brooks for stopping by the house while it was parked at John’s place and getting in touch with me about an amazing business partnership!
Lastly, thanks to everyone who stopped by the Tiny House to say hi, ask questions, take photos, or leave comments!
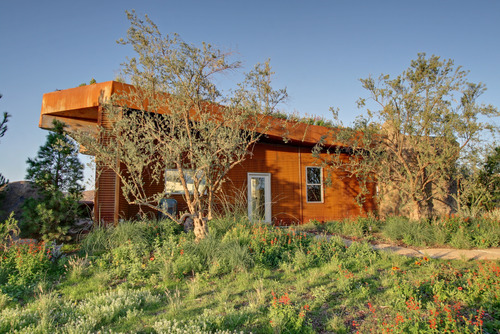
This journey started sometime in the fall of 2013. I was back in Durango following a crazy epic trip to see the rest of the US rockies. I had laid a lot of important ground work prior to that trip, now it was time to get things in motion. I finished the design of the Boulder and wasted no time getting started on construction. Mid January, the house was complete, and it was on to the task of trying to sell it.
The Boulder made its rounds across Facebook, the Tiny House blogosphere, and other internet outlets as well as by word of mouth. It wasn’t long before Chris and Merete found out about it, right at the time they were looking for a tiny house to invite to the festival. Following the formal invitation, I pondered it for a whole 2 hours before deciding to accept.
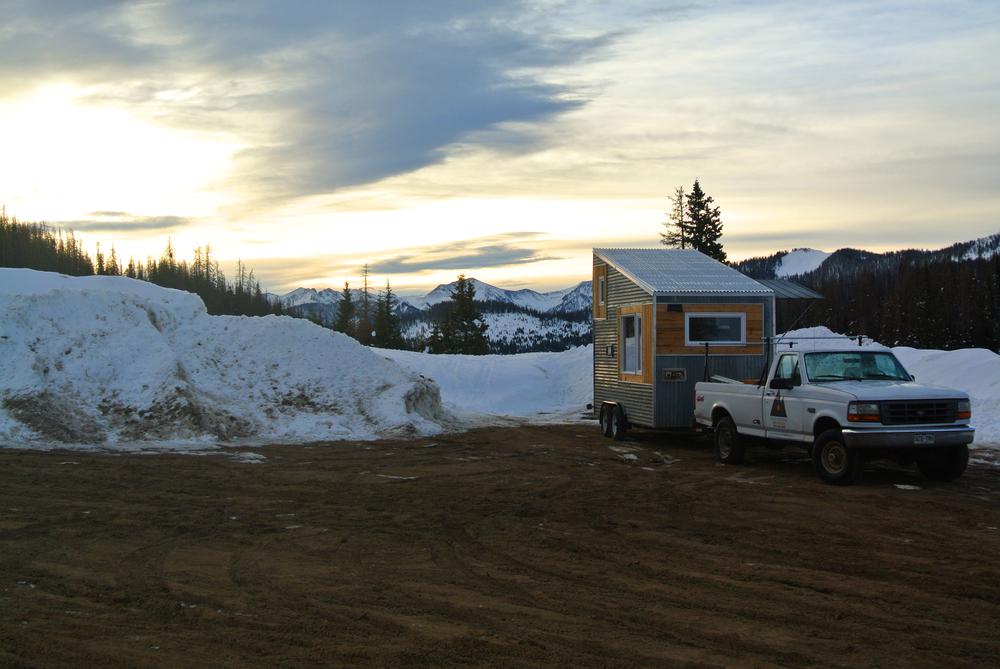
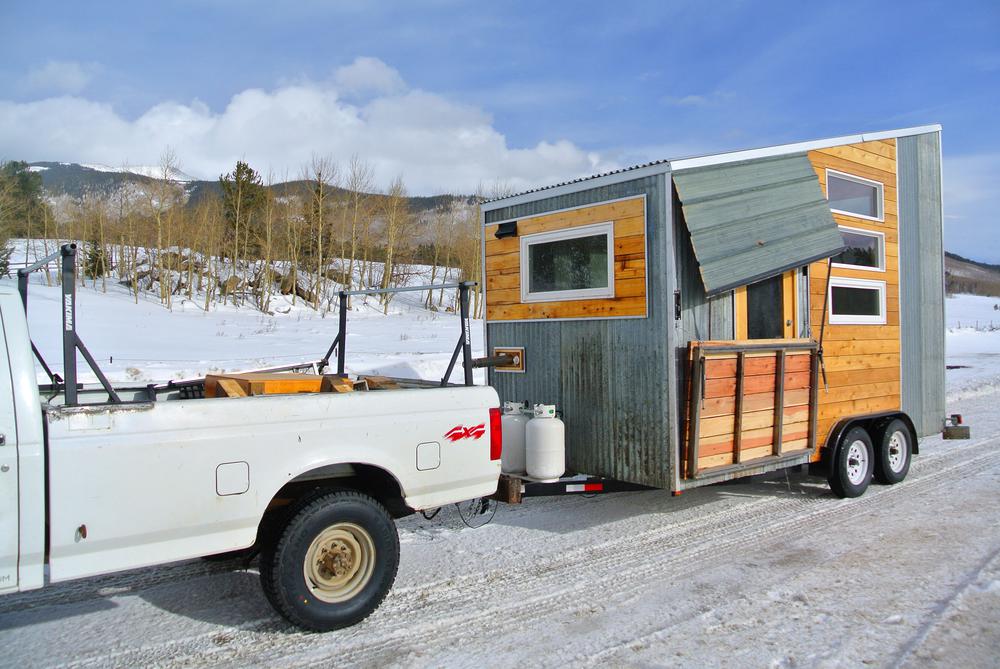
I spent the 10 or so days in between then and the trip to work on the pickup, finish itty bitty details on the house, build a portable solar power system and just get all my ducks in a row. Come evening of February 14, we hit the road! It was my first time towing a tiny house that far and over such conditions-long stretches of highway, mountain passes, high winds, high profile trailer, etc., but once I got a feel for the handling, my nerves calmed down and we were cruising. I wasn’t anxious, but I was still on high alert and constantly having to adjust the steering wheel and gas pedal to be in sync with the conditions. That evening, we made it up to Wolf Creek pass where we decided to park and camp til day break.
After a good night’s sleep and a lovely sunrise over the continental divide, we coasted into South Fork and found a little cafe for breakfast. Even in a town as small as South Fork, the house welcomed many looks and questions! It was back on the road to Del Norte and then north for a long stretch to Salida, where we stopped for coffee and a short break. Lots of people here stopped to take pictures and ask questions too. From here on, driving conditions turned unfavorable. The winds picked up and we began hitting sections with steeper grade and tighter turns. In times like this, just remember: better safe than sorry. I took my time and used pull outs when available to let faster traffic behind me pass.
It was slow go, but we were still on schedule. I had figured my average speed would probably be around 40 mph, with a top cruise speed of 45 mph. Some places, like the 7-8% grade up Wolf Creek only topped out at 20 mph, but that whole stretch from Center to Poncha Pass on US 285 is flat and smooth; we had no problem holding 55 mph, even getting up to 66mph just to see how the trailer did at that speed (it did fine, I just didn’t like watching my gas gauge visibly more towards the E! ) Then, our first major setback. Right after cresting a pass north of Jefferson, we heard a loud clunk under the truck and I noticed I didn’t have power steering anymore. The truck was still running, but I feared something with the steering had broke and fell out, either the power steering pump or gear box. Luckily there was a long pull out immediately to the right we were able to use.
We walked back aways looking for unknown auto part on the highway. I found a worn plastic pulley on the opposite side of the road, but it looked like it had been there a while and not what I was looking for. I picked it up anyways. After not finding anything else, I walked back to the truck, popped the hood, and there was the problem staring me in the face. The pulley I had found was the idler pulley that puts tension on the belt that runs all the auxillary parts like the water pump, alternator, cooling fan, and yes, power steering. It had popped off the metal bearings still attached to the bracket. I got my tool bag out and began trying to put things back together enough to limp into the next town.
Shortly after, Emilie showed up with her friends Jill and Danny. They had left Durango that morning and had just caught up with us-perfect timing! After not being able to reattach the old pulley, we decided it would be best to drive into the next town of Bailey 15 miles up the road and look for an auto parts store. There was no cell reception or yellow pages where we were, so we just had to hope for the best once we got there. Of course, we get there only to learn the nearest parts store is 14 more miles up the highway in Conifer.
We get there and find an O’ Reilly’s and thank God they had 1 pulley in stock. I buy it and we hop back in the car to drive back to the stranded truck 30 miles back down the road. After some nice conversation with Jill and Danny, we make it back, put the part in, and get back on the road. Jill and Danny follow us back to Conifer to make sure everything is alright (it was) and we set course for Boulder while they set theirs for Denver. I am so gracious for their help and I’m not sure we would have made it to Boulder on time without them. Someday, I shall come across someone in a similar situation, and I will not hesitate to return the karmic favor.
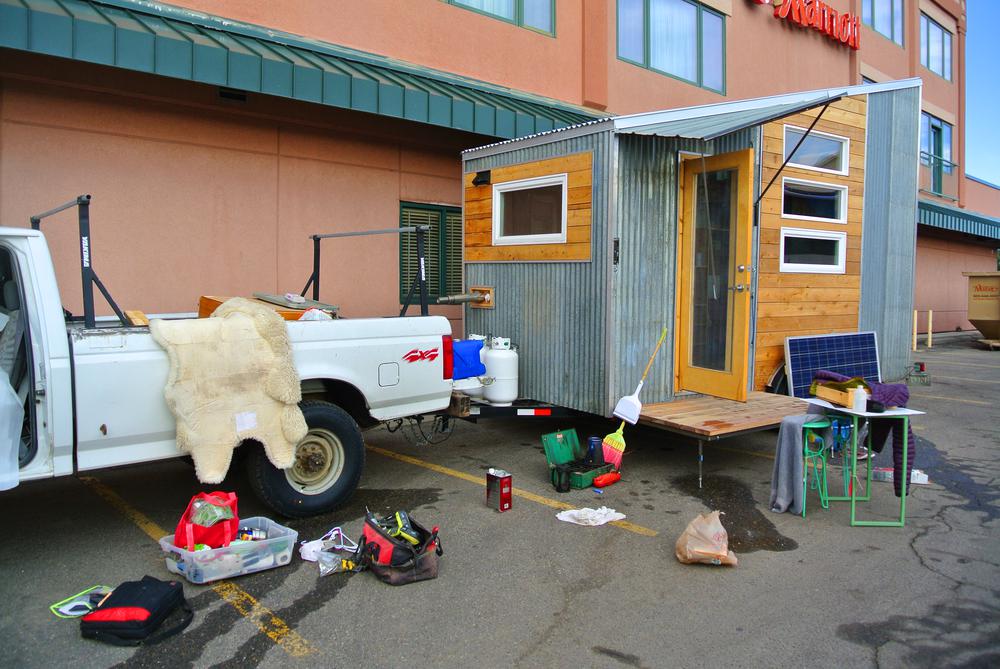 The film festival set us up with a hotel room that night which was much appreciated since all three of us were exhausted and stressed from the day’s travels. I roused the crew at sunrise and we got to work doing one last tiny house clean and pre-organization. We grabbed a bite for breakfast at a neighboring Einstein’s before hopping in the truck and heading to the Boulder Theater to setup for the big event.
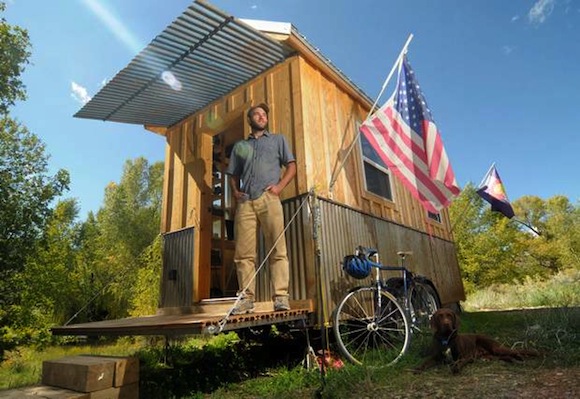
The scene was already hopping when we rolled up at around 10am. I got the trailer backed into a spot where the festival people wanted it, and we began setting it up, first leveling the house, then stabilizing it, unfolding the porch, setting up the solar system, and staging. We had about 40 minutes before the film let out and chaos would surround us for the remainder of the day.
We got settled in just in time before masses of people exited the theater and begin forming a huge line to check out the Tiny House. It was an incredible moment, if not a little overwhelming. Between the three of us and a few festival volunteers that had a cheat sheet with a few basic facts, we were barely able to keep up with all the questions. Just about everyone who visited the house had great things to say.
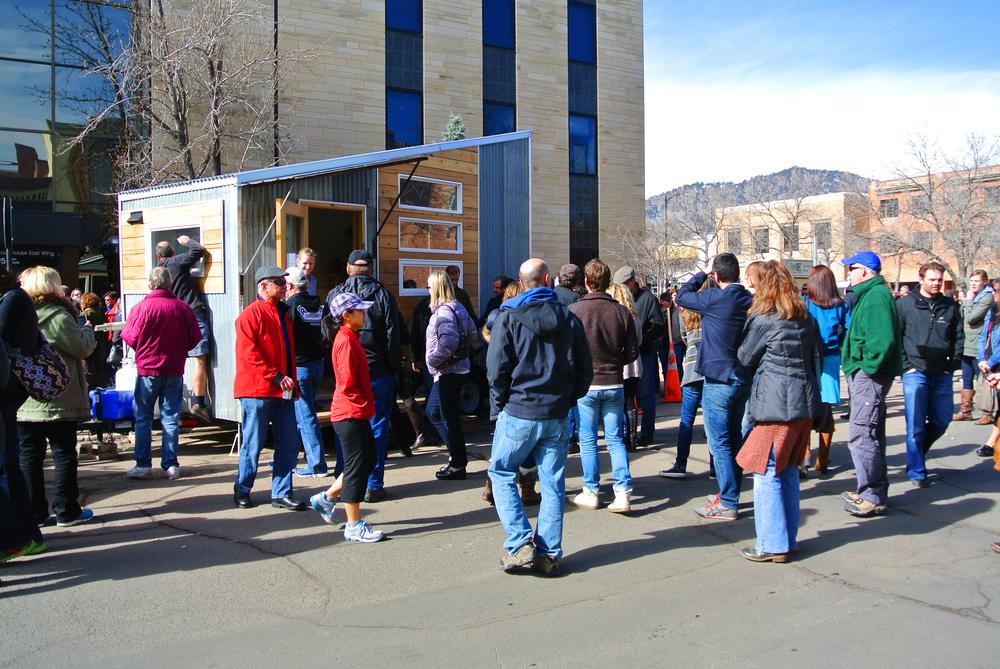
Throughout the day we had a steady influx of visitors, although the big waves came and went in conjunction with film starts and finishes. I originally thought we might be there until 4 or 5 pm, but the crowds didn’t die down until about 8:30 when we decided to call it a day.
After breaking down camp, we began driving towards our host location for the evening. We came to a stop sign at Pine street and 20th. As I slowly let off the clutch, there was a loud chatter and very little forward movement. I knew right away something in the driveline was severely damaged, and this wasn’t good. I double checked that the shift stick for the transfer case was in the right spot and tried moving again. Nothing, except for that awful noise. My first instinct was to try and get the truck and trailer out of the middle of the road. The street had a little slope to it, and I was able to push the truck backward, but neither one of the ladies had experience backing up a trailer so we were able to kind of get the trailer to the side, but not the truck.
All three of us got on our phones and began making calls, trying to figure out the best line of action. It was 9pm on a Sunday in unfamiliar territory amongst unfamiliar faces. A few people did stop and ask if they could help, but what we really needed was someone with a big truck that could pull us to a safe place for the night. Everyone there seemingly drives a Subaru, Prius, or some other small car. Pickup trucks are a rarity. I had called Crystal, my contact for the BIFF but had to settle for her voicemail. I had spoken with my insurance company and I could get a tow to the Ford dealer 15 miles away in Broomfield, but wasn’t sure I wanted to do this just yet since I wasn’t sure about what to do with the house.
After exhausting a few other options, I was getting ready to unhook the trailer and have a tow truck come out to get the Ford. Luckily, Crystal called me back and said help was on the way. In a matter of minutes, her boyfriend John, who lived a few blocks up the street, was there to help us. We came up with plan to use one of his AAA tows to get the truck and house into a school parking lot around the corner. We were all welcome to stay at his house for the evening. Heather and Emilie gathered some things and he took them to get settled in while I waited for the tow to show up. We didn’t have a good way to hook the two trucks up, so we threw the tow cable around my bumper and flawlessly executed a live cable tow a few hundred feet. I’ve done this before, but never with a 3 ton trailer behind me!
Having felt better about the location of the house for the night, John and I walked back to his house where I was glad to be out of the cold and wind. He gave me a quick tour and then showed me to his computer so I could look a few things up and attempt to get in touch with CNN. We were scheduled to do a film shoot with them in downtown Denver early the next morning. I didn’t know if it would be possible, so I sent a message to the camera man asking if he could meet us in Boulder instead. Having done everything I felt I could have done that night to remedy the craziness, I crashed hard.
Come morning I was right back at it coordinating between the Ford dealer, local repair shops, tow drivers, John, Emilie, Heather, CNN, and a few people interested in tiny houses. CNN agreed to drive to Boulder and do the shoot there, sparing me the trouble of trying to track down a rental truck or rescheduling. Check. I found a reputable local shop and used my insurance tow to get the truck there. Check. John’s son, Chris, finally did locate one of his friends with a truck big enough to tow the tiny house from the school parking lot up the street to a safe place in front of John’s house. Check. I cooked an awesome breakfast for everyone. Check. I was completely stressed out about this whole situation, but keeping my calm and carrying on. For those curious about what happened to the truck, it was crazy. The teeth of the drive spline coming out of the transmission into the transfer case had rusted so much that the spline was no longer transferring any power to the driveline. The mechanic said he ‘d never seen anything like it before. The fix, completely rebuild both the transmission and the transfer case and reinstall them.
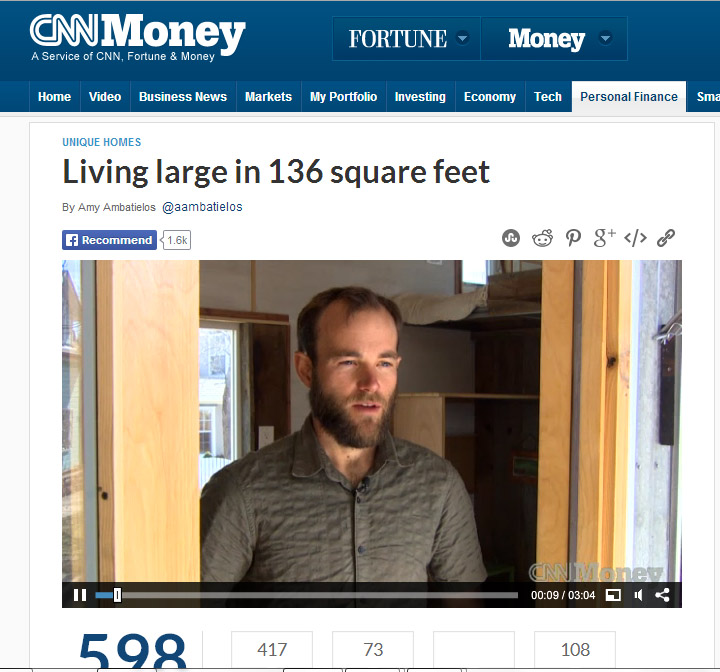 Jeff, the camera man from CNN, showed up later in the morning and we had a very successful filming of the tiny house along with some commentary from yours truly. If you haven’t seen the clip on CNN Money yet, check it out here. I was extremely relieved to have cleared the next major hurdle of the trip, but there were still a few more to contend with. It was Monday morning, and word from the shop was that it would probably be Thursday or Friday before the truck was fixed, so we had some time to kill while in Boulder. It also meant that I would have to track down a rental truck for another engagement in Denver Tuesday night.
While in Boulder, we spent a lot of time with Chris. He owns a house in Gunnison, but is back staying in Boulder to work on a masters degree in accounting. I cannot tell you how cool and how helpful Chris was to all of us. Just about everyone we met in Boulder were super nice people. Chris introduced us to his good friend Jeff, who turns out to not only be a badass gold prospector, but a super nice guy as well. Between the five of us, we had a real good time exploring the town. All the while, the tiny house was getting a lot of attention just being parked on the street…
Aside from several people that were walking, cycling, or driving by and pulling over to take a look and ask questions, one man in particular happened to drive by and stopped to take a look. I wasn’t there, but John happened to be home and talked to this gentleman for a good half hour about the thing parked in front of his house. A little later in the day I received a call from said gentleman, and wouldn’t you know, it was opportunity knocking at my door. I’m not at liberty to spare too many details at the moment, because nothing is set in stone quite yet, but, I will say that this person and I had a series of meetings while in Boulder and that if our proposed business venture does get off the ground here soon, it is going to be BIG. Sometimes a catastrophic vehicular breakdown is a good thing 😉
Tuesday afternoon rolled around, and I had located a 1/2 ton Uhaul truck that I felt could tow the house to Denver for a second screening of TINY at the Denver Film Society off of Colfax Ave. Surprisingly, the truck handled the house very well. Being a new truck, I think it even had more power with better MPG than my ’94 F-250. I could tell the suspension was a little lighter, but the Boulder is light and balanced enough that we made it to Denver without any problem. We were parked and setup with time to spare before the movie let out.
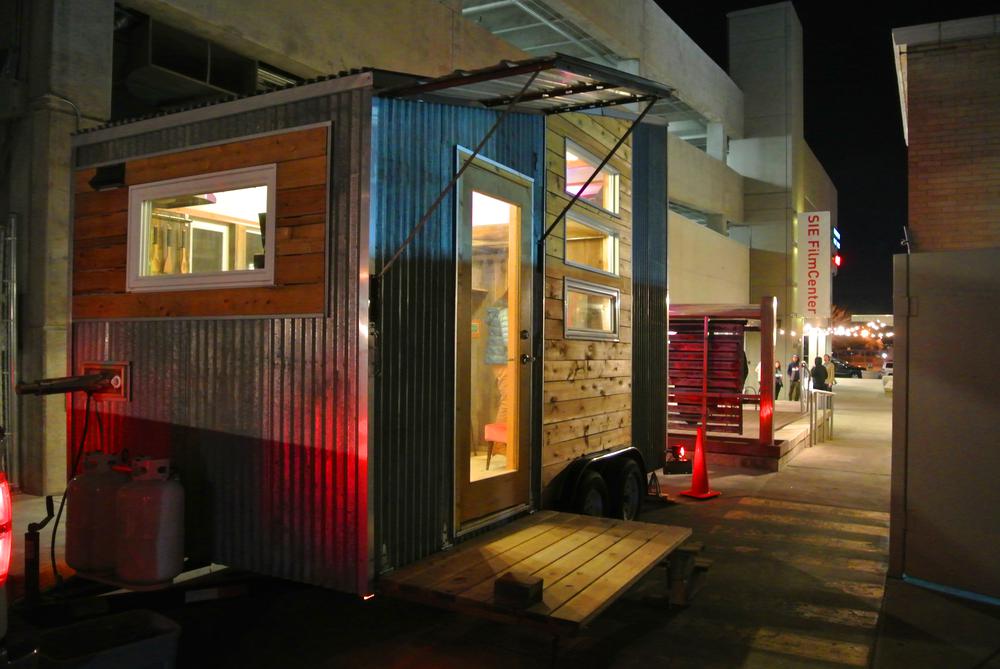
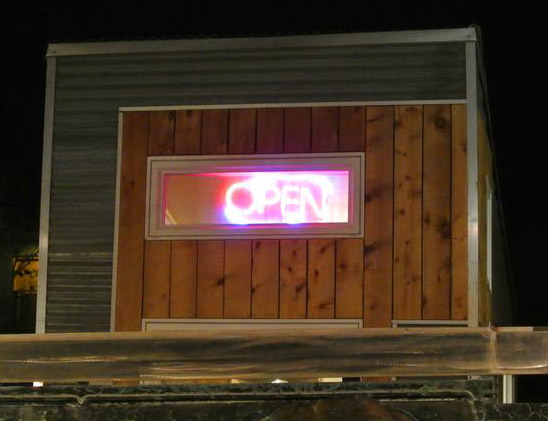 Although there weren’t nearly as many people at this event compared to the BIFF screening, the folks that were in attendance seemed to have more interest and asked deeper questions about tiny houses. A lot of them had already started building their own, or planned to start very soon. I was happy to share advice and encouragement. I was also stoked to display the sweet neon “Open” sign that had been gifted to me earlier in the day by Chris and Jeff. This thing is so sweet! Thanks guys!
After this crowd thinned out close to 9pm, we packed up and drove a little ways over to our host for the evening, Sam Palmer-Dwore. As mentioned in the opening credits, Sam is working on his Masters of Architecture in Denver and has started work on his own tiny house! ( He and his roomies were kind enough to let us crash inside their big house, and this was much appreciated since the three of us were completely exhausted!
Following daybreak, we unhooked the house from the rental truck, locked it up, and headed to the 16th st. pedestrian mall in Downtown Denver to grab a bite and do some sightseeing. We enjoyed the lazy morning, not having any obligations or dilemmas to try and figure out. Thinking that my truck would be fixed Thursday or Friday (the next day or another day thereafter), I left the house in Denver with plans to come back through and pick it up en route to Durango via Colorado Springs and I-25. We spent the rest of Wednesday hanging out in Boulder.
Thursday morning, Heather and I were up super early, along with Chris. Heather had to be back in Durango for work that evening and we had arranged for her to fly back from Denver. Chris graciously volunteered to drive Heather to the airport 40 minutes away. I tagged along to say bye and keep Chris company on the drive back. I was sad to see her go, but thankful for all her help. I knew we’d only be a day or two behind her too.
Emilie and I spent a good chunk of the remaining day doing some business planning and brainstorming. All the while we were still meeting with this potential new business partner. There were a lot of things to be figured out, and there will be for some time to come, but this forced time away from Durango turned out to be very beneficial in this regard. I got a hold of the auto shop that evening and the news on the truck worsened a bit. It was going to cost more to fix than originally quoted and not be ready until Monday or Tuesday of the following week. While I didn’t have any obligations requiring me to be back home by then, I just really wanted to be back in Durango so I could go skiing, biking, and hiking once more. Emilie did have some reasons to be back by Saturday, so I began exploring some backup options like purchasing another vehicle, renting a car, and trying to track down a good used transmission and transfer case for my truck that could be put in immediately and spare us the wait for the rebuild of the damaged ones.
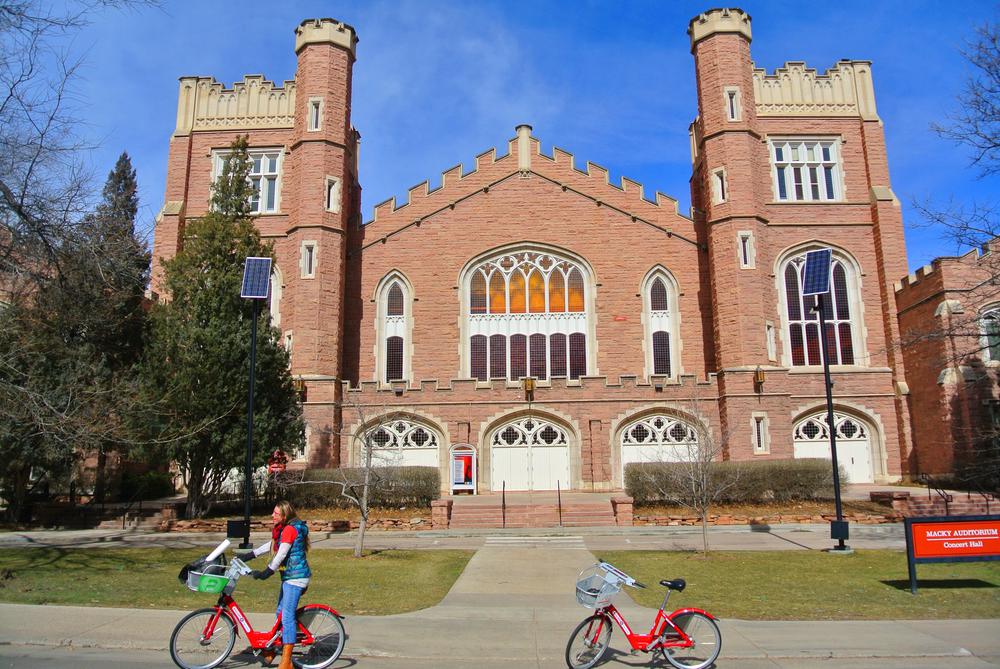 As luck would have it, I couldn’t find any decent parts, everyone in town was out of rental cars, and I could not find a good enough truck with what little funds I had, but, Emilie was able to make some calls and get business taken care of back in Durango, so we decided to wait it out another 3-4 days. On Friday, we rented bicycles and rode around Boulder most of the day, stopping a while to check out the University of Colorado campus as well as some other neighborhoods we hadn’t explored yet.
Saturday was back to some business planning with a little more lounging around town. Sunday, I did not want to work and felt like getting out of Boulder for a little while. We had originally planned to stop by IKEA while in the Denver area and hadn’t got around to it yet, so this was the perfect day to do so. I didn’t want to burden Chris with making that 45 mile trip out and then back, so I asked if there was public transportation that would get us there and sure enough there is a bus from Boulder to Union Station in Denver, and from there, a light rail route that stops fairly close to the IKEA in Centennial.
It took a good 2 hours to get there, but we made it! After chowing down on some meatballs and lingonberry sauce, Emilie, Chris, and I continued our epic journey through the crazy rat maze also known as the IKEA showroom and marketplace. I like to visit IKEA once in while to get ideas about using space more efficiently, and also to see what kinds accessories would go well with tiny houses. There are a few secret items I like to stock up on because I can’t find them anywhere else, or I can’t find them for the ridiculous low price that IKEA sells them for.
After 5 hours of aimlessly wondering around and filling up my cart with super secret items, we got in checkout just as they announced the store was closing in 10 minutes. We had to walk another 25 minutes carrying bags full of Chinese Swedish stuff back to the train stop, and from there it was another 2 hour trip back to Boulder, and just like that, the day was gone.
Emilie and I enjoyed Monday doing our own things. I called the auto shop again only to be informed they were still waiting on the rebuilt tranny and t-case but would have them put back in as soon as they received them sometime on Tuesday.
Tuesday afternoon rolled around and the call finally came in that the truck was fixed! John gave me a ride to the shop, I doled out some serious cash, and it was back to John’s house to grab all our gear and bid farewell to the most awesome hosts ever. We drove back to Sam’s place in Denver and found the house just as we had left it. After a brief hookup and light check, we were on the road again! I-25 South was smooth sailing all the way down to Walsenburg where we parked the house at a quiet truck stop to crash for the night.
Most of Wednesday was spent driving to Durango on US 160. There was a little bit of wind and two mountain passes to contend with, but overall a much easier drive than US 285. On one particular stretch of road we got the train up to 70 mph! That might be a a new Tiny House land speed record!
We made it over Wolf Creek pass and down to Pagosa Springs, where a hot springs soak was well in order. I dropped Emilie off at her place on the outskirts of Durango and then warmly embraced the moment where Hwy 160 bends around a mountain and you see the Durango City Limits sign along with a great view of the Animas Valley in which the city lies. I made it back to the shop, backed the house in, killed the engine, then drank a beer as I watch the sun set over the western horizon.