Tiny Living in a Big World

  • About
    • Philosophy
    • The Tiny House Movement
    • How To Get Started
    • Delivery
    • Media
  • TINY HOUSES
    • Gallery
    • Features & Options
    • Shell Builds
    • Tiny House Size Limitations
  • Tiny Commerce
  • Tiny House Plans
  • Pricing
    • Financing
    • Contract Pricing Details
  • FAQ
  • Other Services
  • Contact

© 2026 RMTH

Privacy Policy

Terms & Conditions

For Sale: 18′ Front Range

March 19, 2015 By Greg Parham 3 Comments

Front Range Tiny House
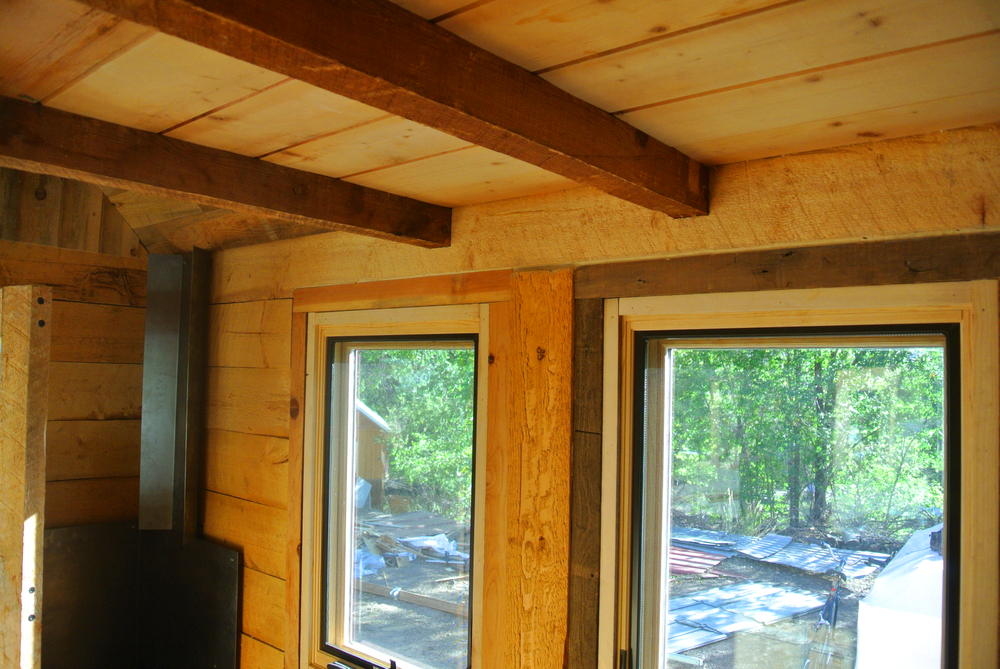
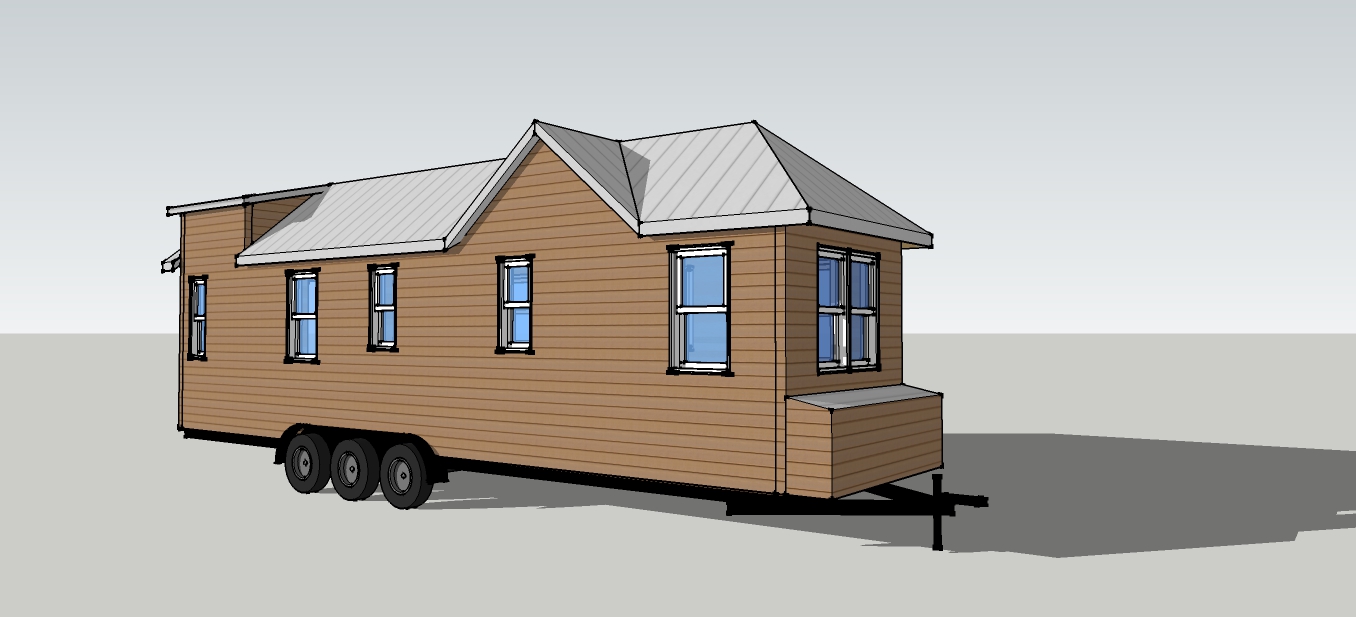
We are pleased to announce the upcoming completion of our latest model in the RMTH lineup, The Front Range. The simple shed roof design takes a nod from the Front Range mountains  that rise abruptly from the great plains, stretching from Casper, WY down to Pueblo,CO. The designated “south” side has four large windows that are intended to soak up the views and sunshine. The floor plan is basic in nature to place less emphasis on the house, and more on the outside surroundings.

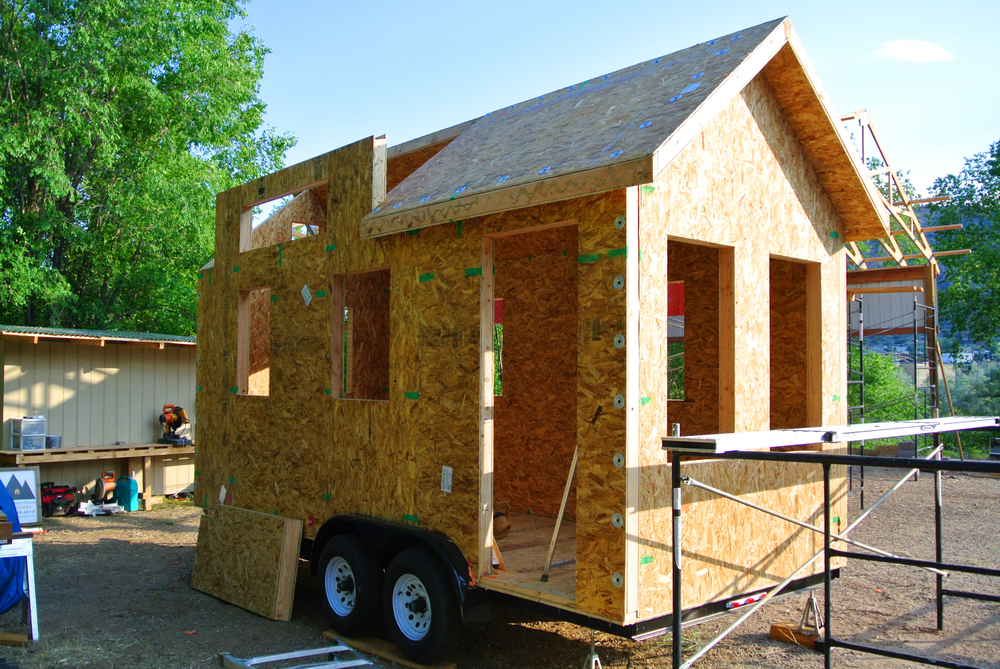
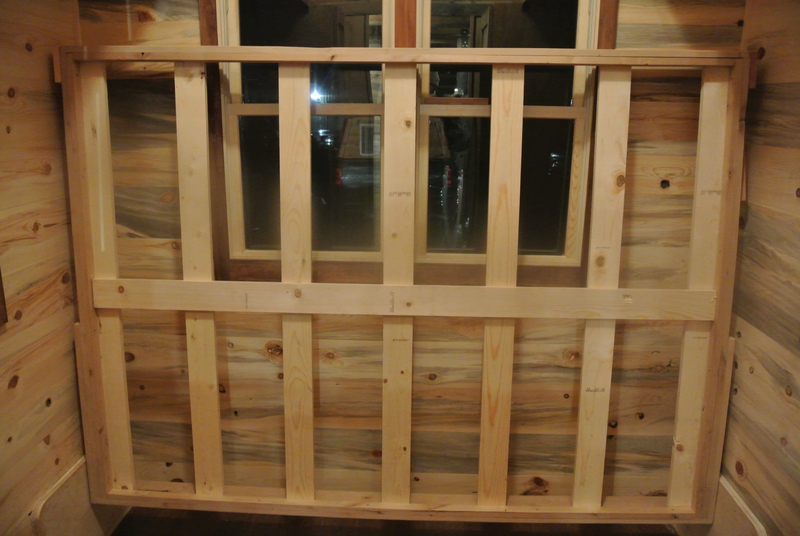
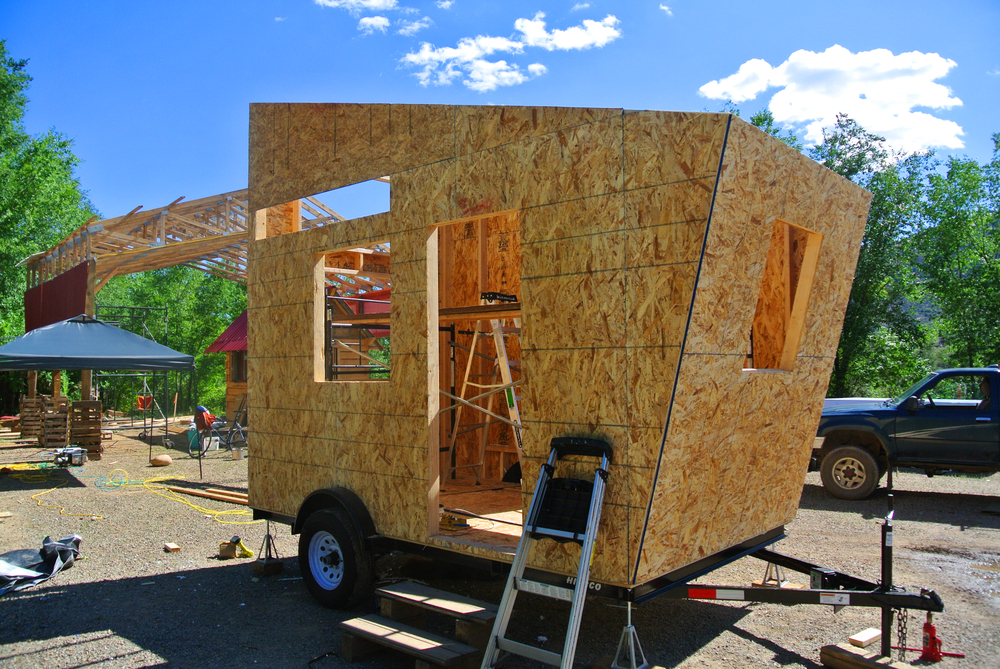
This particular house is constructed using SIP’s (structural insulated panels). This will be the 5th SIP structure we have completed. If you’ve missed the previous conversation regarding this building system, in a nutshell it provides much greater thermal efficiency, is stronger, and easier to construct compared to stick framing, saving on costs.

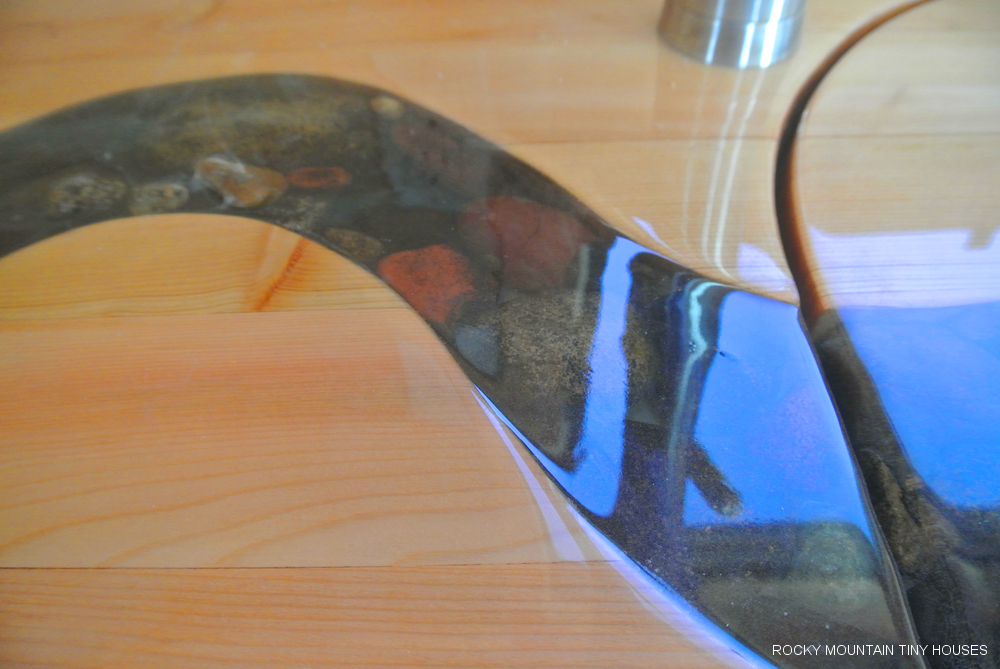
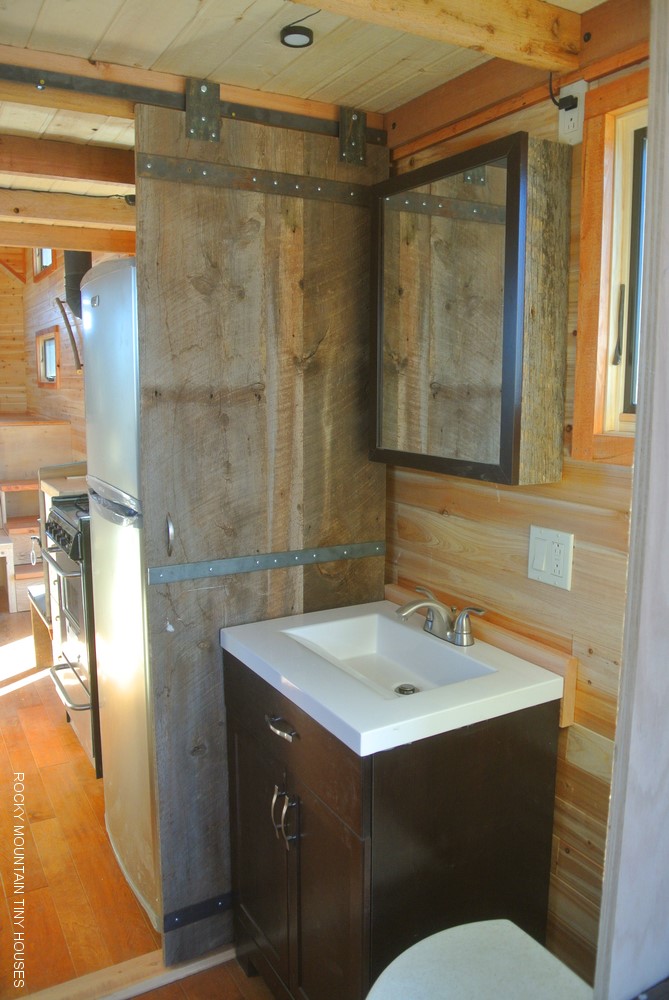
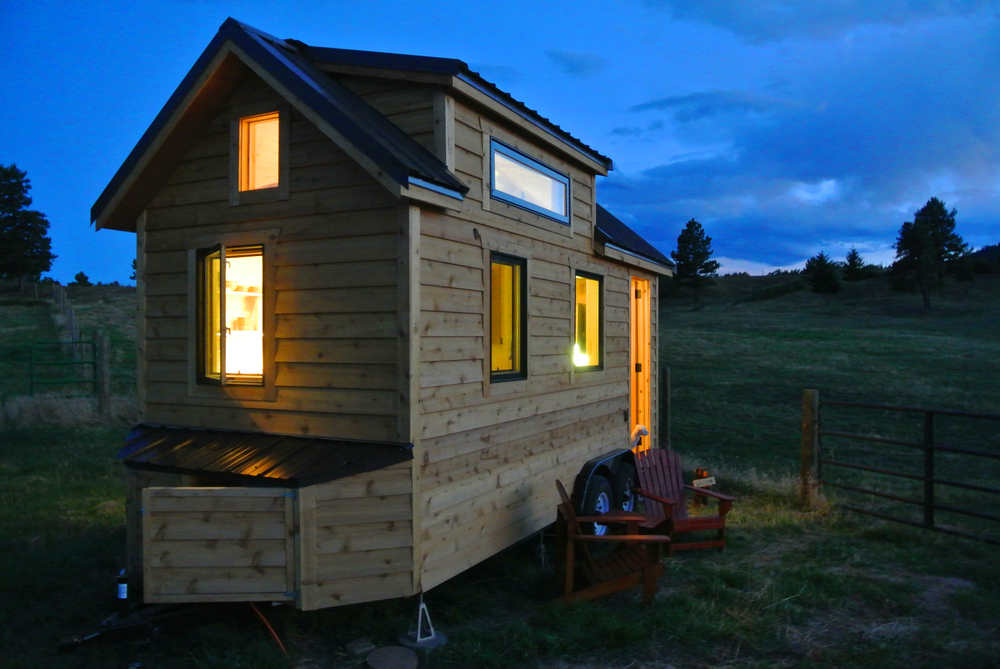
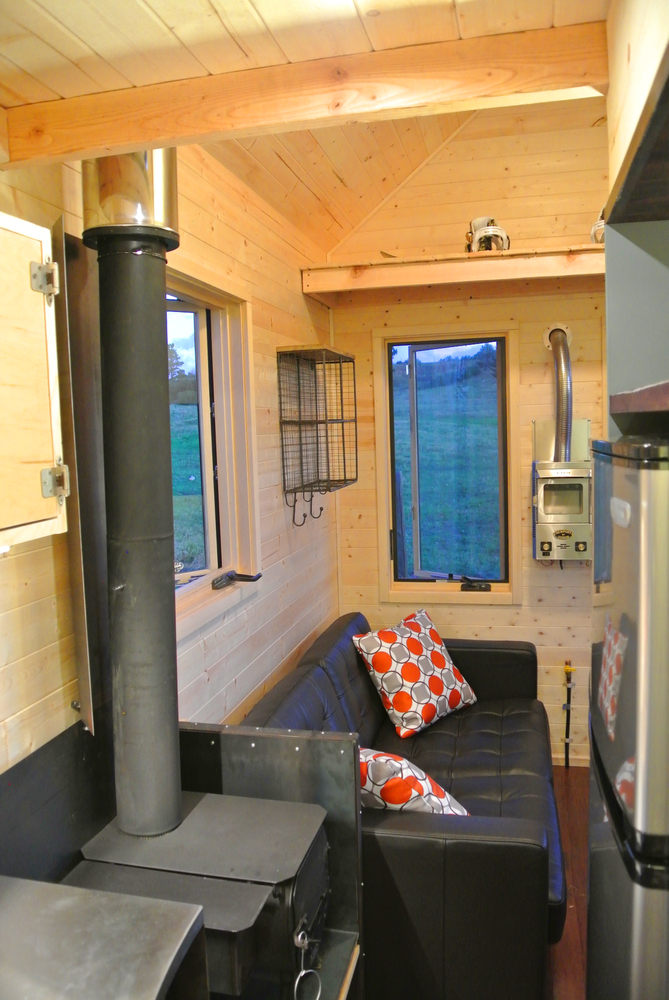
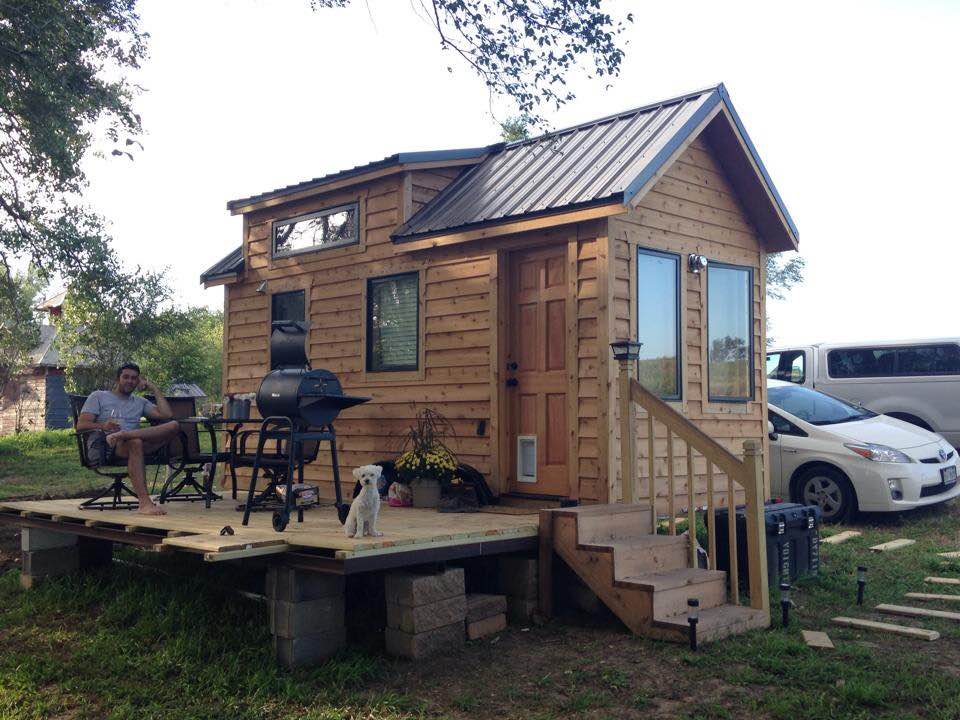
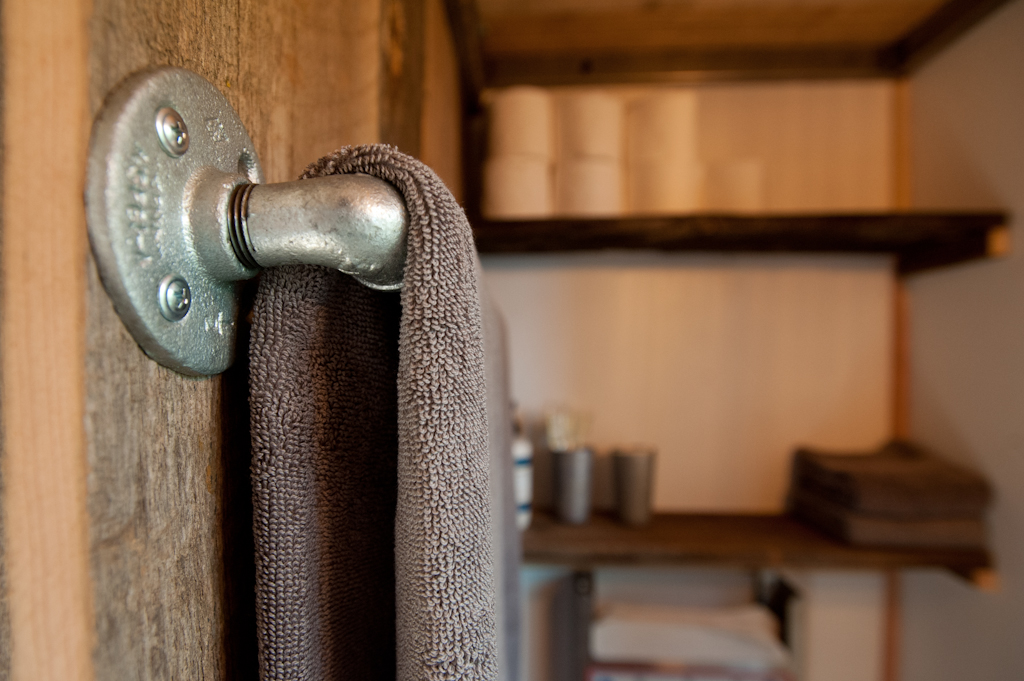
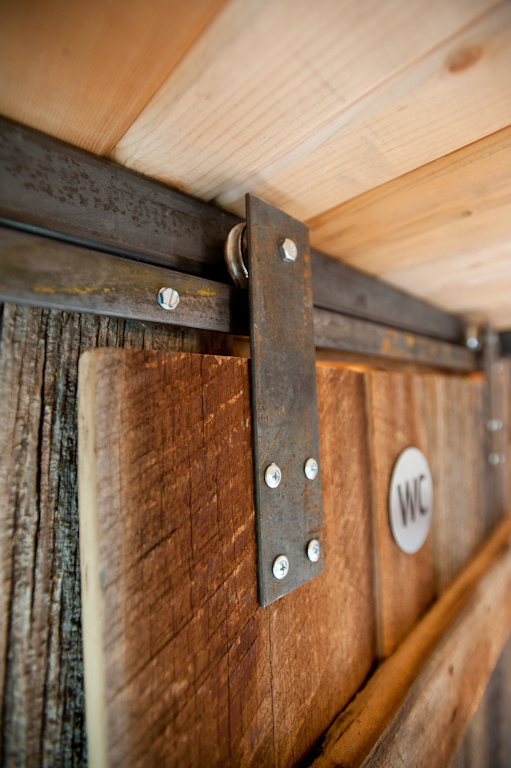
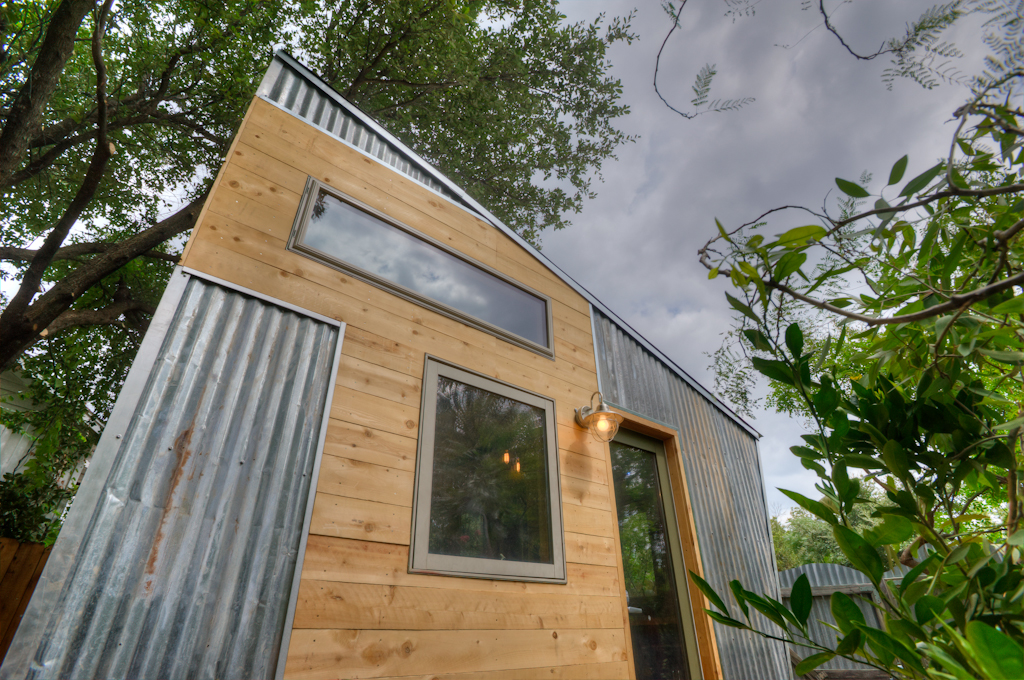
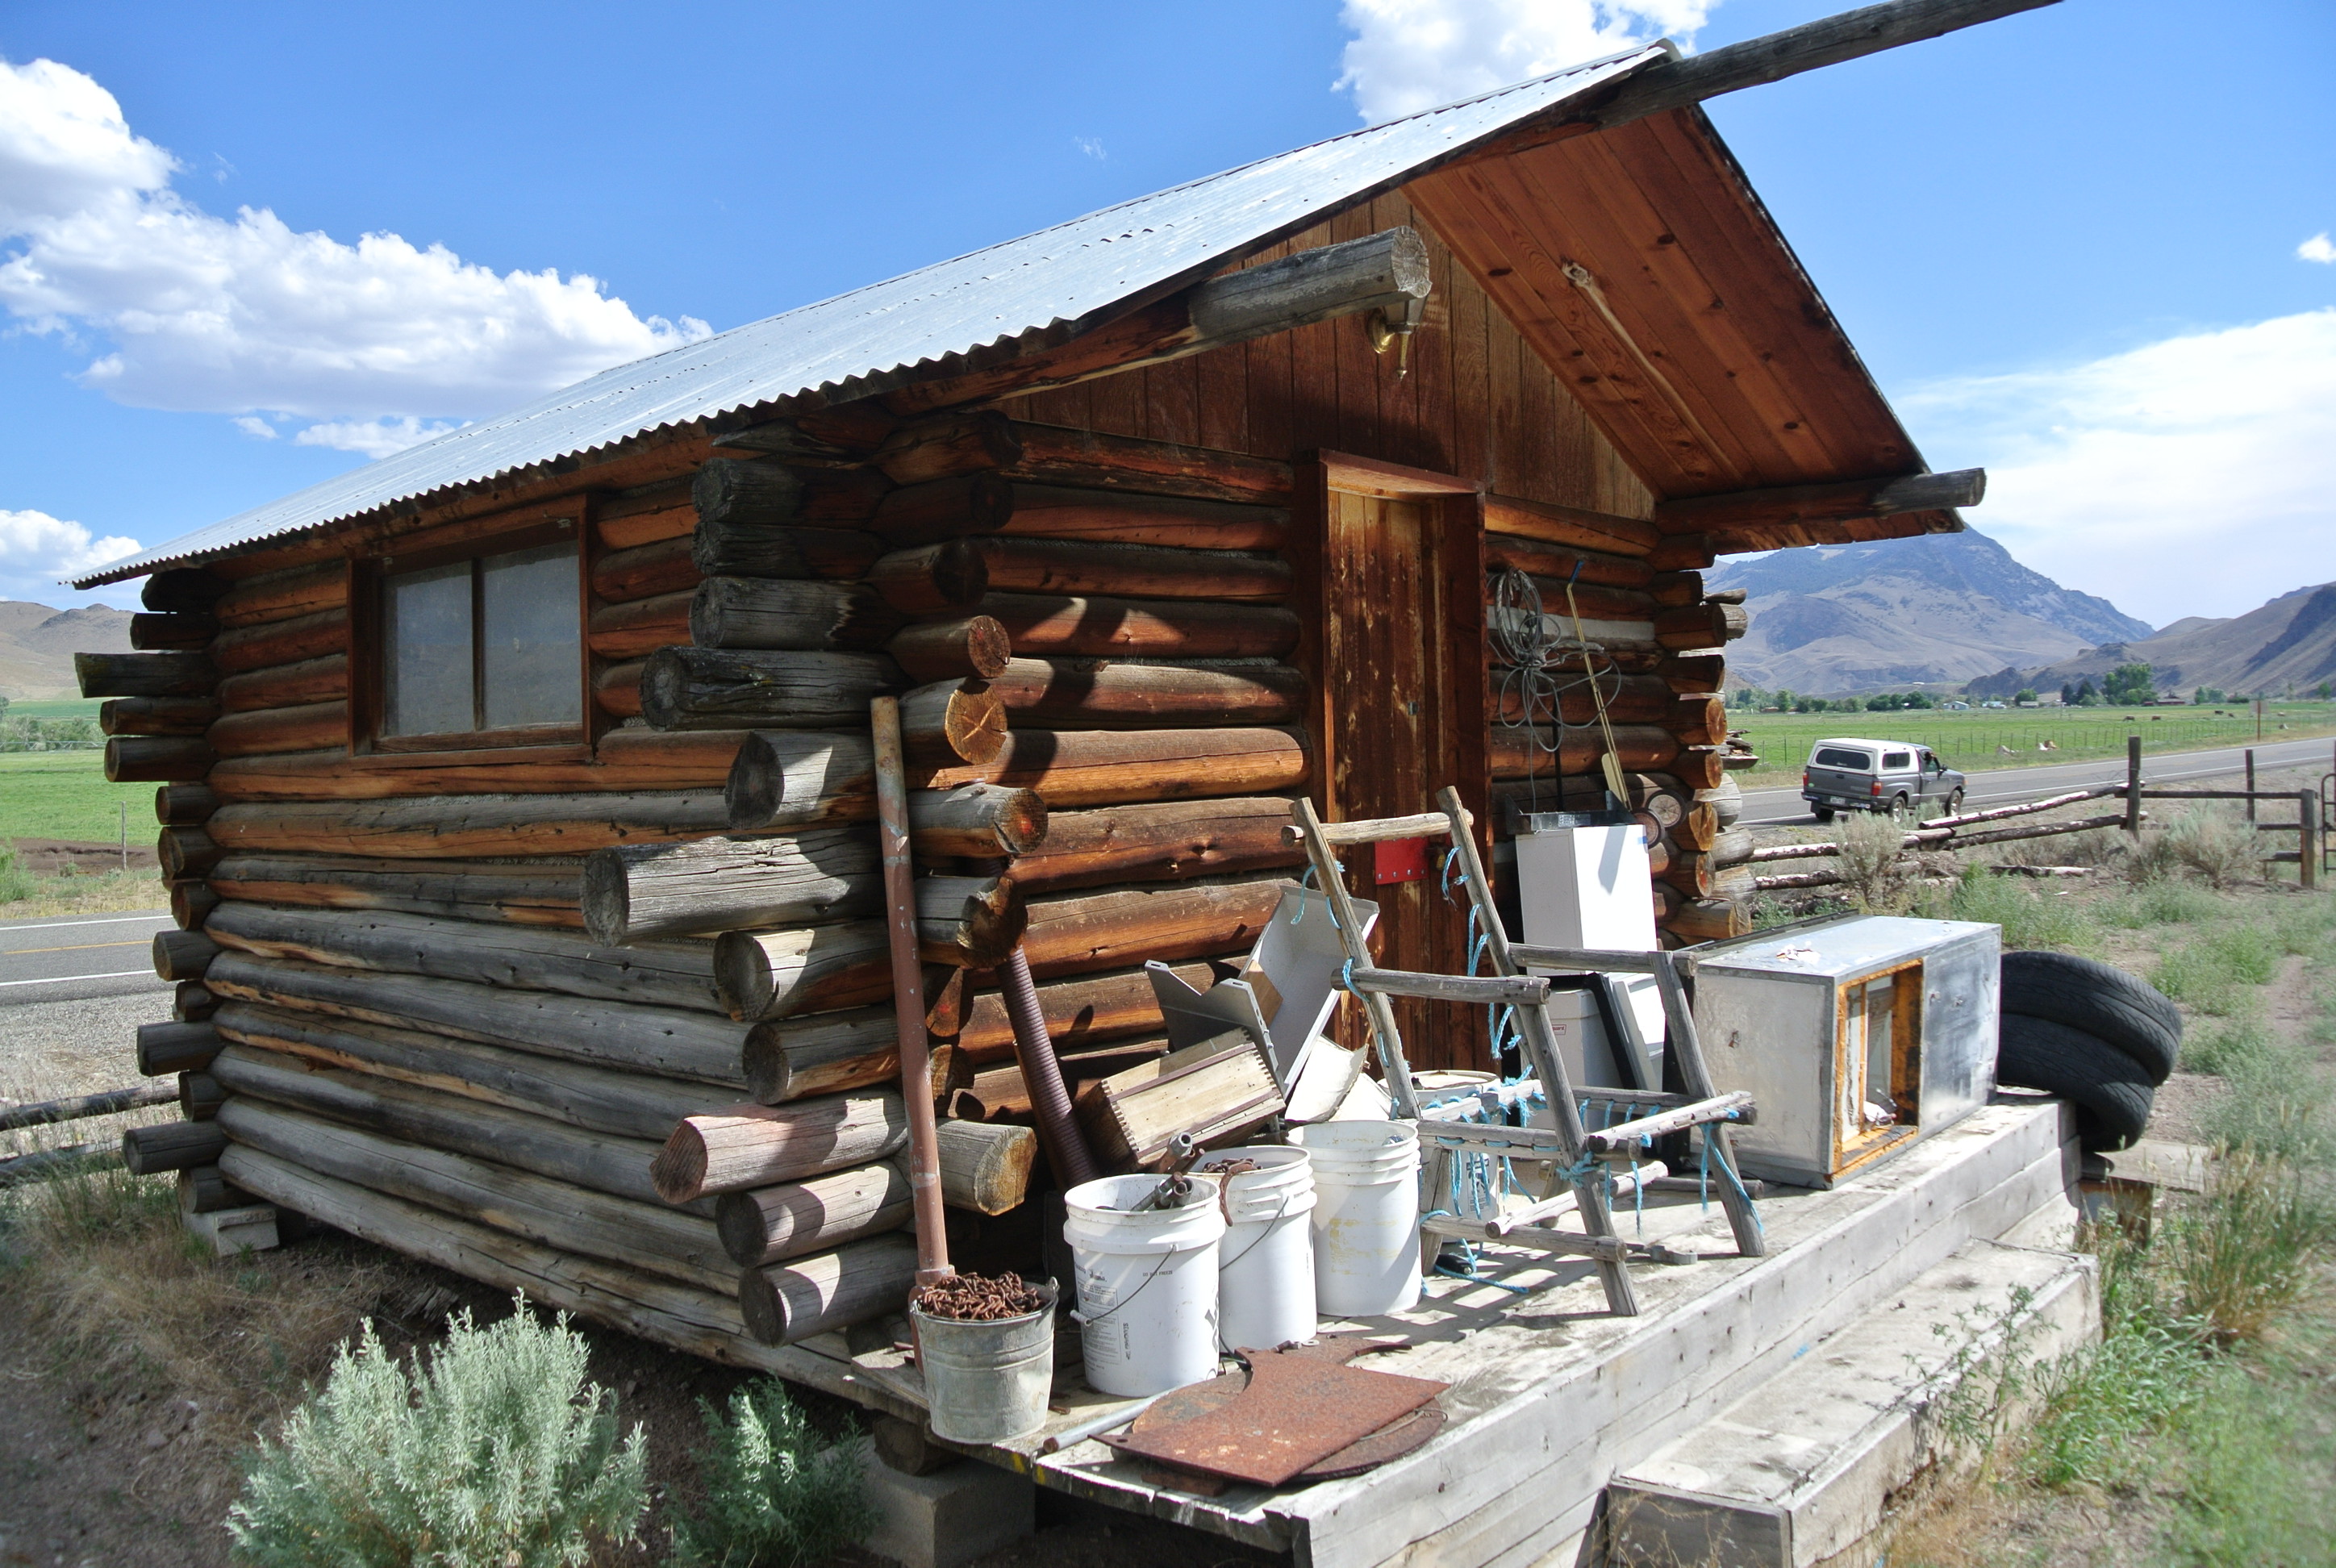
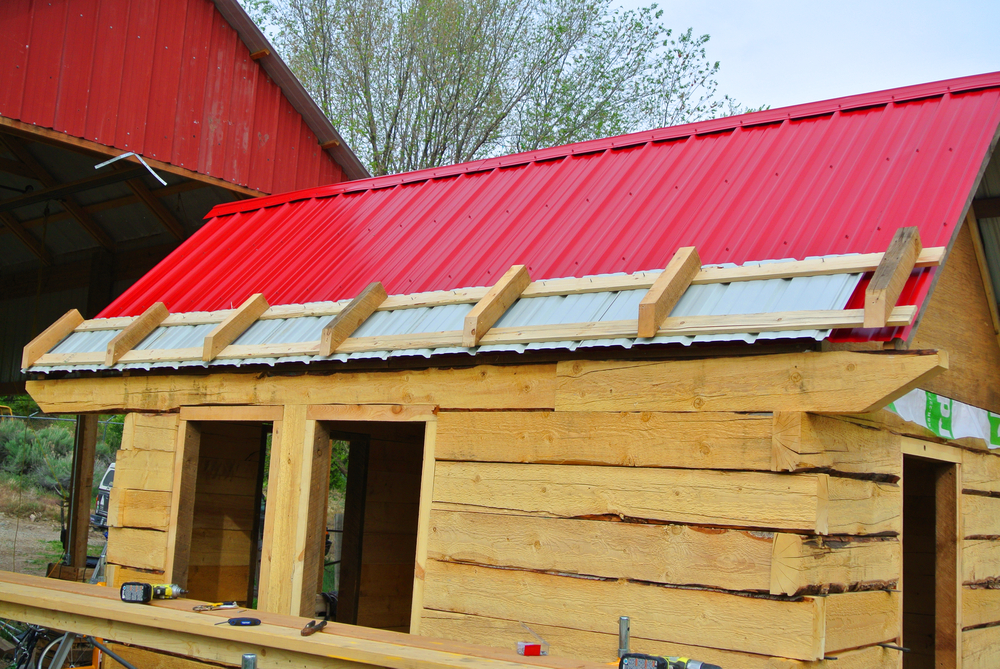
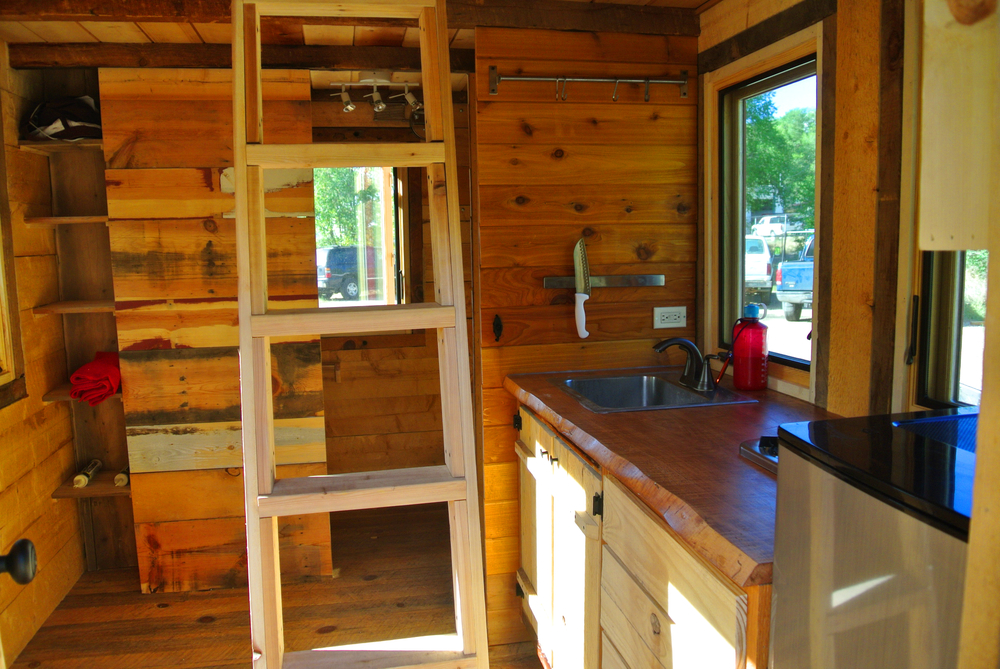
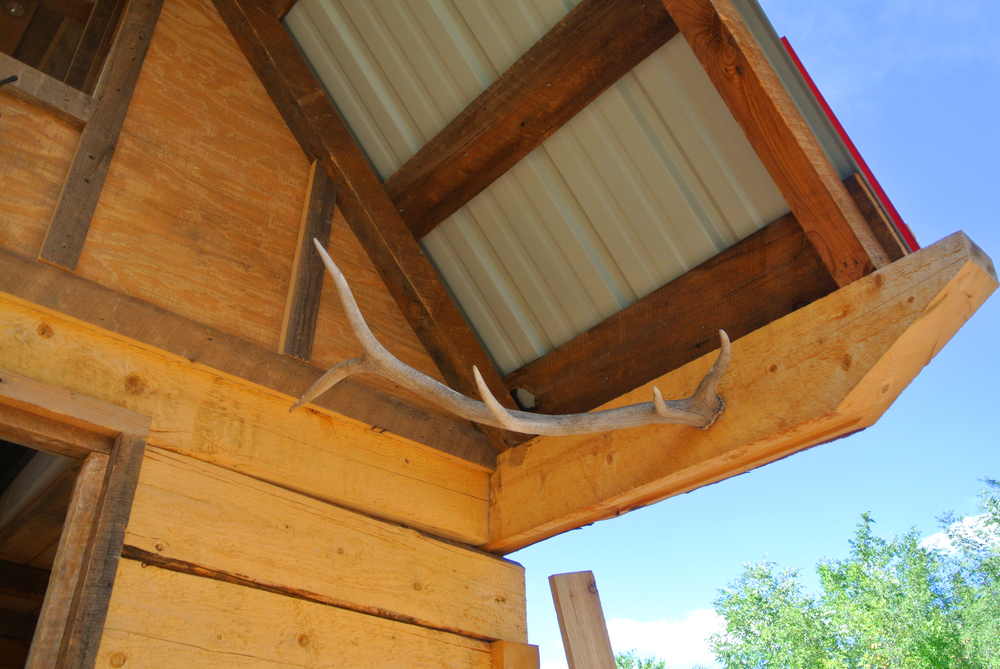
All of the windows and the front door were acquired from the local salvage yard. They don’t all quite match, and there are some architectural lines that don’t quite line up as a result, but hey, there are in very good shape and were inexpensive. The cream colored metal roof also came from the salvage yard. It had some dents we had to smooth out, but no holes! We took the drops from the roof and applied them to the siding in a way that looked nice and maximized what we had left. We had some leftover cedar lap siding pieces from previous projects we were able to use as a wainscot. On the endwalls, we had some leftover cedar shakes to finish the tops off. We’ll be using vertical cedar planks on the sidewalls above the metal band.

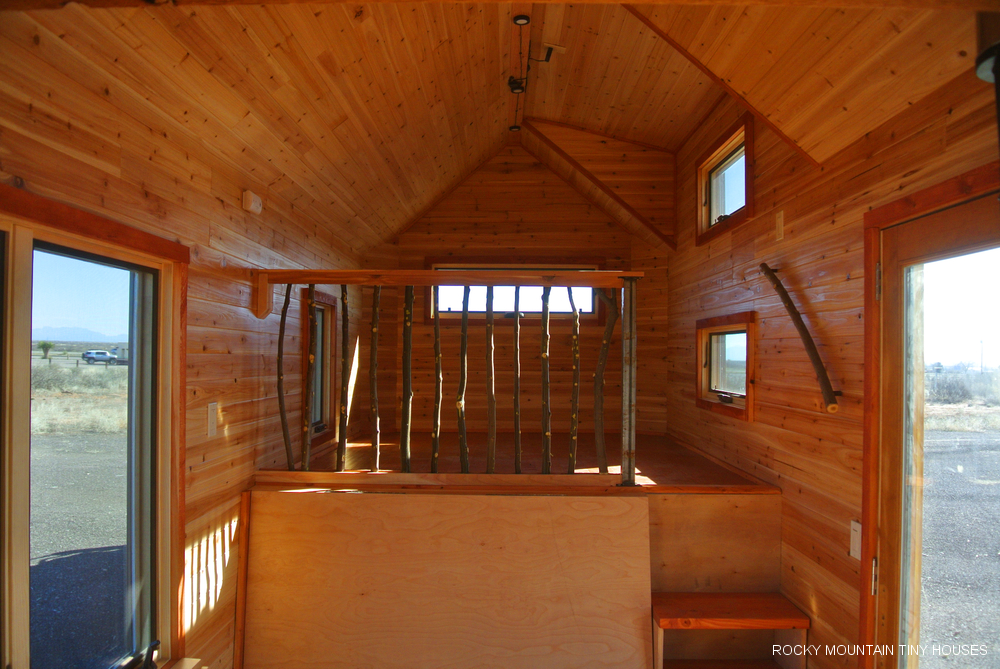
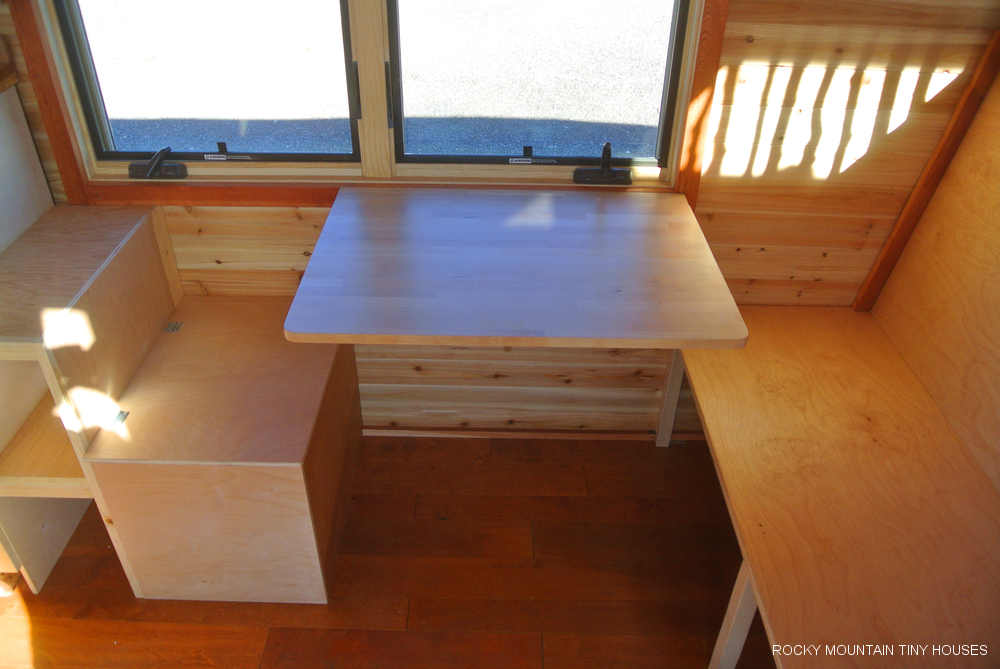
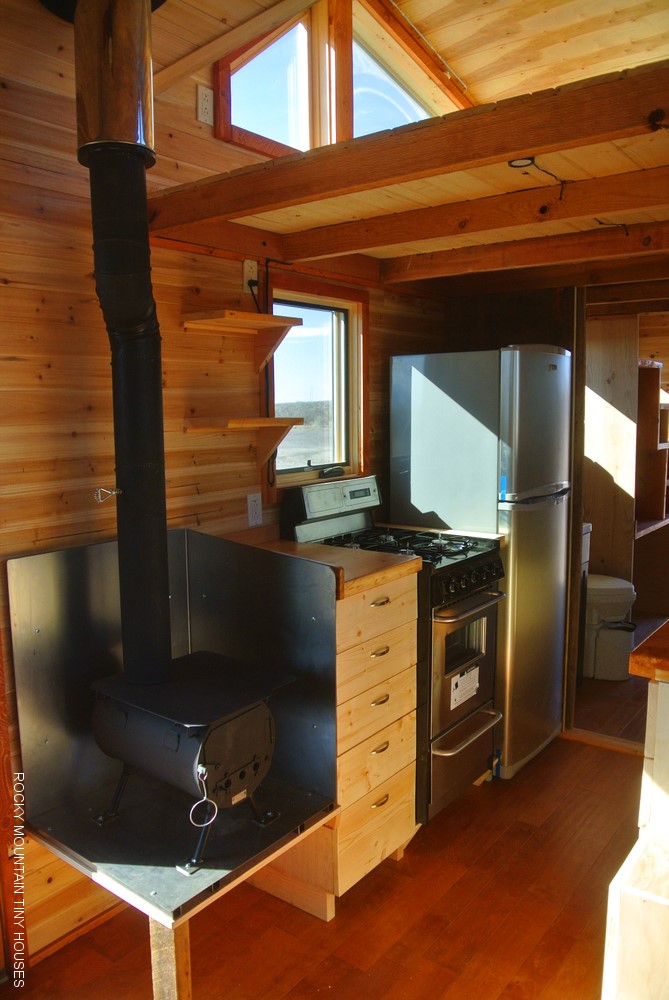
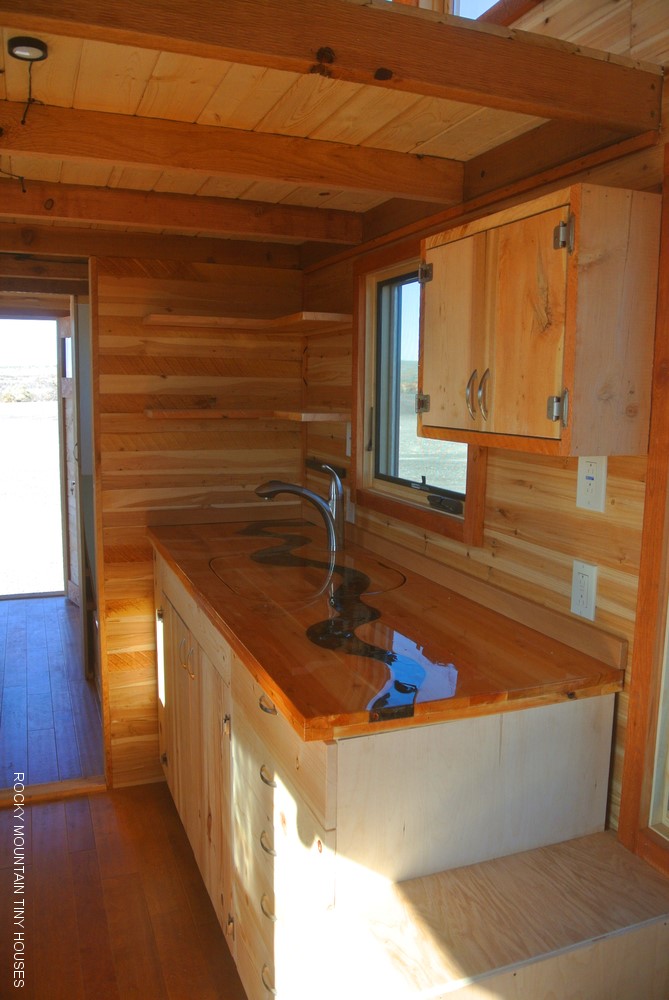
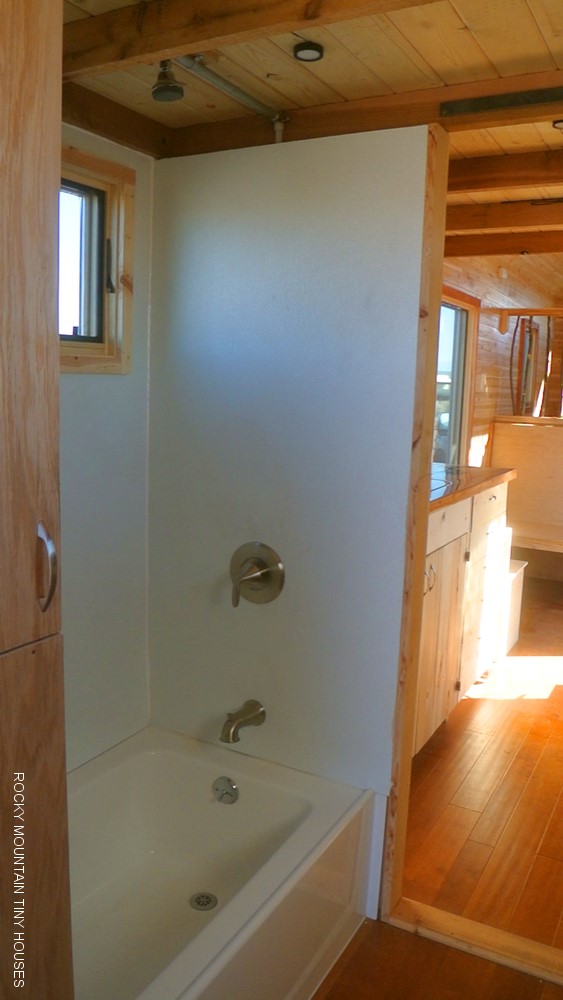
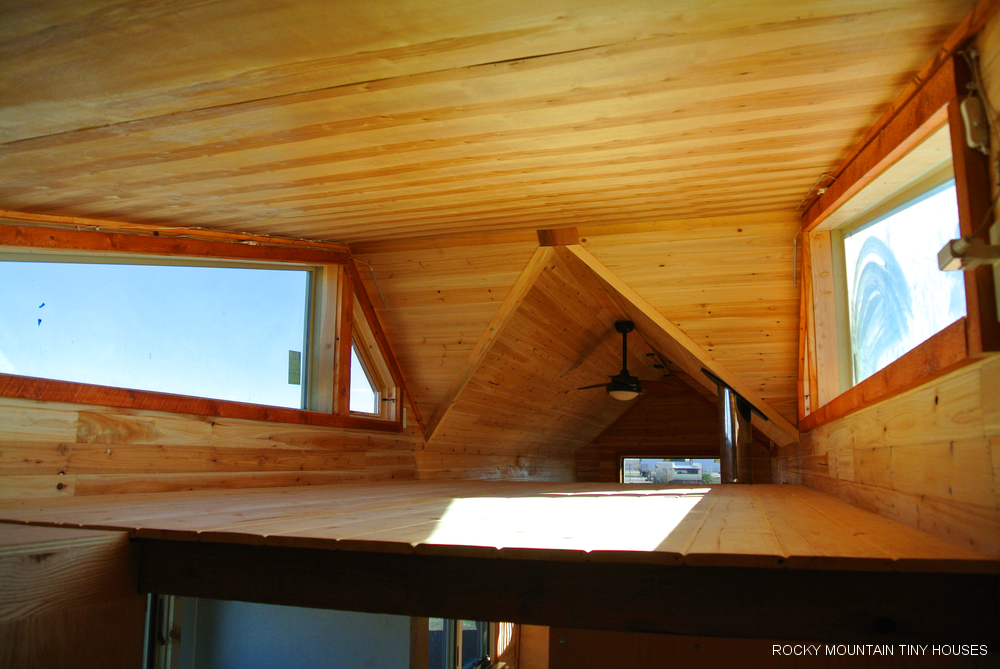
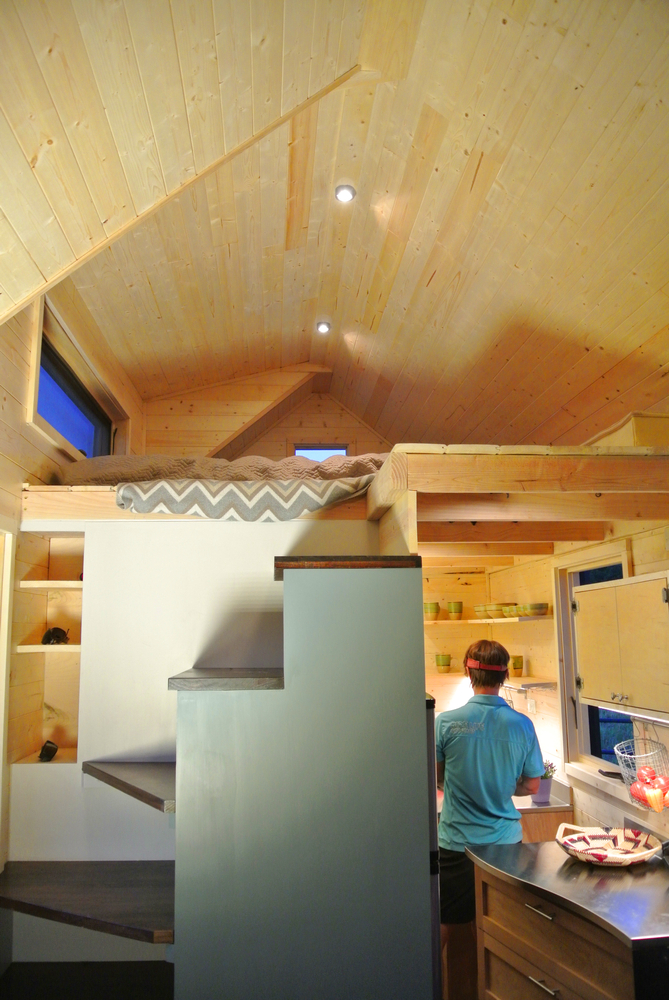
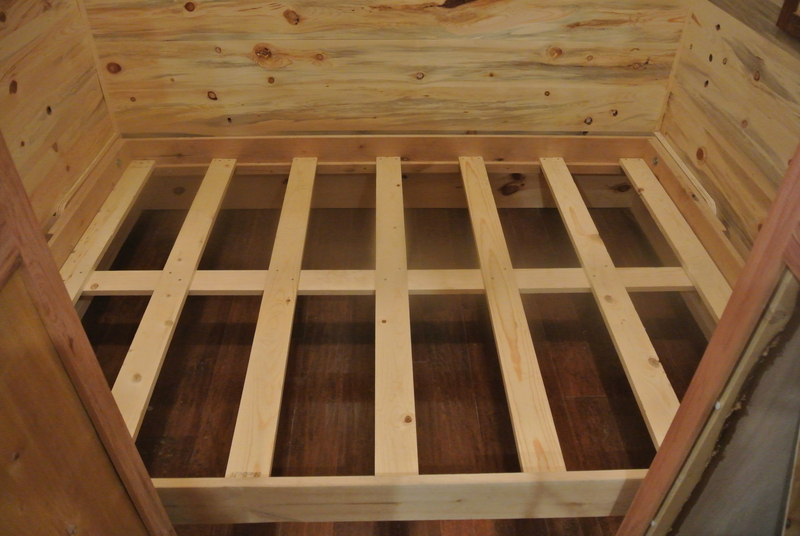
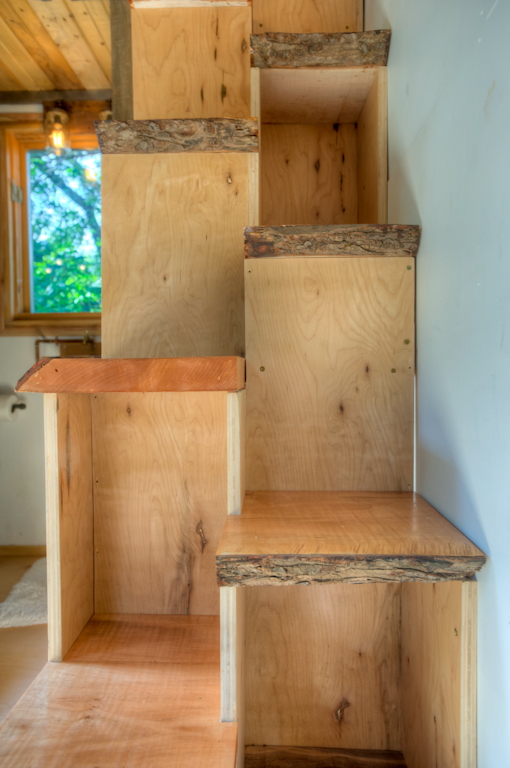
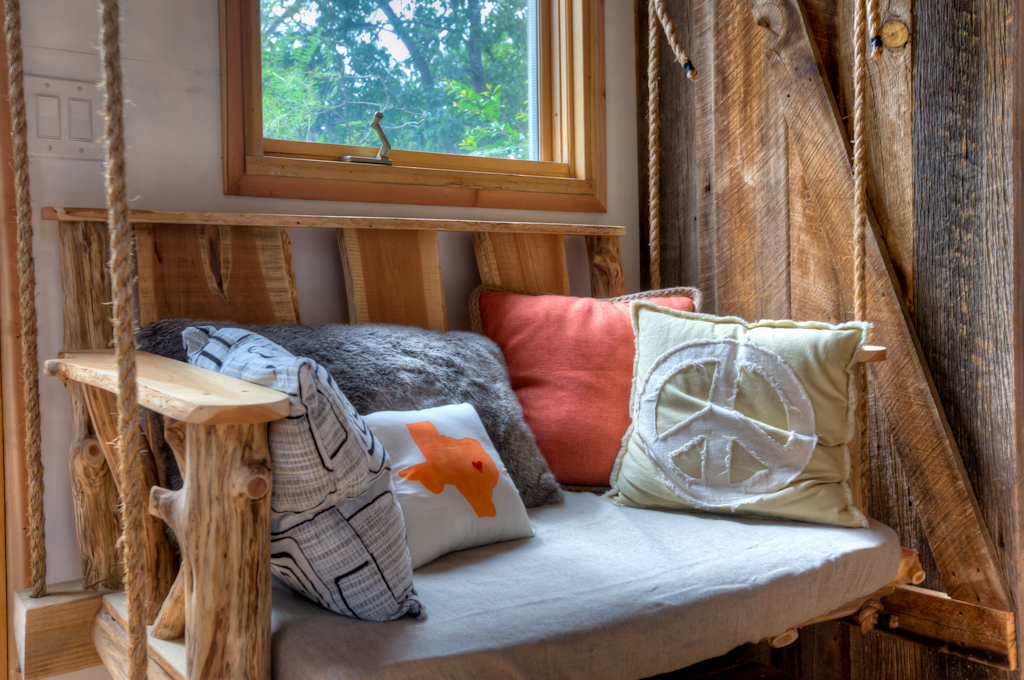
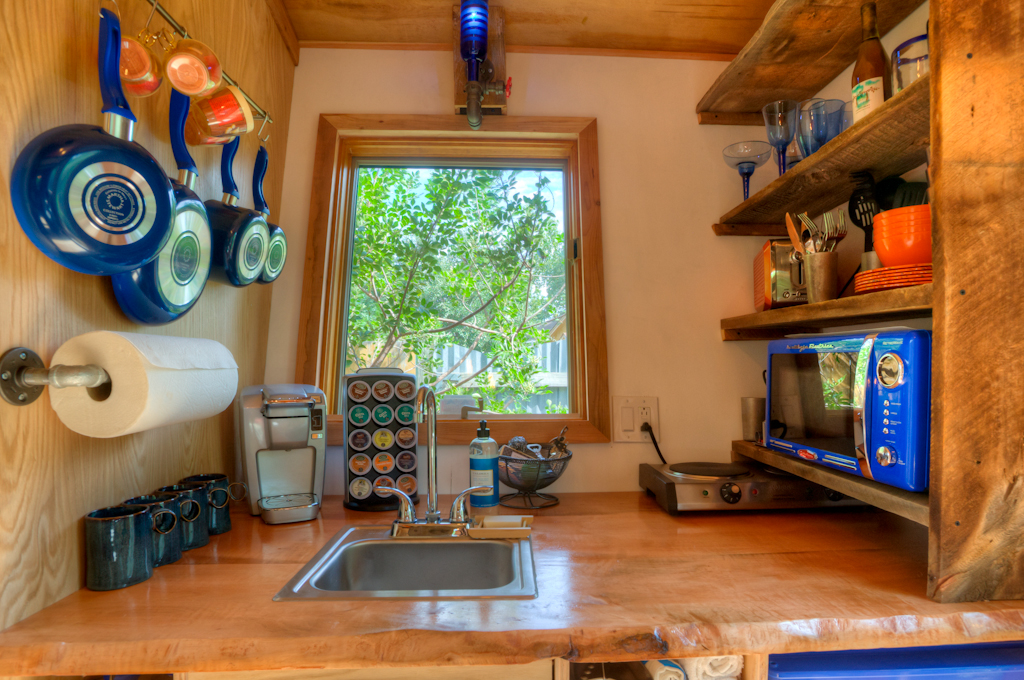
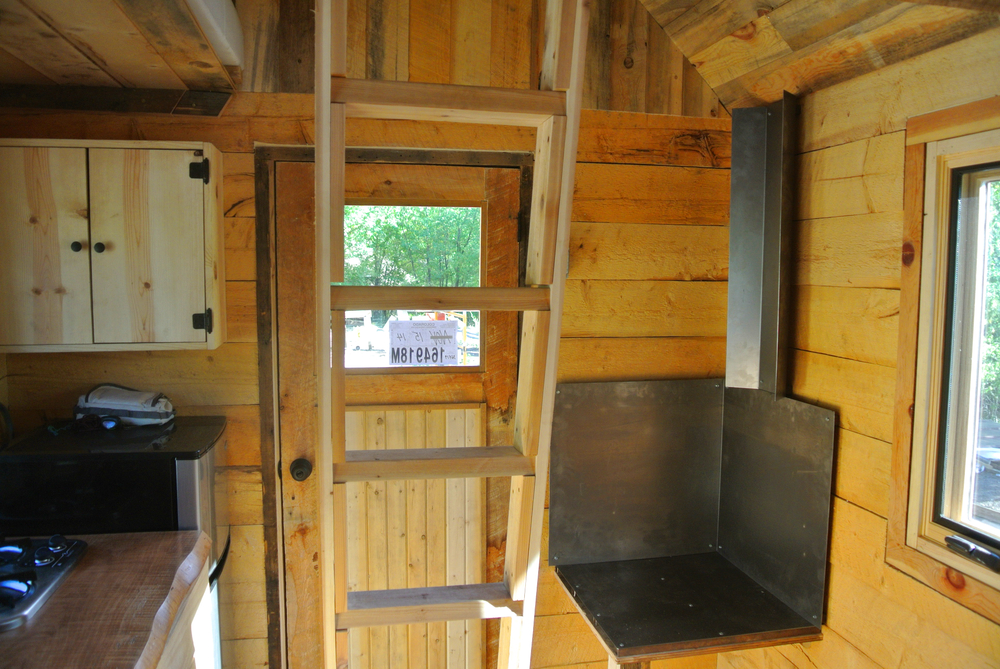
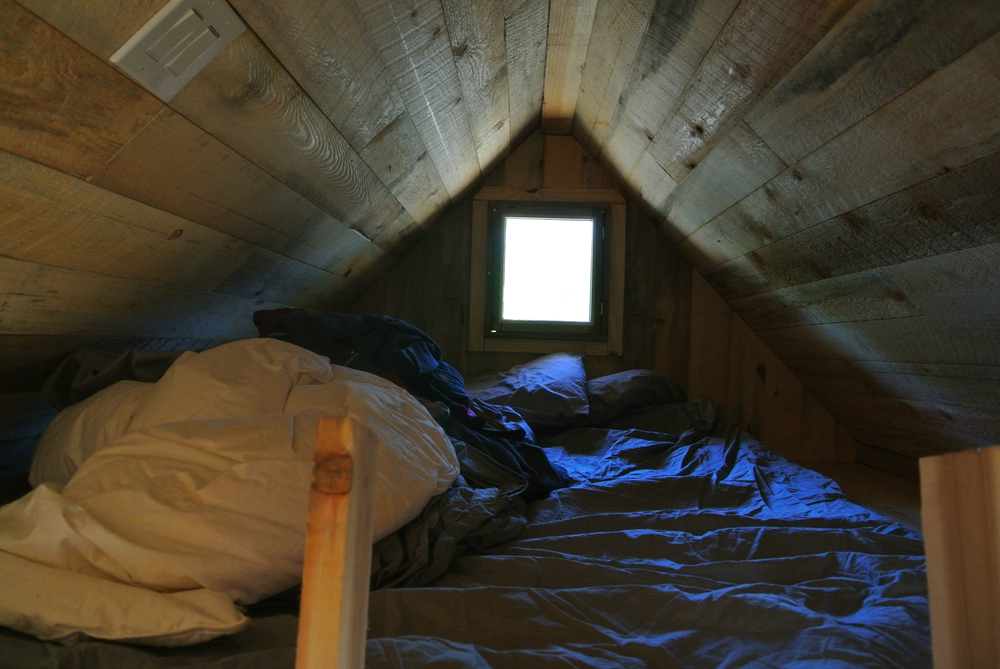
The 18′ long by 7′-6″ footprint features a dry bath at one end, closet space and kitchen in the middle with a loft above, and an open living space on the other end. A 28″ full lite door with a screen  on the rear of the trailer provides access and lots of light/fresh air.

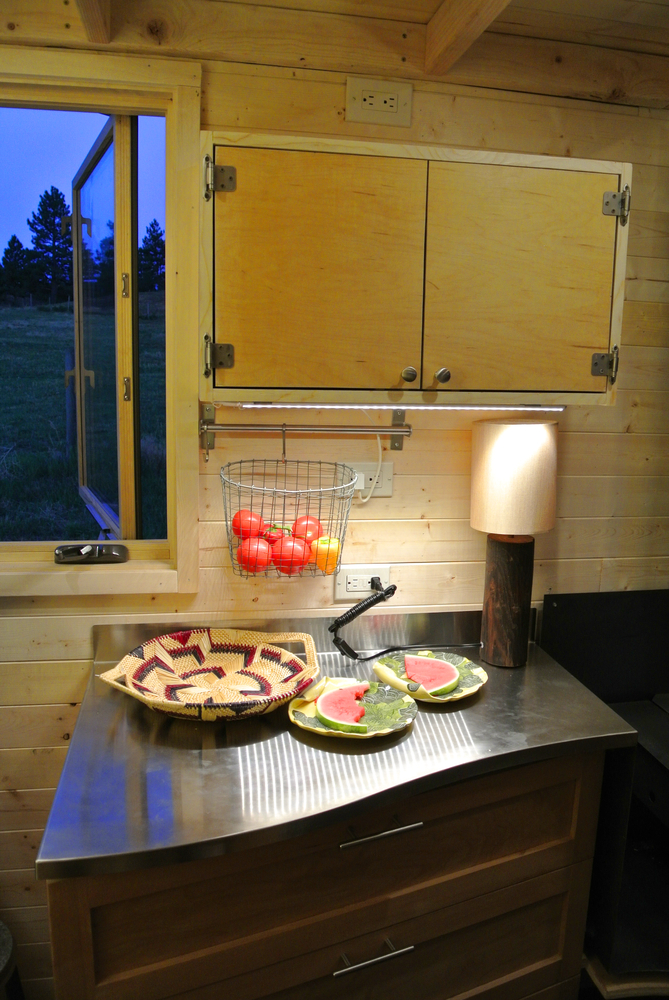
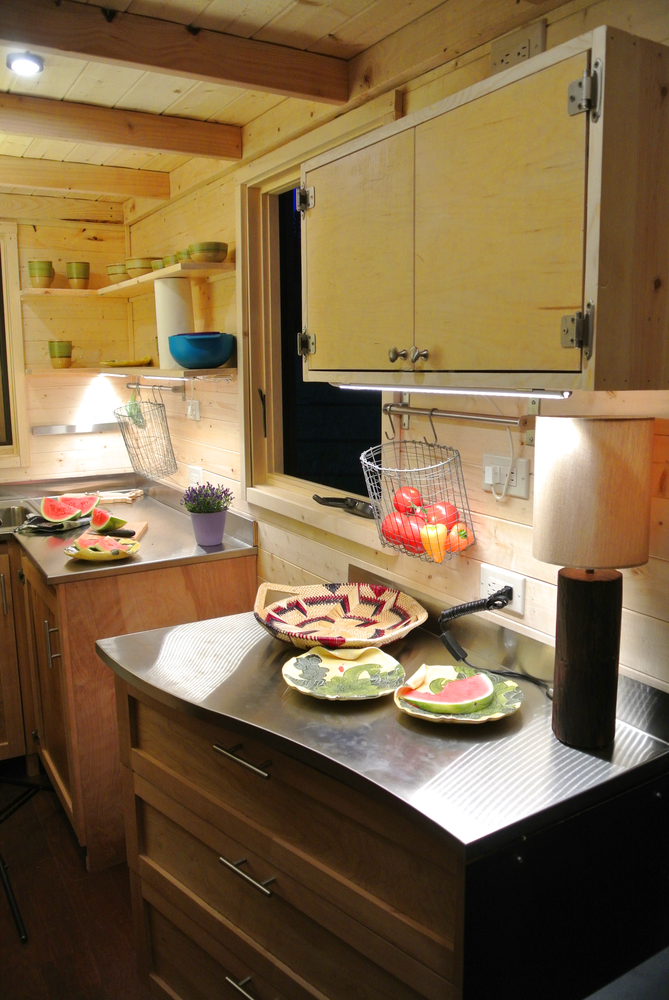
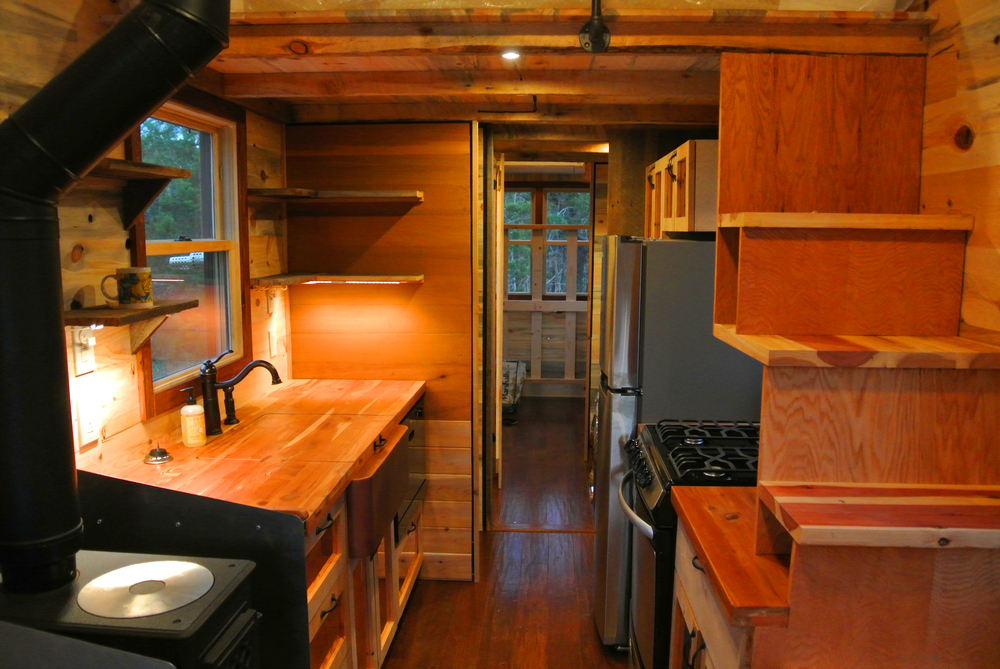
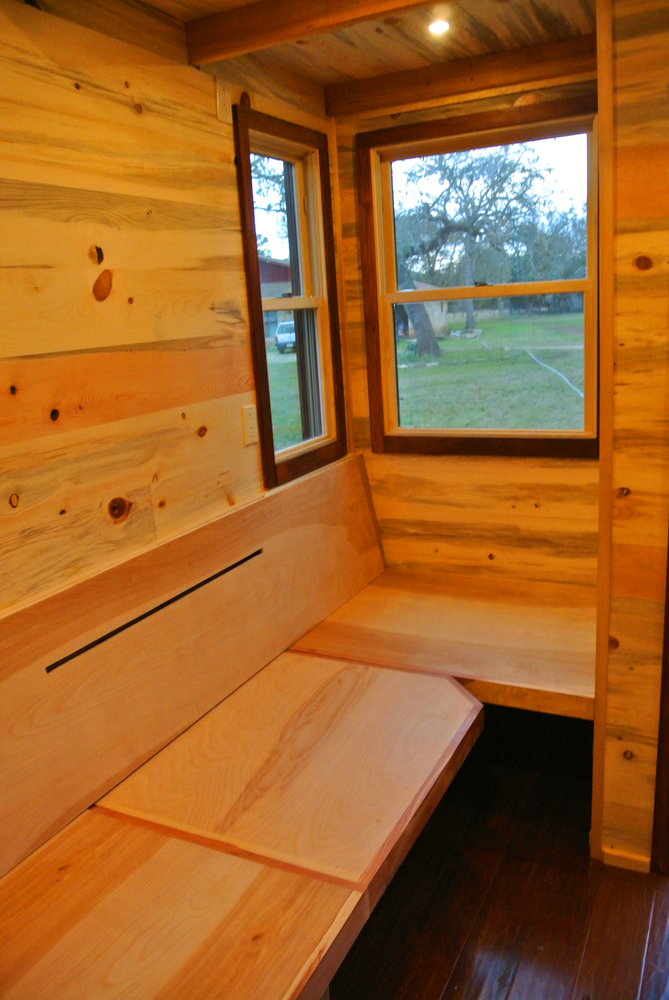
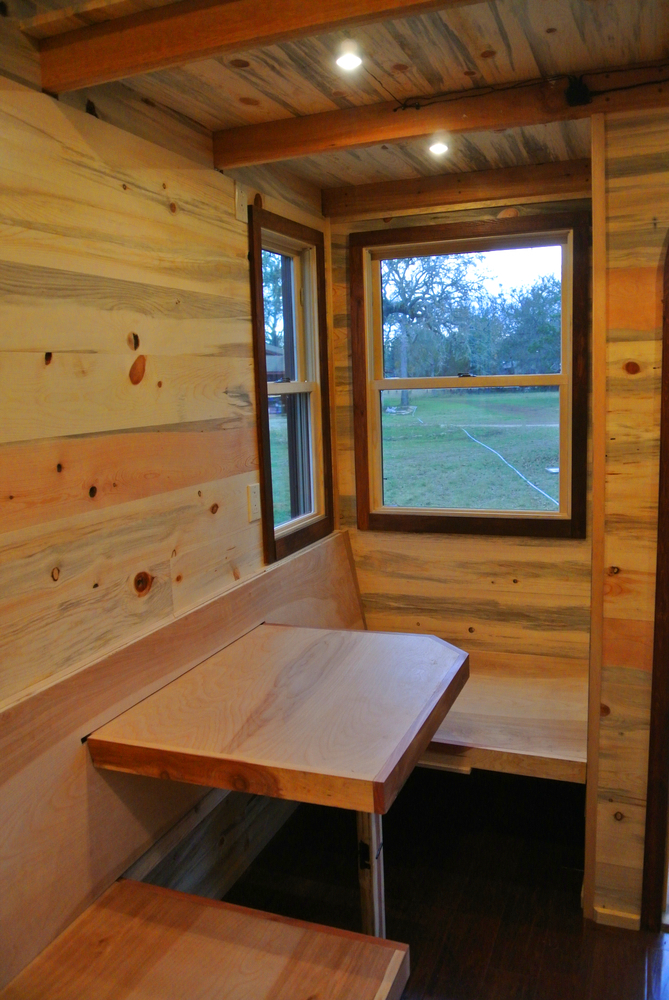
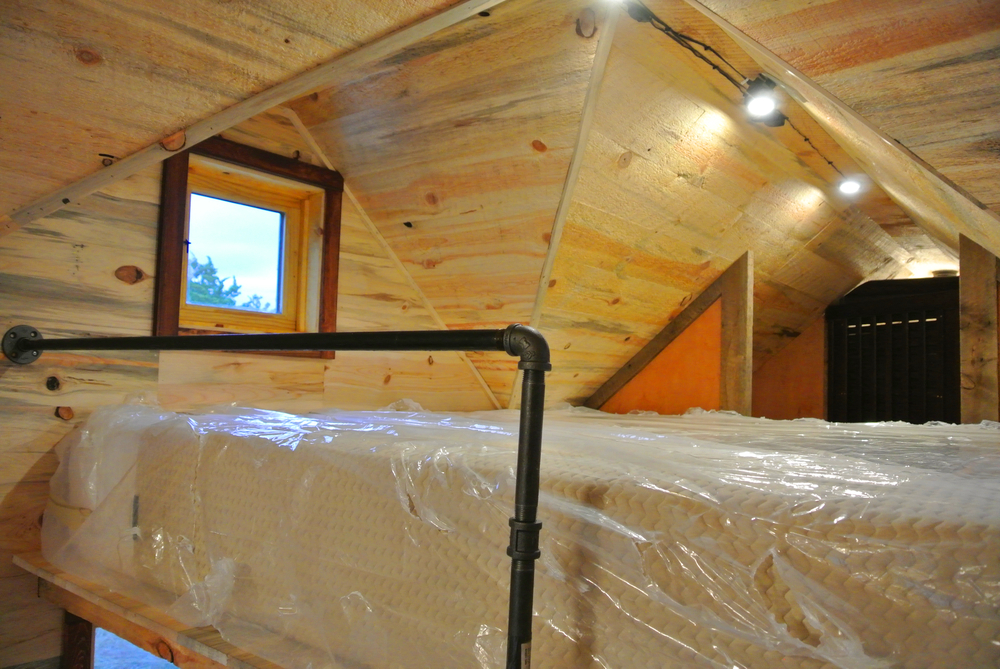
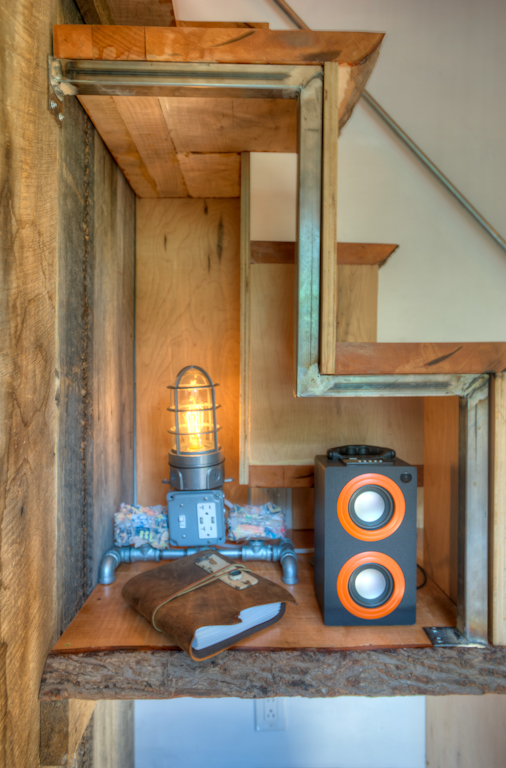
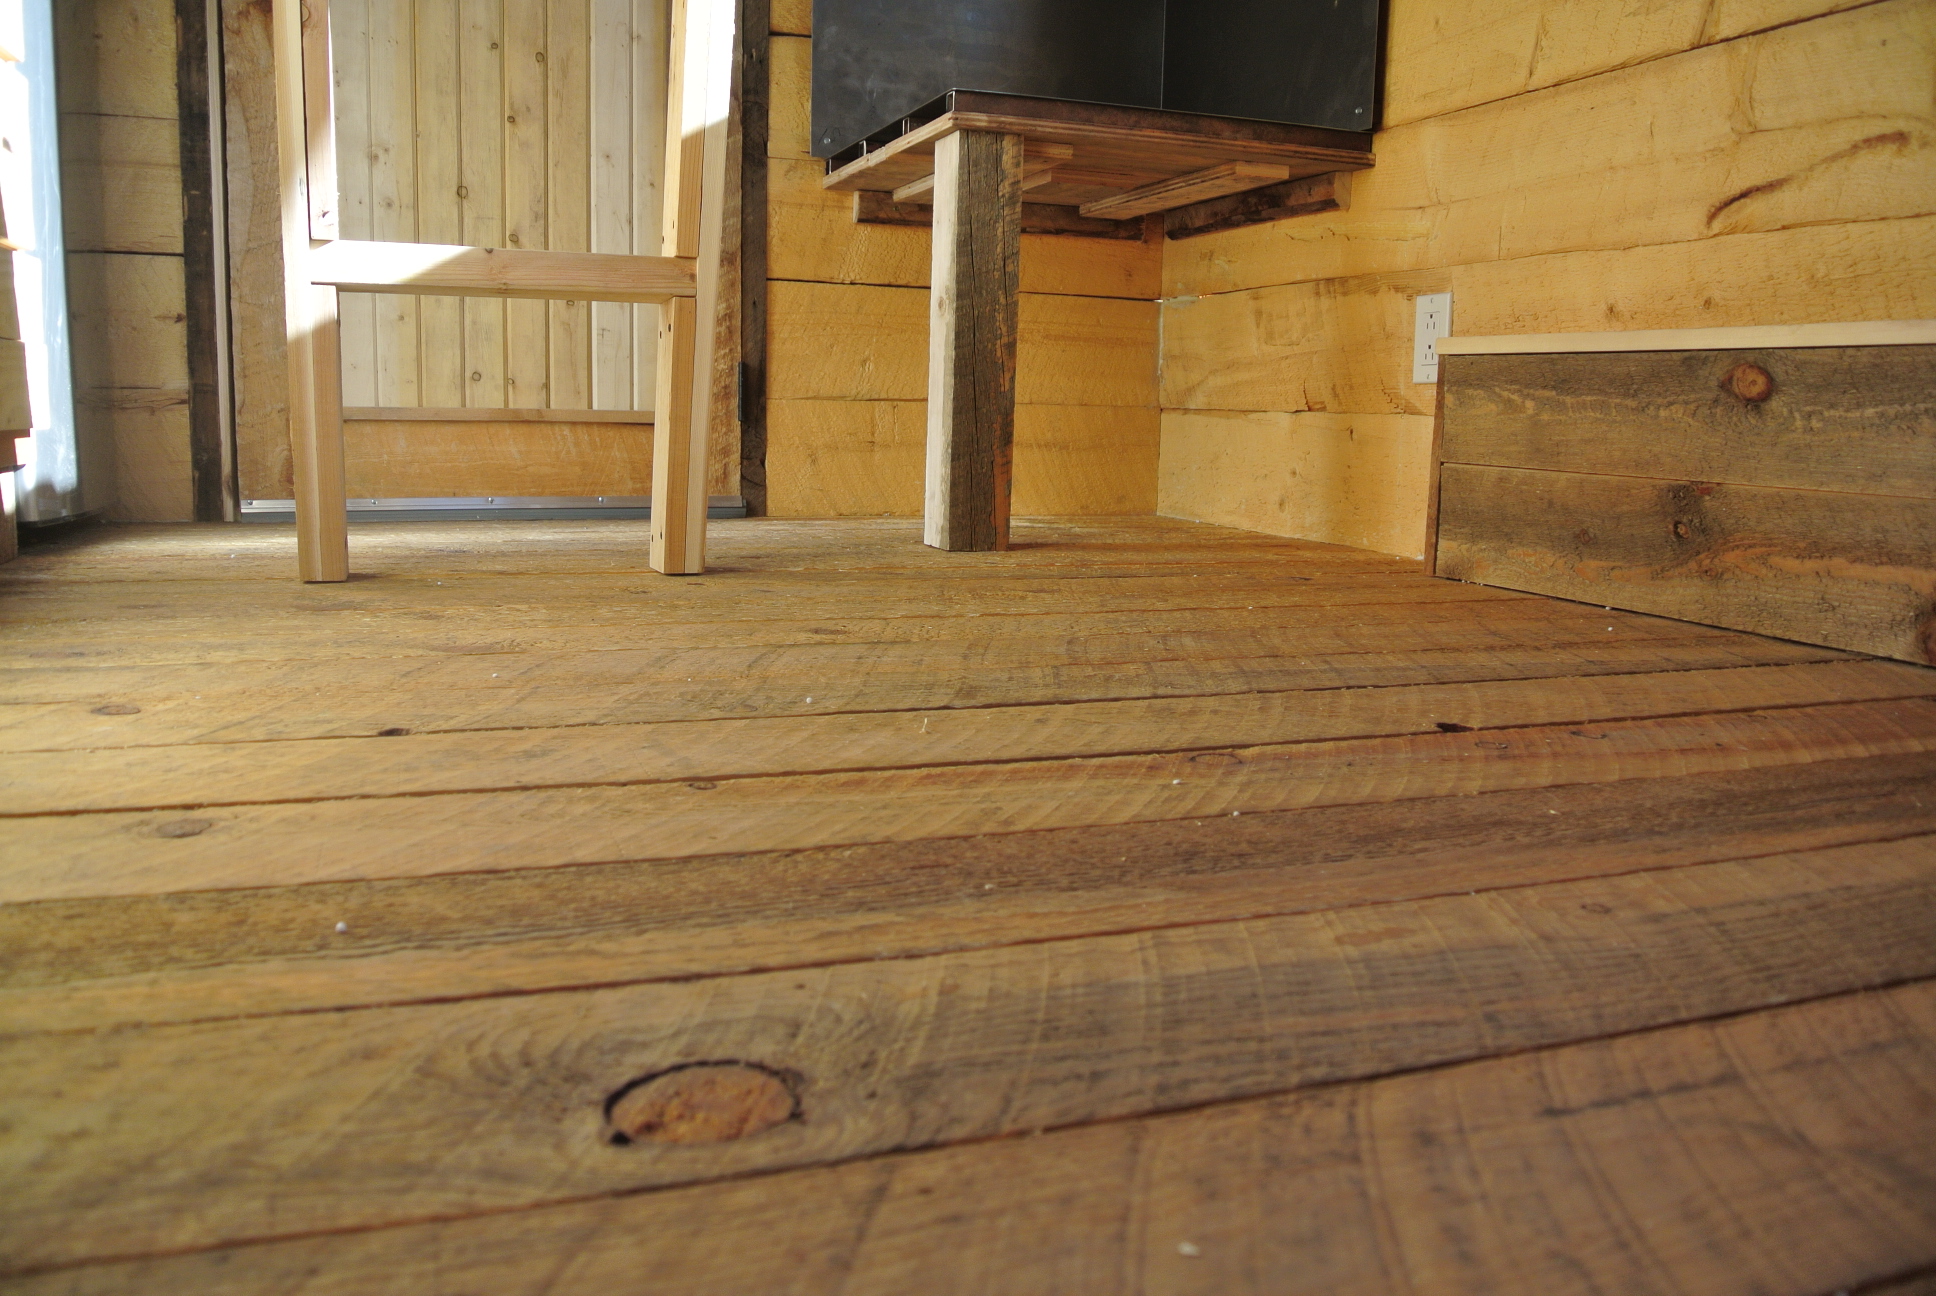
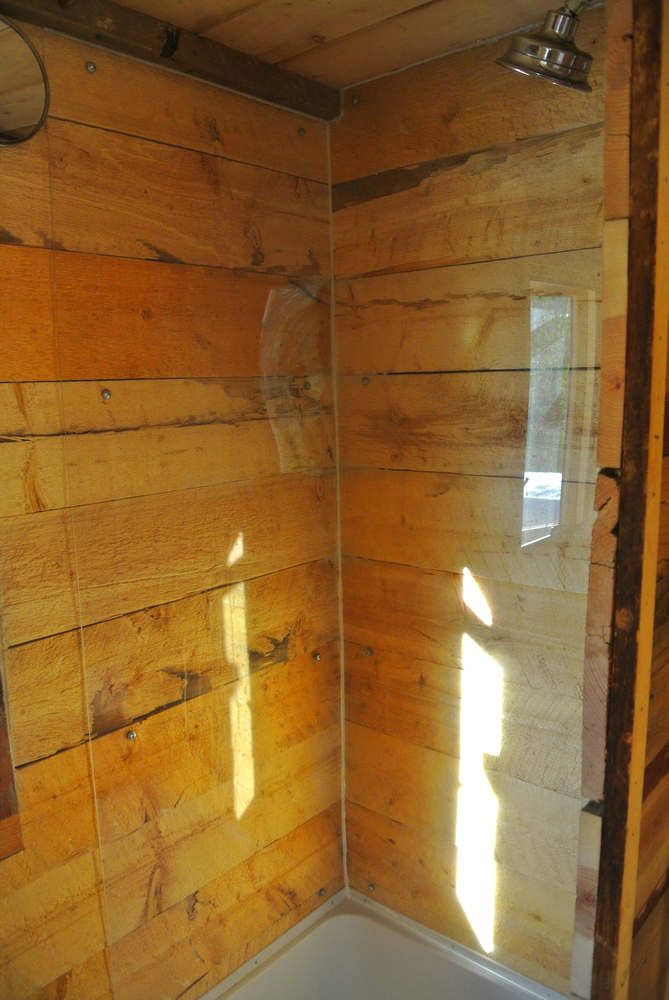
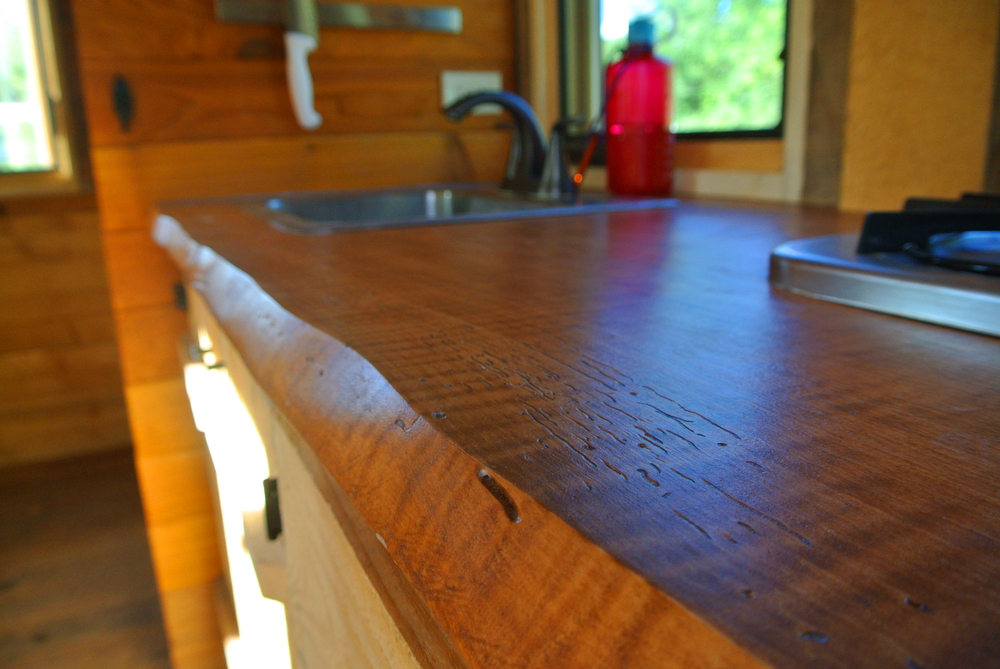
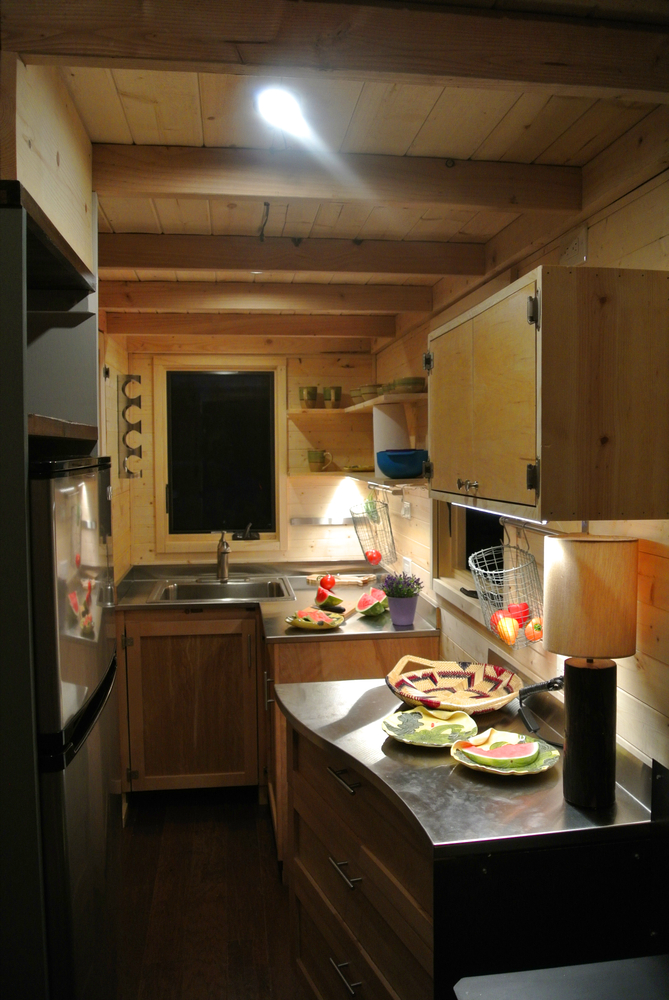
The interior will be a combination of whitewash walls, pallet wood, beetle kill planks, and overall lighter toned woods for trim, counters, etc. It is not too late to contact us if you would like to add your own personal touches.

As the house is still in construction and I do not know what the final costs will be, I do not yet have a sales price. Our target price is somewhere around $35k, however. If you are interested in purchasing this professionally built tiny house, please get in touch with us here.

Front Range Tiny House plan


Front range tiny house interior 1

Front Range tiny house exterior 2

Front Range tiny house north

Filed Under: Tiny House Design

A River Runs Through It: Custom Gooseneck Tiny House

February 17, 2015 By Greg Parham 83 Comments

Rio Grande Gooseneck Tiny House

A gentleman that I went to college and used to race bikes with back in my days of collegiate cycling contacted me last year. He and his wife Krissy were interested in having me build a tiny house for their young family to live in so they could simplify life, pay off their debt quicker, and start saving up for their ultimate dream of buying a sailboat and sailing ’round the world. With a toddler, a dog, and a cat comprising this family, as well as a second child on the way, they knew they would need something on the larger end of the tiny house spectrum, preferably 32′ or longer.

While the 30′ bumper pull tiny house was completed back in December ’14, I wasn’t sure how I felt about doing a 32′, especially knowing that they would eventually be towing it themselves from their current location in El Paso near Ft. Bliss to some place further north where Steve could be a park ranger after his time in the reserve was up. I asked if they would be open to a gooseneck design, partially because I had yet to do one and really wanted to, but also because I knew it would be easier to tow than a bumper pull of equal length. After drumming up some quick sketches, they said “sure!” And so started another fun, innovative, creative tiny house build here in the San Juan Mountains.

I like to name all the houses I build, as does most everyone else, so I asked them what they wanted to name the house, and after a little thought Steve got back to me: “Rio Grande”. It was a fitting name in so many ways. The headwaters of the Rio Grande lie only about 70 miles away from Durango in the San Juans, just on the other side of the Continental Divide. From high up in the alpine, snow melt travels south into New Mexico, meandering by Sante Fe and Albuquerque, before paralleling I-25 down to Las Cruces and then to El Paso. Most of the drive from Durango to El Paso follows the river closely.  The river is always ebbing and flowing, changing with the seasons, reacting to the demands we humans have placed upon it. Just like life.

We took this river theme and found ways to artistically incorporate it into the design. The overall shape of the tiny house with the gooseneck, the changing rooflines, and a shed roof that gently drops off towards the aft invoke a feeling of flow. We took a propane torch to the cedar siding to brand on the shape of a flowing, growing river. Making “water” with fire. It’s awesome. Steve and Krissy collected river rocks, which we inlaid into a “river” that we let into the wood countertop and then applied epoxy over. I was ale to collect some river willow and use it for the guardrail over the gooseneck bedroom. Everything really turned out great.

I will stop babbling let the pictures and video do the rest of the talking. First, here are some quick stats:

  • 24′ deck with 8′ of floor over gooseneck for a total length of 32′. Typical 7′-5″ width 13′-6″ tall at ridge
  • (2) 7000# axles with brakes, GVWR 14,000#
  • actual dry weight 11,500#
  • 218 sq ft main level living ( including front gooseneck), 70 sq ft of sleeping loft
  • 36″ reclaimed front door with a fold down porch, 24″ rear door made from reclaimed wood and glass
  • Custom river rock inlaid counters at 41″ height for tall people!
  • reclaimed picture windows in the main loft
  • propane range and on demand water heater
  • full size fridge, full size bathtub, washer/dryer combo
  • 110v shore power
  • on grid water system with hose hookup
  • Nature’s Head composting toilet
  • greywater drain system
  • Full size 30×60 bath tub
  • Woodstove primary heat
  • Mini split A/C (not shown at time of photography)
  • approx sale price: $73,000
  • time to construct: 6 weeks (from day of trailer arrival)

DSC_3679

Rio Grande Gooseneck Tiny House dining

Rio Grande Gooseneck Tiny House woodstove

Rio Grande Gooseneck Tiny House kitchen

Rio Grande Gooseneck Tiny House custom countertop

Rio Grande Gooseneck Tiny House vanity

Rio Grande Gooseneck Tiny House full size tub

Rio Grande Gooseneck Tiny House stairs

Rio Grande Gooseneck Tiny House loft


Filed Under: Company News, Tiny House Design Tagged With: 32' tiny house, El Paso Tiny House, Gooseneck Tiny House, Rio Grand Tiny House, Rocky Mountain Tiny Houses

Custom SIP Tiny House (As Seen on TV)

January 4, 2015 By Greg Parham 29 Comments

SIP tiny houseA lovely couple from Colorado Springs commissioned me to build this tiny home for them in spring of 2014. As the time approached to get started on it late summer, a tv production company also contacted me asking if I had any unique builds going on or knew of any people building their own tiny house that they could film for a new tiny house reality series for HGTV. All I could send them was the contact for my clients to see if they were interested. Turns out, Derek and Mary were, and so we all agreed to let the house build be filmed.

After nailing down the details and getting all our ducks in a row, the crew came down to Durango from Denver on three weekends to film construction, and we filmed a fourth weekend in Colorado Springs once the house was complete and delivered. I wasn’t really able to talk much about the house, and absolutely none about the filming. We wanted to keep everything a surprise up until the air date.

The show aired back in December ’14, and so now it is ok for me to share this. People have been looking for more info about this house and haven’t been able to find it, until now!

Like all tiny houses that pass through the shop, this was a full custom design and build from scratch. Here are some of the design parameters we had to work around:

  1. Needed to be light enough to be towed by a 1/2 ton Ford F-150
  2. Needed to be warm, since the clients might have to move to a colder climate for work
  3. Needed stairs that their dog Buddy could go up and down
  4. Also needed a doggy door for Buddy.
  5. More or less a traditional looking tiny house, but with some contemporary flair
  6. Stainless counterops. A fridge larger than typical dorm style fridges.
  7. Woodstove, and Dickinson propane heater if feasible
  8. Room for a store bought couch. Also enough wall space to mount a 40″ tv

I worked with the Voight’s extensively to refine the design. I had just developed a great relationship with a SIP (structural insulated panel) company while on business trips to Boulder earlier in the winter. In fact, I had just built 3 energy huts for Hunter Douglass using SIP’s the month before, so I had learned about how the product goes together and was excited to apply it to a full time living tiny house. Luckily, Derek and Mary were open to SIP’s and were ready to become one of the few owners of a tiny house made from SIP’s.

tiny house SIP construction

SIP’s are a cool building product to work with, esp. for tiny houses. You absolutely have to pay attention to the minuscule details, however, or you are going to fight the system until it drives you crazy. My experience with the other three SIP structures along with the help of a very good sales rep made the assembly of these panels a breeze. I made absolutely sure my trailer was square and level before starting. We triple checked the locations of our baseplates before raising the walls. We made sure all of our edge nailers were flush with the OSB and no dried glue was sticking out. We left some wiggle room in key places. Everything went together perfectly until the last dormer roof panel. Things had somehow gotten a hair off, and a hair multiplied over nine or ten feet can add up to 1/4″ on the other end. Luckily, we were able to attach some mounting plates to key areas of the roof and pull everything into plane using winches.

I called Derek the other day to see how the SIP’s were performing now that they are in the dead of a Nebraska winter. He said “Great, it’s -4 outside and 77 on the inside.” Without doubt, the thermal performance of SIP’s is the number one reason to use them, but let me also cite a few more:

  • They go up very fast compared to stick framing. The added cost of the product outweighs the labor time involved with traditional methods
  • They are CNC cut, from the angles of the walls and roof panels, to the rough openings for the windows and doors. You are left with a very precise shell that makes it easier to install windows, siding, and interior wood.
  • You have a solid substrate to attach components to on the inside. No need to locate a stud, just screw or nail anywhere and you will hit meat.
  • they are strong as all get out. So strong, that you can actually use less steel on your trailer frame and still have a tiny house that is stronger than a stick frame house with an overbuilt trailer. The use of SIP’s on a trailer really takes rigidity to a whole new level. This was important since we were trying to keep weight down

SIP’s do have their drawbacks, too, but I will save this for a later post since they did not effect any of the design goals for this project. Moving along, here are some quick stats of the finished product:

  • custom fabricated 18′ trailer with (2) 5200# axles equipped with brakes and a break away system
  • Walls and Ceiling constructed from pre-engineered 4 5/8″ Structurally Insulated Panels. Floor insulation and subfloor is integrated into trailer frame to provide an extra 4″ of headroom
  • Finished dry weight came out to 6900# This was within the weight rating of Derek’s truck with a little bit to spare for personal goods
  • Electric and Water supply are setup for grid tie
  • Grey water goes to a gravel collection pit that the clients installed after delivery. Solid wastes are handled via a “humanure” composting toilet
  • Primary heat is provided by a woodstove, backup heat by a propane Dickinson Marine Newport
  • A/C not required due to temperate climate
  • Cost for a replicate would be in the 46k range

Due to all the filming craziness, I wasn’t able to snap too many shots of the finished product, but I did get a few:

SIP tiny house exteriortiny house stairs

tiny house couch

tiny house curved counter

tiny house dormer loft

tiny house modern kitchen


To close this post out, I would like to share a photo that the clients sent me with the house all settled in alongside a sweet deck that they installed on top of an old trailer frame that was laying around at the Nebraska farm where they are parked. Tiny House, Big Living!

tiny house with big deck


Filed Under: Company News, Tiny House Design Tagged With: SIP, SIP tiny house, structural insulated panel, tiny house big living, tiny house TV show

Custom 30 Foot House

December 12, 2014 By Greg Parham 111 Comments

I am pleased to show you the latest tiny house to leave our shop and find its way to some very excited owners. I hauled this beauty down to Driftwood, TX where it will live for a year or so before moving right back into the Rockies. A family of three contacted me in late Spring this year to discuss having me build their dream home. The program requirements were pretty grand: 30 feet or longer, two lofts, a bedroom, a murphy bed, full size appliances, a full size tub/shower, stairs, A/C, LOTS of storage, an electic mix of gingerbread traditional, and rustic modern. We collaborated a few months getting the design complete and had to wait til mid October to begin construction.

From a RMTH standpoint, you can throw just about every superlative on this house you like: longest, tallest, heaviest,  most difficult to tow, most complicated, most expensive, most delayed, most man hours, and most fun! The project came in on budget, but our completion was delayed two weeks due to a late delivery of all the beetle kill wood.

I’m not going to write up a whole lot more about it, because I actually made a video tour! My camera and impromptu documentary skills really suck, but I think you’ll get a pretty good idea of how this house feels and functions. Also below this are some photos of the exterior, the haul, and a few interior stills.

A few quick stats for the curious:

  • 30 foot 15,000# triple axle trailer chassis custom fabricated
  • about 12,000# dry
  •  197 sq ft on the main floor and about 100 sq ft of loft space
  • 4″ EPS foam floor and wall insulation, 6″ in the ceiling
  • advanced wood framing
  • $89,000 as shown

tiny house barn door

big tiny house kitchen

tiny house couchtiny house pop up table

tiny house murphy bedtiny house murphy bedtiny house loft king

30 foot tiny house

30 foot tiny house on the roadtiny house in New Mexicotiny house next to 18 wheelerstiny house curvy porchbig tiny house towtiny house peaceful parking

Filed Under: Company News, Tiny House Design

RMTH To Be On National Television

December 10, 2014 By Greg Parham 20 Comments

This past summer, a production company working with HGTV filmed Rocky Mountain Tiny Houses building a custom tiny house for some wonderful clients now enjoying their tiny house in Nebraska. I got word today that the pilot show will be airing Monday December 15 8pm CST. While there is definitely an entertainment factor involved, this should be a good honest look at the construction process, as well as builder-client relations. It will also be the first really good shots of the house that I wasn’t able to publish after the house was complete due to our agreement. If you have this channel or can find some place to stream it, please do so. Also, I’d appreciate it if you could help spread the word to all tiny house enthusiasts!

Filed Under: Company News

Funky East Austin Rental

November 30, 2014 By Greg Parham 54 Comments

Mandy Harris Urban Oak Photograpy

Mandy Harris Urban Oak Photograpy

Here it is December and I am just now getting to this! Things have been crazy busy this fall heading into winter-so busy that I now have four employees! That’s a whole other post though. Today I wand to share with you a wonderful tiny house project that was completed back in October.

Sometime earlier this summer a lovely woman from Austin contacted me to see about having a unique tiny house built that she could use as a nightly rental for Airbnb and other similar sites. She was on a very tight budget and timeline, but was looking for some really funky and creative design ideas. After some back and forth collaboration, we agreed on a price and delivery date, as well as began with the design process .

With some careful planning and thoughtful use of reclaimed materials, along with some very much appreciated assistance from the client, we were able to meet budget constraints and were if not for some large rains that flooded the shop a few times, we would have been exactly on time but instead were a week late on delivery. Most importantly though, we were able to create a tiny house with very unique details that has caught the attention of tiny house enthusiasts the world wide. It is with great pride I present the Funky East Austin Rental tiny house.

Mandy Harris Urban Oak Photograpy

Mandy Harris Urban Oak Photograpy

First off, this tiny house is built on a single axle 12′ trailer. The client was originally drawn to the 16′ Boulder house I built  since her backyard was fenced in by faded corrugated metal and cedar pickets, but due to the small size of where she had room to park it, we had to go with a 12′ design. We were both glad we did after I showed up and we had a heck of time just getting this 12 foot trailer through the gate, turned, rotated, and placed in the final spot! I have a motorized trailer dolly that I fabricated to help in situations like this, but it broke down right before delivery, and I’m not sure how well it would have worked since the yard had very loose soil. We enlisted the help of some neighbors and in duo with a hand winch, were able to manually get the house situated!

Similar to the Boulder, the plan features a kitchen up front, bathroom in the back, living space in the middle, and alternating stair treads that lead up to the sleeping loft. The house utilizes a shed roof design.

In addition to the inspiration taken from the original Boulder, the client wanted some steampunk and industrial flair, yet with a healthy dose of rustic elements. We achieved this unique look with the following:

Mandy Harris

Mandy Harris

Pipe fixtures- using off the shelf pipe fittings, these fixtures were installed for items such as TP holder, paper towel, pot racks, closet rods, handrails, and more

Mandy Harris

Mandy Harris

Barn wood with sliding barn door- much like the Boulder, there is a barnwood wall separating the main space from the bathroom. This design, however, features a sliding door that we fabricated the hardware for in house.

Steampunk light fixtures-these were all hand picked and purchased by the client. She had them shipped to my shop in Durango. This was not only a huge load of work off my to do list, but afforded the client a very hands on approach that reflected her tastes very well. They are beautiful!

Steampunk plumbing fixtures-these were all fabricated in house using carefully selected off the shelf pipe fixtures

Mandy Harris Urban Oak Photography

Mandy Harris Urban Oak Photography

Live edge maple stairs- I bought this wood in large slabs from the salvage yard next door. They took A LOT of cutting, planing, jointing, glueing, and prep work, but the end result speaks for itself. Another element of the stairs that was integral to the program requirements was to have a space under the stairs to use for suitcase storage, and or a small work area with a charging station.

Mandy Harris Urban Oak Photograpy

Mandy Harris Urban Oak Photograpy

Mandy Harris Urban Oak Photograpy

Mandy Harris Urban Oak Photograpy


Hanging couch- while I wish I could take credit for this beautifully designed and crafted piece of furniture, it was the client’s idea (purchased from this Etsy shop), so that suitcases and a small sliding coffee table could fit underneath. Most of my clients have a hard time comprehending just how compact tiny houses are and how to maximize function and storage, so hats off to Denise for bringing a ton of good ideas like this to the project.

Mandy Harris Urban Oak Photography

Mandy Harris Urban Oak Photography

Barnwood kitchen shelves. Simple but undeniably gorgeous. Care was taken to make sure electrical outlets were put in the right place to power the appliances the client had purchased as well as make sure they all fit neatly.

Live edge maple countertop- using the same maple slabs, we crafted a beautiful and large kitchen counter for guest to use during their stay.


Austin Tiny House kitchen

Mandy Harris Urban Oak Photography

Overall, this was a very fun project to work on and I’m proud to have had a hand in it. All accessories/furnishings were pre-purchased and installed by the client. I have to say, the grand vision for this project was entirely hers, and it wouldn’t have been nearly as nice without her very close coordination and help. Thank you Denise, for trusting me with this unique and fun project. I hope many folks come to stay and partake in your hospitality!

You can view a full gallery of images at the Rocky Mountain Tiny House facebook page here!

You can view the AirBnB listing and get in touch with Denise, the owner, here.

Hope you enjoyed learning about this project. Stay tuned for more awesome tiny house projects coming up!

Mandy Harris Urban Oak Photography

Mandy Harris Urban Oak Photography

Filed Under: Company News, Tiny House Design

Stanley Log Cabin Tiny House

October 20, 2014 By Greg Parham 2 Comments

Stanley Log Cabin Tiny House

Rocky Mountain Tiny Houses is pleased to announce the completion AND sale of its latest creation, the Stanley. It was about this time last year that I was taking a sabbatical traveling throughout Idaho, Montana, and Wyoming, not only in search of adventure and a little vacation time, but also on the hunt for tiny house design inspiration.

My travels took me through a wonderful little town called Stanley, in the midst of the magnificent Sawtooth mountains and along the Salmon River in Idaho. Stanley Stanley Tiny Houseis probably my single favorite town that I passed through on this trip. It has a little bit of everything for the outdoor enthusiast. Scattered throughout the small town and along the outskirts are structures from a bygone era-beautiful, rustic, and tiny log cabins. After photographing a few, I knew right away that I had to build a log cabin tiny house on wheels and name it after this place.

Immediately after selling the Boulder tiny house, I began construction on this fun new project. There wasn’t a whole lot of precedent for true log cabins built on wheels. the ones I did come across weren’t that visually appealing, weighed too much, or just had lots of room for improvement, so I started from scratch and designed this house from the tires up. I had never built a log cabin before, much less one on wheels, but how hard could it be, right? Turns out, a little harder than I thought, but not too much.

Along with building a tiny house out of logs, I was also interested in building a 12′ long house to see just how small I could go and still have a very livable structure. Keeping the cost below $22k was the third goal of this project, since I was getting a lot of requests for something less expensive even though my larger models are very competitive with other builders. The log cabin method seemed like a good way to do this since the walls are now only one layer instead of six or seven (framing, sheathing, insulation, moisture barrier, ext siding, int finish), and even if the logs cost a bit more, all the time savings should more than make up for it.

logs for tiny house

The fourth primary goal was to keep the house a reasonable weight under 5,200 lbs, since I was only going to use a single axle rated for that much weight. This would open up the doors for this house to be towed with a 1/2 ton truck, and possibly even a V-6 vehicle. With these lofty goals in place, I cranked out some drawings, ordered the trailer, ordered the logs, ordered the windows, and set out to craft this beauty.

Tiny house rough cut tongue and groove floorOnce the trailer arrived, I wasted no time in insulating the floor and installing the beetle kill spruce t&g flooring. I went ahead and applied two coats of natural tung oil. Soon after, the logs arrived and I was very excited to get going on the walls. The first course of logs is bolted to the trailer through custom tabs I have welded on the trailer frame. Each additional course above that is fastened to the one below using massive 12″ timberlocks. I had the Colorado beetle kill spruce logs milled with a large tongue and groove to add structural strength, but also help seal the logs and not require any chinking.

Unfortunately, the mill didn’t do a top notch job, and the tongues were not lining up with the grooves like they Log Cabin tiny house cornershould have been. After many hours of hammering/chisesling, and routing, I got things to mostly line up. The logs also had some warping, crowning, and twisting that also had to be worked to keep all the courses straight and within tolerance. All this work was definitely more time consuming that I had planned for, but once complete I have a very solid and beautiful structure with which to frame the roof and finish out the rest.

The window and door bucks were made from very old and thick rough cut wood I got from Durango Salvage. The roof was framed out of regular 2×4’s and a large doug fir ridge beam that is left exposed on the inside. Red somehow seemed like an appropriate color for this house so I installed a very bright red metal roof and the casement windows came clad in red as well. The roof cavity is insulated with EPS foam and then covered with the same beetle kill spruce material as the floor, only thinner. The final look is quite spectacular with the rough cut saw marks, blue stains, and randomness.

Since this house was only going to be 12′ long, I wanted to maximize the width. I normally build the walls so the inside flushes out with the fenders, but this time I made the outside dimension a full 8′ and decided to box out around the fenders on the inside. Road legal is of course 8′-6″, meaning that didn’t leave much room for roof overhangs. Decent overhangs were necessary to match the look I was going for (plus they add some nice function), so I designed hinged overhangs that spend most of the time tucked up under the main roof, but can fold up and latch down to the main roof for times the house needs to be moved and still remain highway legal.

tiny house Roof flap down

tiny house roof flap downThe back of the trailer/front of the house also features a fold up porch similar to the Durango model built from a welded steel frame and cedar planks. The roof structure above the porch does not fold up but is built stationary to show off the beautiful woodwork of a cantilevered log and rafters/purlins cut from thick barnwood. I had a set of elk antlers that I found in the woods last fall that I mounted to one side for a little decor, but also to hang stuff. The buyer, a young man named Ethan, hung a chair from the other beam and plans to use the porch quite often!

The interior features a plethora of rustic and reclaimed woods for wall partitions, built ins, loft joists and decking, gable windows, front door, and more. To showcase the beauty of the log cabin walls in the shower, as opposed to covering them with fiberglass or other typical shower enclosures, clear plexiglass was carefully measured,cut,  and fastened with self sealing screws. The corners were sealed with clear silicone. The final effect is very cool!

log cabin tiny house shower

Although not pictured at the moment since it was a last minute change order, the toilet will be a composting unit by Nature’s Head in lieu of a sawdust toilet. There are some built in shelves and cabinets above the toilet all crafted from reclaimed wood.

The kitchen uses a reclaimed base drawer unit that I changed out the drawer faces with some leftover rough cut flooring. The sink base and drawers were built in place also with reclaimed wood, The countertop is custom made from maple slabs I got from the salvage yard. We left one edge “live” and it is cool! You can see where insects burrowed in and left squiggly marks. There is a medium sized sink, a double burner cooktop, and a two door refrigerator. A pine upper cabinet and xenon cabinet lights round out this part of the house.

tiny house custom wood countertop

Opposite the kitchen is the living space. It was left open for the buyer to place furniture or custom built ins. The front corner was designed to house a Colorado Cylinder stove. It didn’t get shipped in time for me to install it, but should be ready in a few weeks by the time Ethan arrives at his destination and gets settled in. I was able to construct the platform and wall heat shield from 18ga raw steel, using 1″ spacers to hold it off the logs.

log cabin tiny house interior

A 48 gallon water tank was installed in the loft storage above the kitchen as Ethan will be living off the grid. A 750w solar system will be installed once he reaches Oregon to complete off grid components along with the woodstove, propane appliances, and composting toilet. I can’t tell you where, but we also built in some secret storage to hide important documents and a handgun. Trust me, you would never find it.

After all was said and done, I met all of my design goals. The final dry weight came in at 4,800 lbs, a bit more than I was hoping for, but with still within range. The final cost came in at exactly $22,000. Even though it is only a 12′ trailer, it feels very spacious and is very much livable . The log cabin construction method, although a bit testing at first, proved successful and very unique.

So, I think that about wraps up this neat little tiny house. I hope your enjoyed learning about it. For more updates, be sure to like the facebook page. There’s also an album there with more detailed construction photos for those interested.

tiny house loft

log cabin tiny house kitchen

log cabin tiny house elk antlerstiny house loft detailtiny house towing

Filed Under: Tiny House Design, Tiny House Plans Tagged With: 12' tiny house, log cabin tiny house, single axle tiny house

Stanley

September 16, 2014 By Greg Parham 67 Comments

Stanley Log Cabin Tiny House


The Stanley model is a rustic log cabin style tiny house. It is built on an 8×12 single axle trailer and features a folding porch, cantilevered roof for porch covering, folding eaves that allow the house to travel at highway legal width but provide nice water and snow shedding when lowered, a wood stove, small bath, small kitchen, a sleeping loft, and a little bit of room left to place a small couch or desk. Dry weight will range from 4800-7000 lbs depending on what kind of logs we are able to source and other features you want included in the build. Price for the Stanley range from $32,000-$40,000 depending on features.

2021 Update: Due to wood scarcity, we are no longer offering this model in a true log cabin style. We can however, stick frame it and maintain a similar feel. With it’s small footprint, and simple layout, it remains one of the most affordable option in our lineup.

tiny house Roof flap down

tiny house roof flap downi

log cabin tiny house shower


tiny house custom wood countertop


log cabin tiny house interior


tiny house loft

log cabin tiny house kitchen

log cabin tiny house elk antlerstiny house loft detailtiny house towing

Filed Under: Company News, Tiny House Design

OPEN FOR BUSINESS!

August 30, 2014 By Greg Parham 6 Comments

Wow, what a crazy summer it has been. As the temps start to drop and it feels more and more like fall coming on here in Durango, I took a moment to reflect on the failures and successes of my business this summer. It has been a wild roller coaster ride, and the ride is far from over. I realized I hadn’t done any work on the site or blogged in a very long time. I was starting to get emails whether or not I was still in business. Turns out a lot of other builders aren’t, or they just aren’t getting back to anybody, leaving potential clients to believe they aren’t in business.

Well let me tell you right of that bat, RMTH is open for business. If I haven’t gotten back with you, I sincerely apologize. I have been absolutely so overwhelmed with work and inquiries that I just haven’t been able to keep up. For the longest time, I was a one man shop, taking calls, doing designs, building houses, delivering houses, doing my books, doing my marketing, etc. etc. I have finally gotten enough business to start outsourcing a lot of this work, but much of remains in my hands. I have gone weeks at a time working 12-16 hour days. I have pushed myself to the brink of exhaustion, only to get up and do it again.

I wanted to give a brief update of all the cool things that have happened since the Spring.

First off, I took a trip to Boulder in early spring to meet with my potential business partner there, and also meet a sales representative for Porter Corp, who manufacturers Structural Insulated Panels. We discussed the building system at length, as well as its possibilities for tiny houses. I left feeling excited and upon my return began putting together some designs to try out. One of the major hurdles with this product is shipping. They prefer to use semi’s to transport them from their plant in Michigan, and one semi load costs $3200, so it doesn’t make sense to do one project at a time. If you can 4-10 projects on a single truck, then shipping costs make more sense per project.

Hunter Douglas energy huts rocky mountain tiny houses
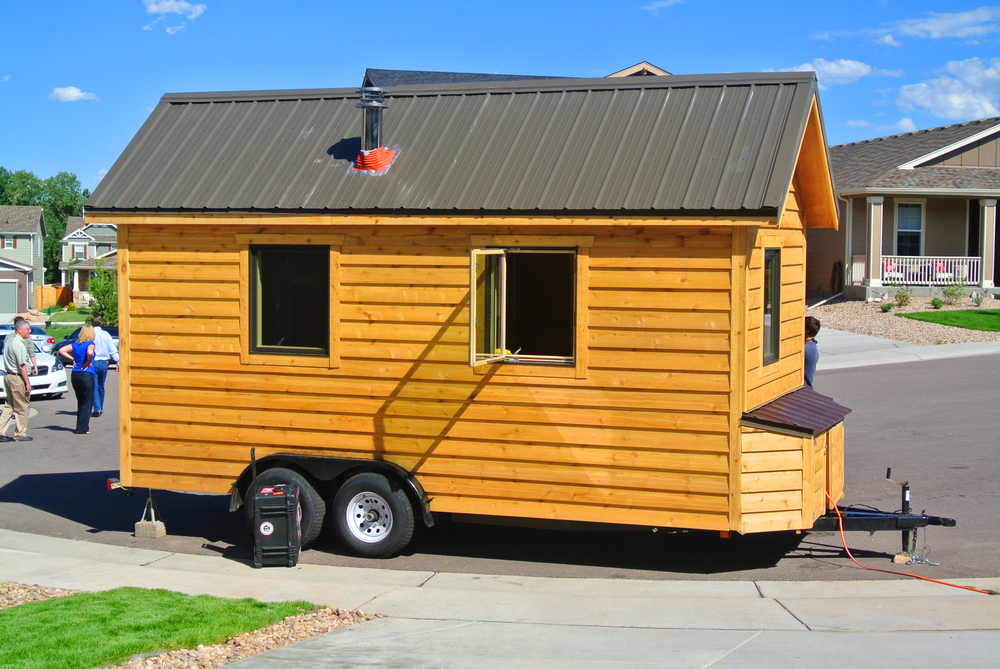
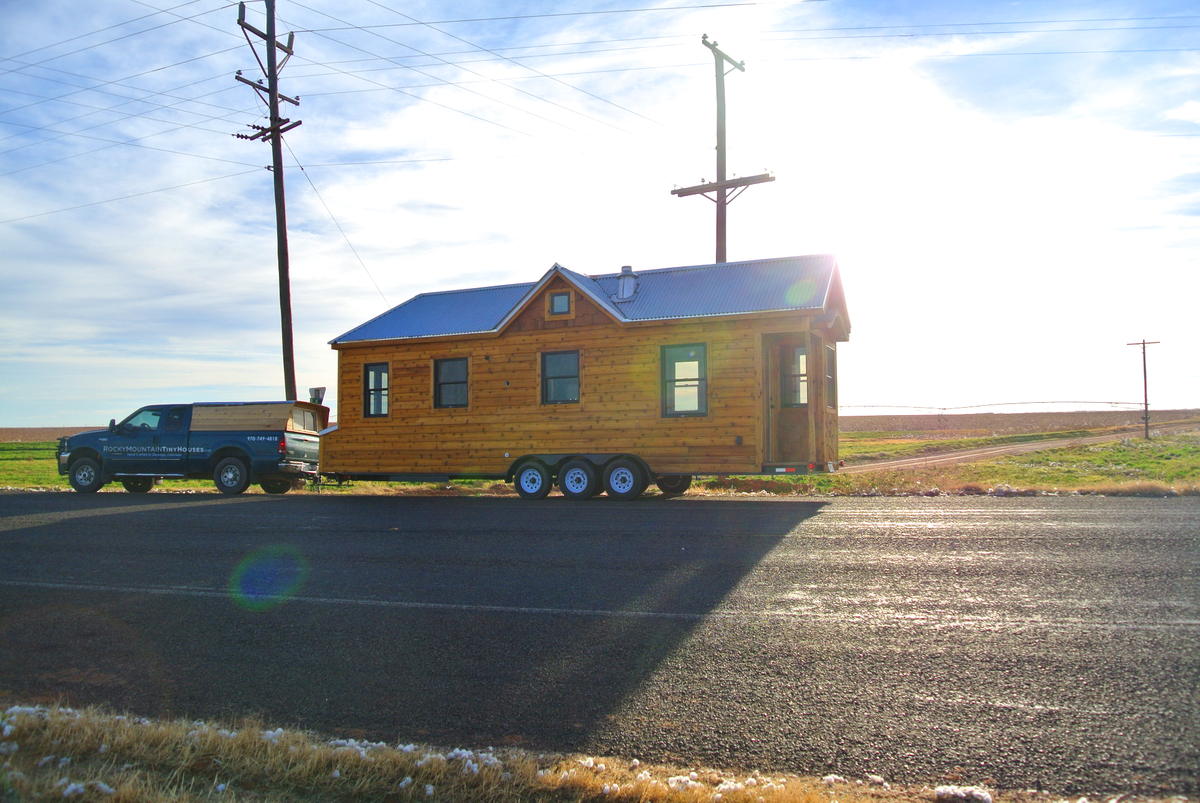
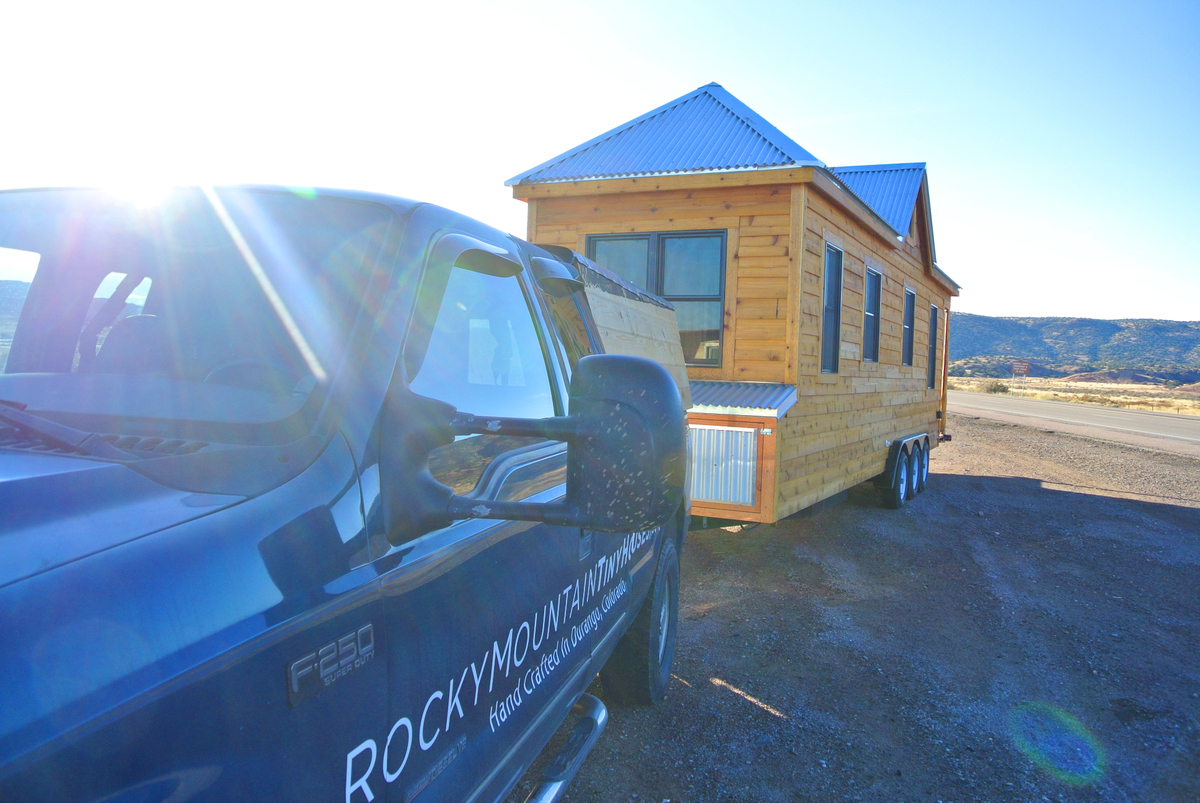
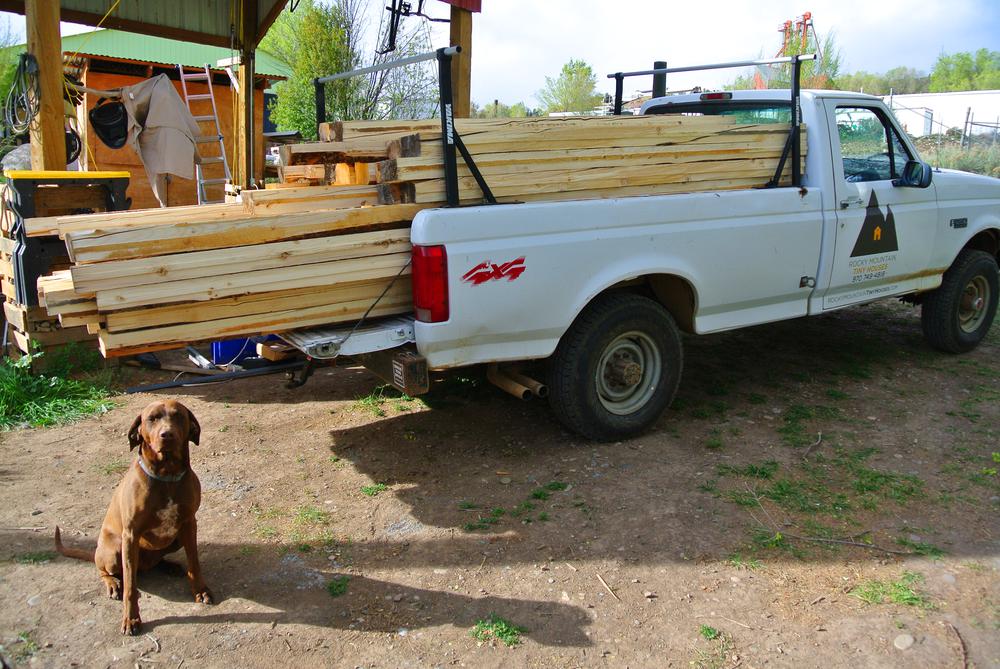
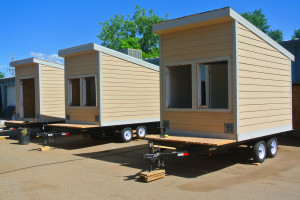
Hunter Douglas, a window treatment manufacturer in Broomfield, CO, commissioned me to build three energy huts on wheels that they could use to test their products, and coincidentally, they wanted them built out of SIP’s, so I had three units right away. I didn’t immediately have any other projects in the cue that I could add to that truck, so I added a Durango SIP package that my partner could build as a spec house and see how that went.

Since the client was only 20 minutes away from Boulder, and my partner had a shop space there, I decided to travel back to Boulder to build the units there with my partner and his crew. There were quite a few details to iron out but we got the units complete in three weeks and delivered to a happy customer.


Before I had departed for that trip, the city of Durango had informed me that I could not operate my business at its current location due to zoning and public access issues. I fought it for a little bit, but soon realized the validity of their arguments and began looking for a new property to relocate to. Luckily, I found a better property just two lots away and setup an agreement with the new landowner. It’s funny how seemingly bad news can actually turn into something better.

So, following my return from Boulder, I immediately had to relocate my shop, which was no small undertaking. I had to take down the old pole barn, put up a new and bigger one, erect a new tool shed, move all my tools, lumber, and other materials I had acquired for the operation of the business. As of this blog post, I still haven’t quite got the new shop fully done, although it is operational.

The reason for the shop not being done is because I’ve had lots of new commissions this summer! The first was an 18′ house for a couple in Colorado Springs. We decided to build this one out of SIPS, and by this time I had my ducks in a row to order two more spec houses (new designs!) out of SIPs so I was able to get three SIP packages on one truck delivered to Durango.

Colorado Tiny House

Tiny House kitchenThis house was on a super tight deadline since the client had just gotten a new job in Nebraska and needed the house ASAP. I recruited some good help and worked my ass off to meet the deadline. We were able to complete this beauty in 4 1/2 weeks and get it delivered just in time. I wasn’t sure if the old ’94 Ford would be able to tow an 18 footer that far, plus I had another build coming up that would require a much larger truck, so after weeks of looking for a new truck I tracked one down in Loveland, CO, somewhat on the way to Norfolk, NE, so the old Ford was able to tow the house up there, I purchased the new truck, and we used it to complete the trip, having to swing back through Loveland on the way home to drive both trucks back to Durango. What a hassle that turned out to be, but completely worth it.

The new truck is a 2000 Ford F-250 Super Duty, with the legendary 7.3l turbo diesel. It is so much more powerful and smoother than the old truck it’s not even funny. The truck had some problems neither the owner or I was aware of, probably brought on by towing a 7,000 lb tiny house 500 miles, but once I get them fixed this will be solid hauler for years to come.

Rocky Mountain Tiny Houses work truck

Following delivery of that house, it was back to Durango to tackle four projects at once. Luckily, before I had set out on the Nebraska trip, I had hired a new full time employee to start when I got back. Chris is a super skilled carpenter with attention to detail and has already proved a great asset to the company. I gave him one of those four tasks to handle mostly by himself, a new 12′ house that will be going to Austin in a few weeks to be used a funky East Austin rental. Having used to live in East Austin, ironically only a few blocks away from where this will be parked, I’ve got a good feel of what the client is looking for and have no doubt she will be absolutely thrilled when this house arrives! After four easy days of work, Chris was able to get it floored, framed, and sheathed on his own.

12' tiny house austin

The second task is starting construction of a 30′ house that will be going to family in Austin as well. I’ve been getting a lot of calls from Austin, TX lately, I guess my reputation is doing well down there. It is slated for delivery mid October. I will probably have to hire another employee to meet that deadline!ext1

The third task will be to finish out the Stanley log cabin I stared back in Spring. I got it about 75% done before I had to jump over to other projects. ILog Cabin tiny house 
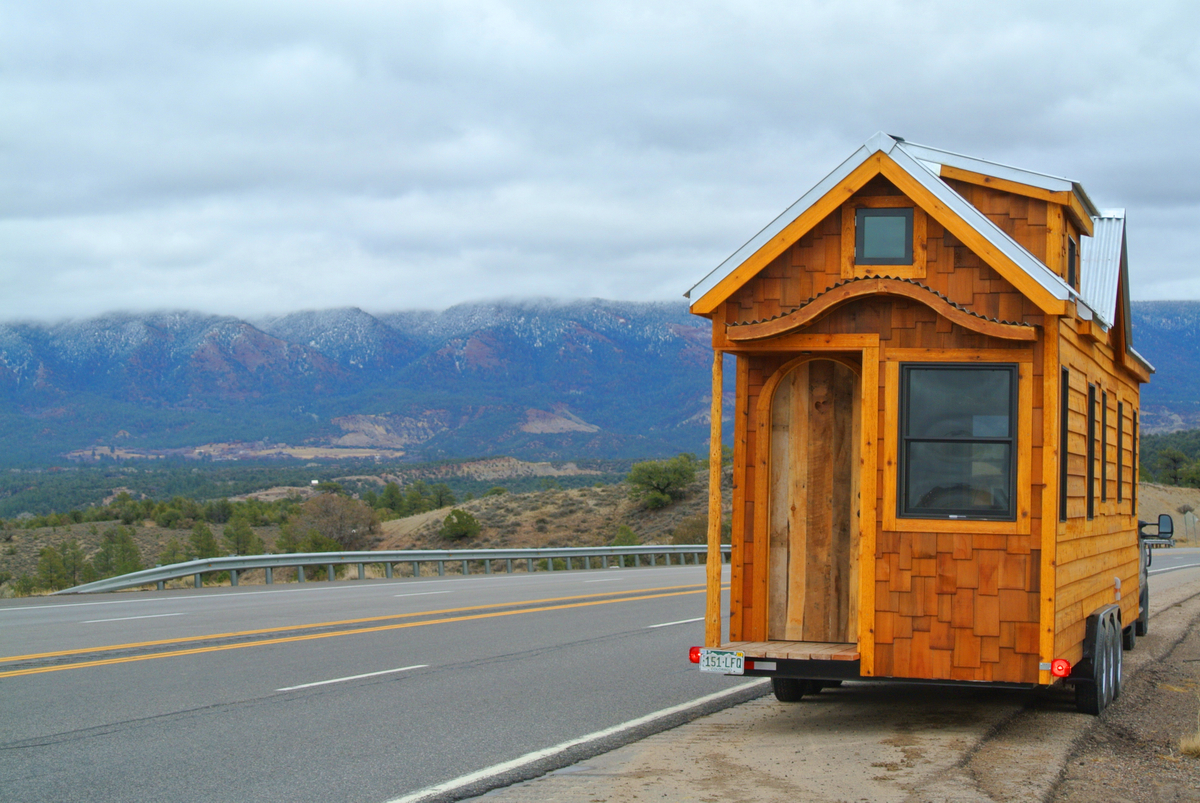
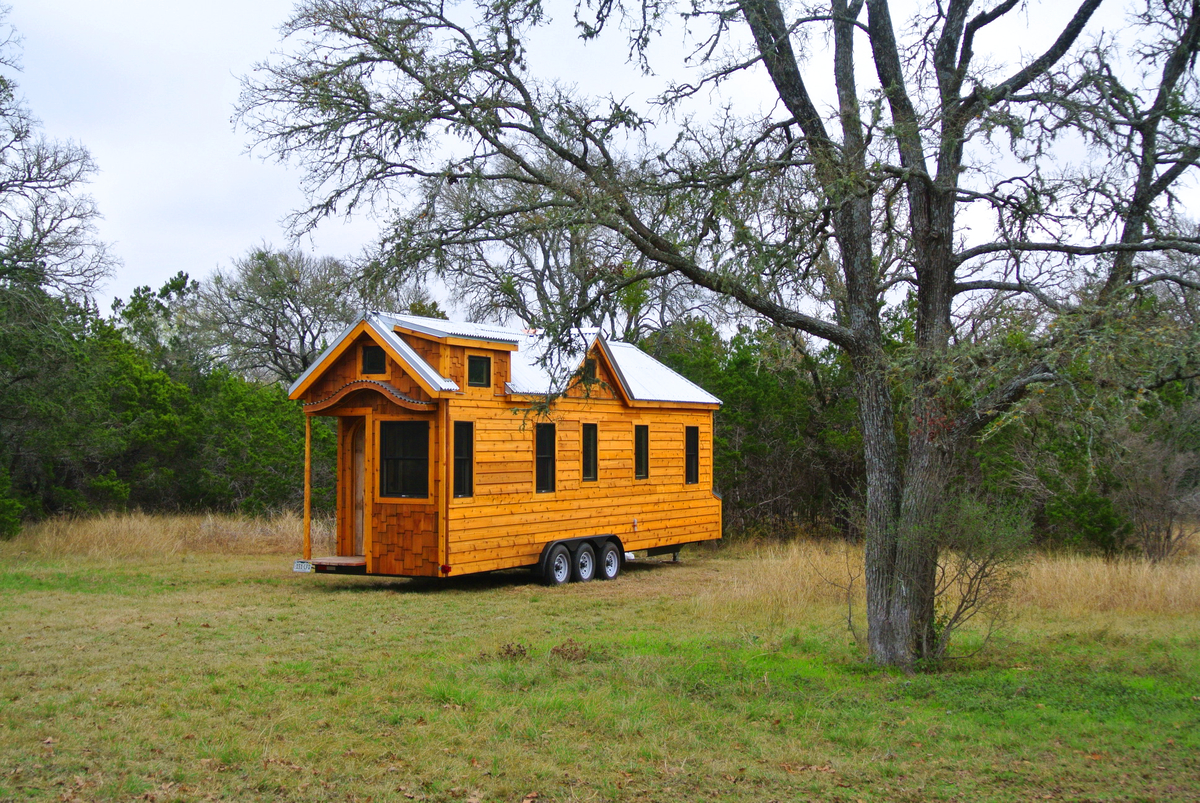
got a call from a guy who will be going to school in Oregon looking for something to built quickly or in stock. After mentioning the Stanley he was excited about it and actually drove out to take a look and put a deposit down. I have two weeks to get it done before school starts for him.


The fourth task is to try and get the shop completed. I had setup the tool shed, office (my personal house), and barn on a part of the site that was tucked in at the rear. I knew it was close to the property line of the neighbors, but I had no idea it actually crossed the line until they came over one to let me know that felt like it did. After some brief survey work, we discovered that it did, so I had to stop what I was doing and relocate those structures so I was in the right property. Got that taken care of and am now in the process of getting a roof on the new pole barn. I had the walls and roof trusses up, just no metal on top, which has been a pain in the butt since it has been a rainy summer. With a little luck I can hopefully knock this out while managing the other three projects. Busy, busy, busy. I’m really hoping things will slow down over the winter so I can get caught up on office work and sleep.

All the while, I’ve been trying to keep up with new leads.  This has proved to actually be the hardest part.  I keep thinking I’ll use all the daylight hours I can get to do physical work, and then do office stuff at night, but by the time I’m done doing design work and emails on current clients, I’m just too exhausted to do anything more. Luckily, with some new help coming in I’m starting to get things checked off my list and seeing some light at the end of the tunnel. Once I get through September, I feel as if my greatest hurdles will have been cleared. I surely hope so. Being your own boss is cool and exciting, but it’s also extremely demanding and damn hard work.

Filed Under: Company Investments, Company News

April News

April 10, 2014 By Greg Parham 3 Comments

There have been lots of happenings here at RMTH over the past few weeks. First off, the Boulder sold to a lovely local woman who just absolutely adores it. I’m happy that the house will get to stay in Durango for a while so I can still show it to interested clients! They say the first sale is the hardest, and although I was stressing for a good 2 months trying to sell this house, it actually wasn’t as hard as I thought it would be. Now that the house is gone from my shop, it actually feels a little lonely over here.

No worries though, I’ve got some good meat and potato news. I’ll start small, and leave you in suspense so that you actually read all this 😉 Construction of the Stanley has commenced with the arrival of the trailer chassis. I’m waiting on timber to get milled before this micro log cabin is really ready to rock and roll. I hope to have enough work done on it to showcase it in the Durango Home and Ranch show coming up April 26-27. I’ll have my personal house there too so people can get a feel for different sizes and styles.

I’m currently wrapping up designs and estimates for two new projects in the Front Range and about to begin two more! All the while I continue to get good leads on a daily basis. I am becoming very efficient in Sketchup which is helping to come up with cool designs more quickly. I’m also fine tuning my system for estimating which is improving speed and accuracy. I have started the process of becoming a licensed RV manufacturer but have no idea when or even if this will happen. It needs to happen at some point though so I can open up the door to RV financing and complete legality in parks that require the unit to have the RVIA seal.

Now, for the really big news, which is two fold: 1.Rocky Mountain Tiny Houses is expanding to Boulder, CO 2. Rocky Mountain Tiny Houses will be changing its building technology primarily to SIP’s

BOULDER- While my truck was broke down in Boulder back in February, I got to meet some really cool people, one of which is a fine home builder and businessman named Brooks. Brooks was extremely interested in my product and immediately saw their potential as temporary housing  for victims of the flood last fall. He has built several large high end houses across that part of the country, and as he puts it, is just sick and tired of such wasteful construction. He was looking for a breath of fresh air, something more modest and meaningful. The reason for my trip to Boulder last week was to get to know Brooks a little better and brainstorm a partnership. Brooks doesn’t have much of a desire to own another business (he already owns 4), but he does really want to build some awesome Rocky Mountain Tiny Houses, so we are working out a general agreement whereas I will handle all of the client coordination, design, paperwork etc. while he will handle the construction work in Boulder. I should be clear that the business is still based in Durango, and I will still be building houses in Durango. This partnership with Brooks will simply add the following benefits. 1. Boulder is in a better geographic location than Durango. It is more or less the center of population for the state of Colorado, being very close to Denver, and not far from Colorado Springs and Ft. Collins. Boulder also has much easier access to I-25 and I-70 which makes transport to adjoining states or even further much more convenient. 2. As someone who has been in the building industry for 30 years, Brooks has access to every tradesman and every material supplier imaginable. He has way more manpower than I do. What takes me 2-3 months will only take him 2-3 weeks. So, it really makes sense to have a satellite location in Boulder for when things really take off. We will need to complete a few builds to see whether he can do it for the same costs, but theoretically he should be able to do it for the same or less.

SIP’s- Aka, Structurally Insulated Panels. For those of you not too familiar with this system, it is a foam insulation core with structural OSB sheathing glued on both sides. I’ve been considering using SIPs on a tiny house project for a while now, I just needed the right cards to fall into place. My second reason for going to Boulder last week was to meet with a SIP manufacturer that Brooks has ties to. The three of us sat down for a good three hours to answer each other’s questions and see how SIPs could be integrated into a Tiny House design. I’ve long been aware of the advantages of using SIP’s, but it wasn’t until this meeting that I had some truly incredible ‘a ha’ moments.  Once the ins and outs of this system were ingrained in my brain, it became clear that for most tiny house designs I have in mind, SIP’s will be the best tool for the job. The product is not conducive to every design, but most of them.

Here is what we deem to be the advantages of SIP’s for Tiny House construction: 1. Assembly speed. It will now only take about a half day to create a shell that is sheathed and fully insulated. This previously would have taken me about 2 weeks. Framing and sheathing aren’t too time consuming, but insulating sure is, speaking of which-2. Better insulation. The R-value for the foam is the same as the R-tech foam I currently use. The main difference is that there are no internal studs to conduct heat and there are no cracks. It is an unbroken plane of foam, except at windows, but even here there is less wood and more foam since you don’t need king studs, trimmer studs, and cripple studs, just studs around the rough opening. 3. Comparable weight. The last house I built used advanced framing and 1/4″ sheathing on both sides to really cut down on weight. SIPs will add weight by using 7/16″ OSB on both sides, however, they take away weight by not requiring interior studs. Without doing a detailed calc or actually weighing each system, I can’t say which will be lighter, but they should each be about the same. SIP’s are definitely lighter than traditional framing with OSB sheathing. 4. Stronger. As opposed to relying on several component pieces and oodles of fasteners, SIPs derive their strength from uniformity.Stresses are transferred throughout the entire panel. This means that not only can they support more weight, but will stand up to wind, flex, and vibration better than stud framing. 5. More accurate- Panels are produced and CNC cut in a factory setting which means everything will be perfectly straight, square and level. 5.Air quality friendly. This was a big concern of mine going into the meeting. Will the foam offgas? Does the OSB have a lot of toxice glues such as formaldehyde? Turns out, the foam is very inert and our bodies contain more formaldehyde than the OSB used in SIP’s, so, this puts my mind at ease for incorporating this system into my Tiny Houses. SIP’s should prove to provide a better product for the same cost or less than I’m currently building my houses for.

With the incorporation of this building system there are some new exciting applications on the works. Sometime very soon, I plan to offer flat pack house “kits”. For those who want to do most of the work on their own house (which seems to be most everybody interested in Tiny Houses), but perhaps don’t have the time or know-how to complete the framing, the kit will consist of the trailer, floor system, wall panels, roof panels, and all the accessories you will need to put the shell together. The package can be delivered more easily and eliminate the hardest part of the construction process, yet still leave plenty of work and personal satisfaction to be had with the finish out. Stay tuned for more developments!

So, I think that about sums it up for now. So far it has been a pleasant spring in Durango and I am really enjoying working outside in abundant sunshine and nicer temps. I’m also enjoying the extra long daylight hours so I can knock off work at 5pm and get some good mountain biking in. Pretty soon river season will start up too, and I look forward to that. Thanks for checking in. Remember, Tiny Houses are awesome, especially ones of the Rocky Mountain variety 😉

Filed Under: Company News

« Previous Page
Next Page »
  • Facebook
  • LinkedIn
  • Pinterest
  • YouTube
Rocky Mountain Tiny Houses 18' Boulder
FRONT RANGE TINY HOUSE
Pequod tiny house exterior
Pequod tiny house countertop
Pequod tiny house catwalk
custom hOMe build exterior1
custom hOMe tiny kitchen
log cabin tiny house kitchen
Custom Tiny House Plans
Colorado Tiny House
Colorado Tiny House
tiny house custom wood countertop
tiny house towing
tiny house towing
steampunk light fixture
Mandy Harris
Austin Tiny House Kitchen
Mandy Harris
Tiny House barn door
Mandy Harris
Funk East Austin Tiny House
Mandy Harris
Austin Tiny House interior
East Austin Funky Tiny House Exterior
Mandy Harris
Boulder Interior
Boulder Interior
Boulder Tiny House front
Boulder custom light
Boulder tiny house porch lights
Rocky Mountain Tiny Houses Boulder side
Durango tiny house in winter
Durango Office
Durango Office
Durango Bookshelf
Durango Bookshelf
Durango Detail
Durango Detail
Shower Detail
Shower Detail

Tiny House Updates

  • Fall 2025 Update
  • 28′ Bandelier
  • 20′ Hermosa Tiny House
  • The Beatle 22′ Tiny House
  • 10×32 Hill Tiny House
  • Emerald Lake 10×32
  • Spring ’24 Update

Tiny House Magazine

RMTH was recently featured as "Builder of the Month" in issue 32. You can purchase this issue, or any other issue, by clicking here

Oh Yeah

Advertisements