Tiny Living in a Big World

  • About
    • Philosophy
    • The Tiny House Movement
    • How To Get Started
    • Delivery
    • Media
  • TINY HOUSES
    • Gallery
    • Features & Options
    • Shell Builds
    • Tiny House Size Limitations
  • Tiny Commerce
  • Tiny House Plans
  • Pricing
    • Financing
    • Contract Pricing Details
  • FAQ
  • Other Services
  • Contact

© 2026 RMTH

Privacy Policy

Terms & Conditions

Otsego Gooseneck Tiny House

September 14, 2016 By Greg Parham 22 Comments

Otsego Gooseneck Tiny House roofline

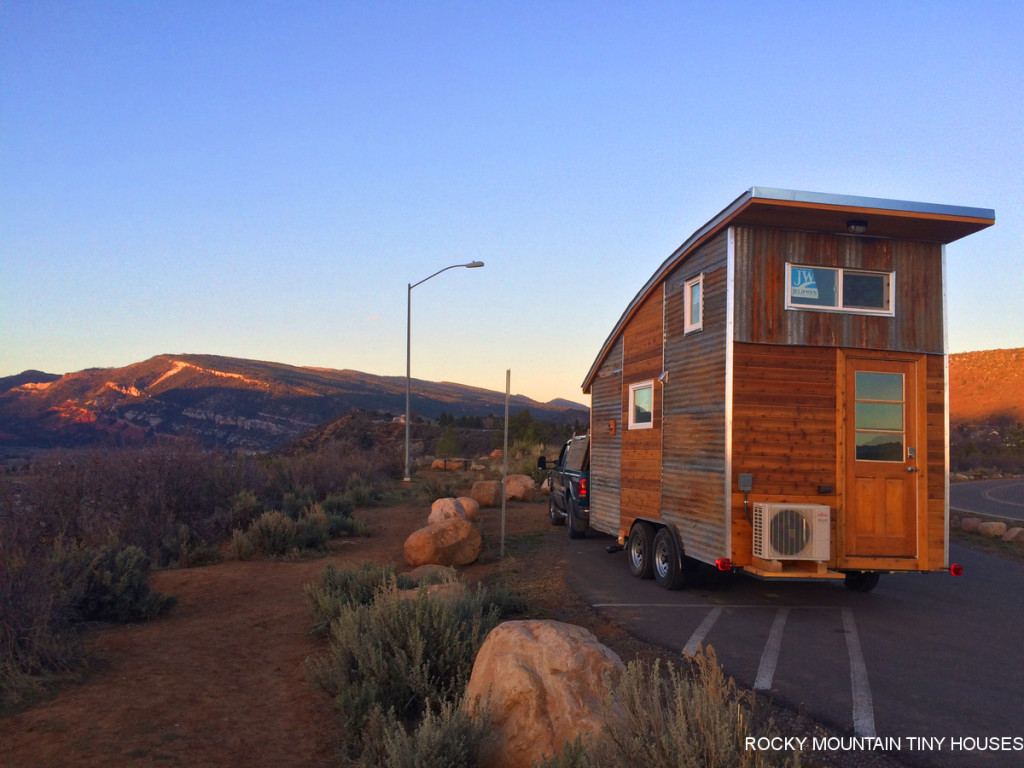
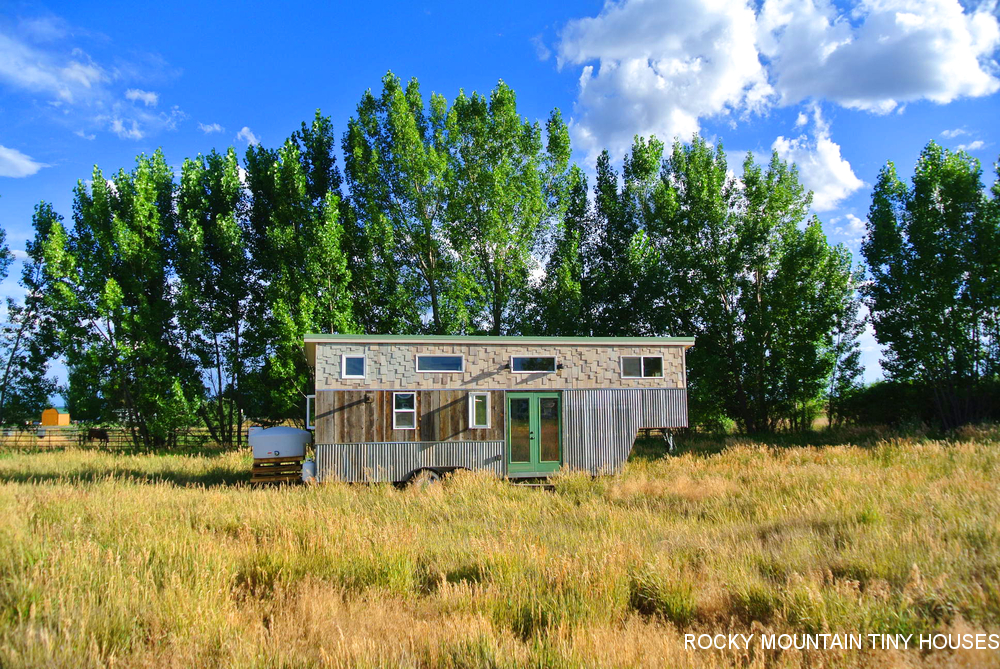
The Otsego Gooseneck is an off grid Tiny House custom designed for a father and son duo in upstate New York. It will primarily be used as a getaway/second home in the beautiful Catskill mountains until time allows for retirement at which point it will become a primary home. “Otsego” means “place of rock” in the local indigenous language.

Otsego Gooseneck Tiny House living room

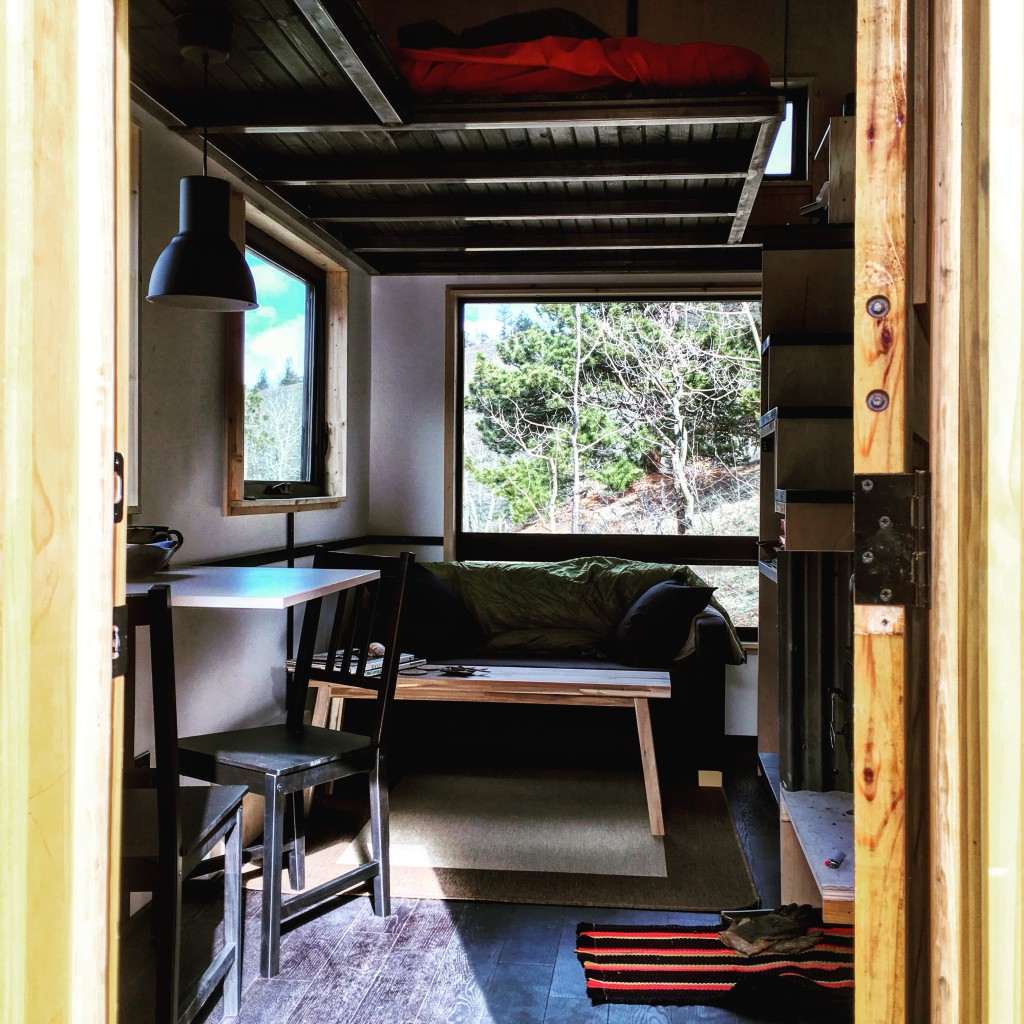
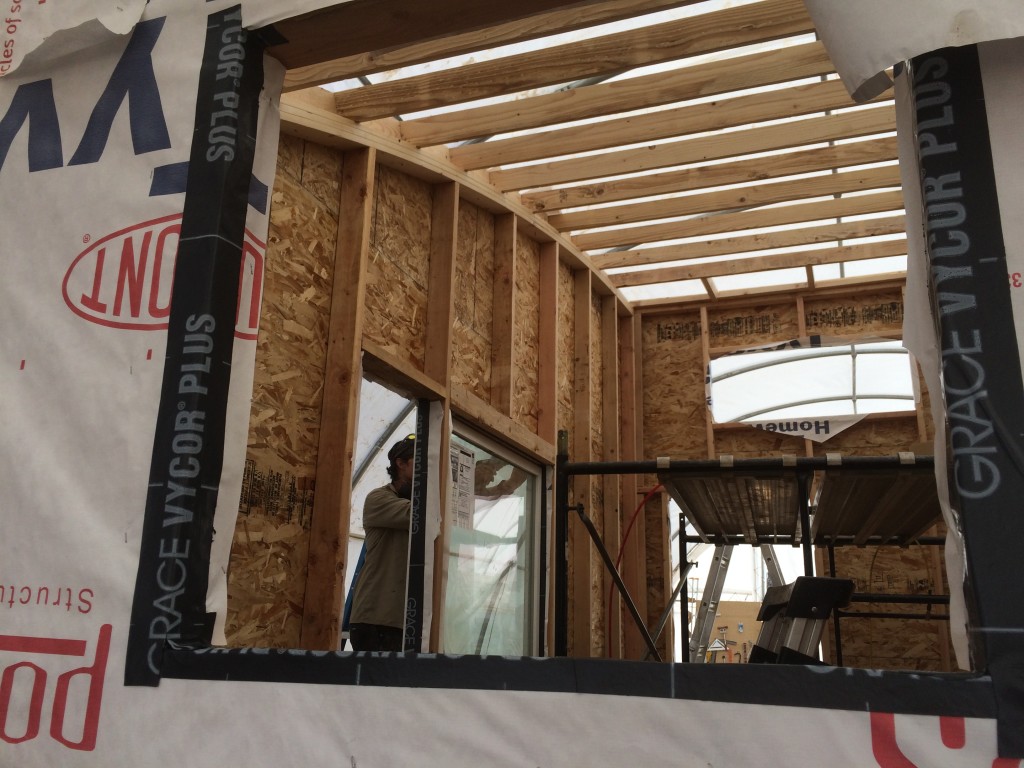
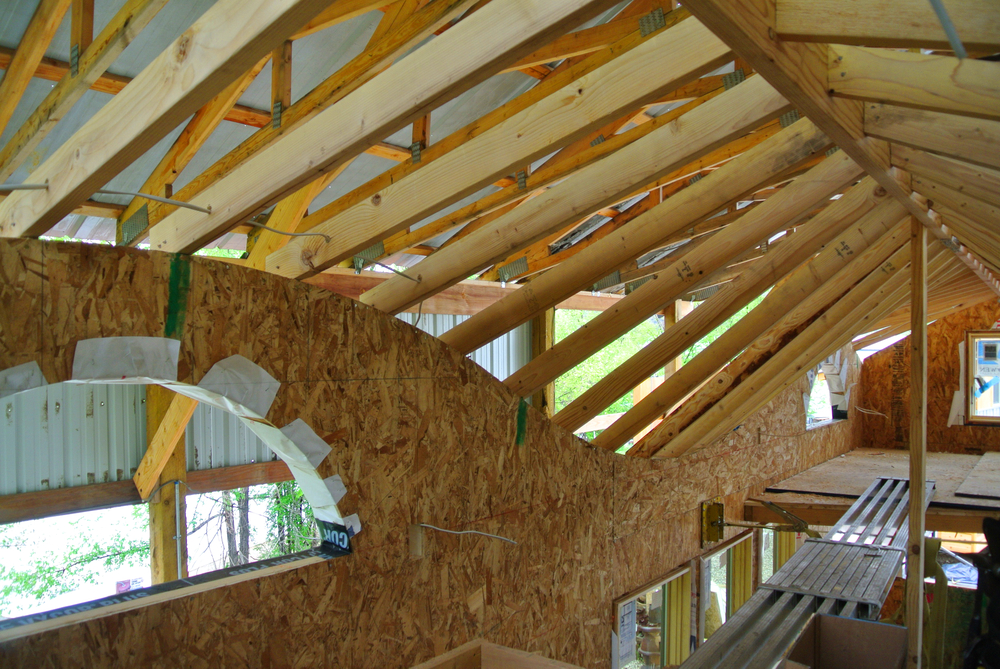
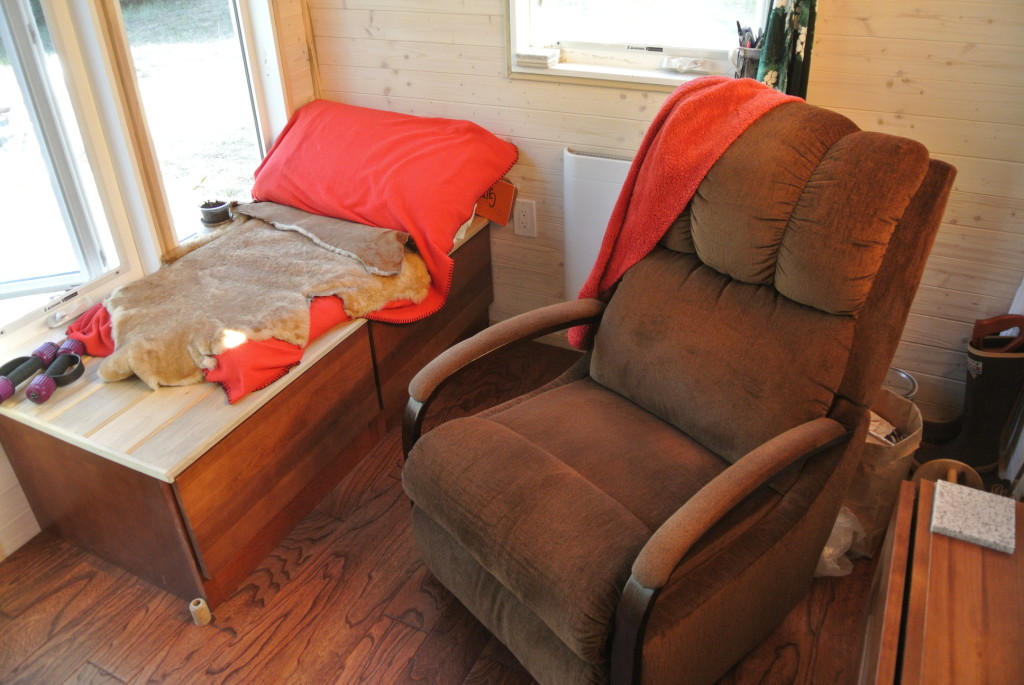
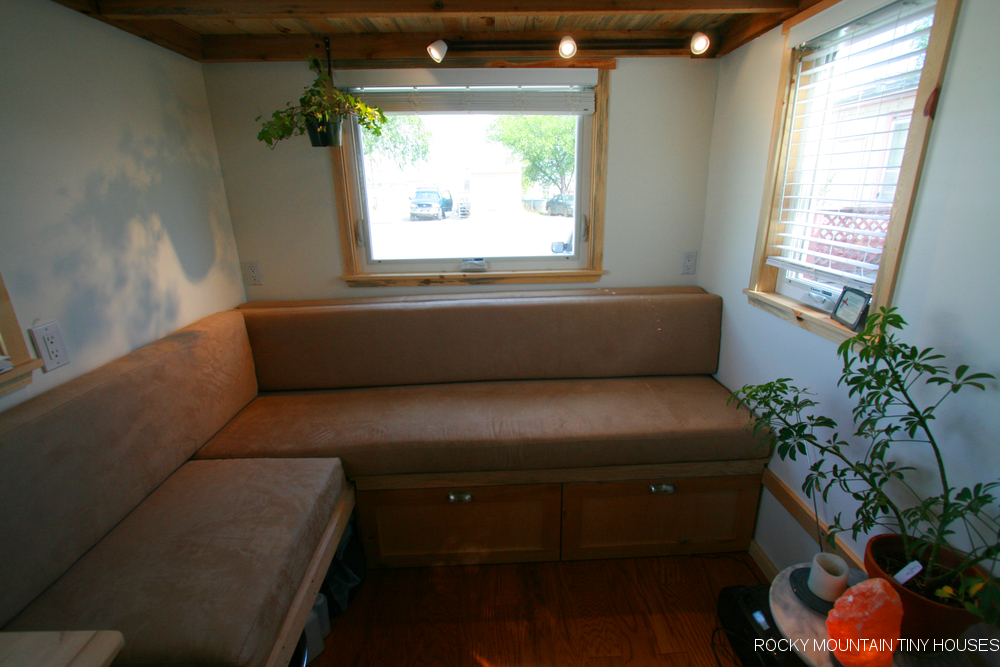
The house features a 24′ deck with a 7′-6″ neck for a total of 31′-6″ of living space. It is framed using Structural Insulated Panels for superior insulation in this bitter cold locale. The rigidity of the SIP’s also allowed us to use 1/4″ painted drywall as the main finish surface. Just one small crack above the door from being moved over 2,000 miles! The roof line is a popular shed on shed design where the central portion is sloped a little steeper where the height is not needed, and shallow sheds pop up over the lofts for extra head height. The photo above is looking rearward from the gooseneck which serves as the living room.  Sitting on a built in couch with storage below, one looks out through a very large picture window towards the mountains.

Otsego Gooseneck Tiny House siding windows

Otsego Gooseneck Tiny House sleeping loft stairs

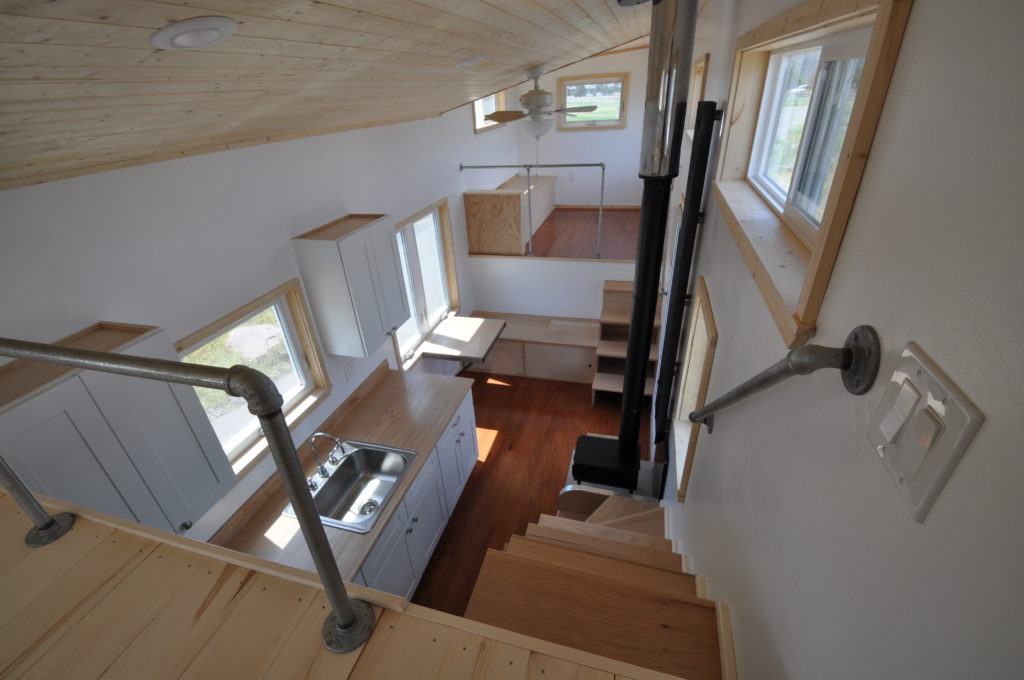
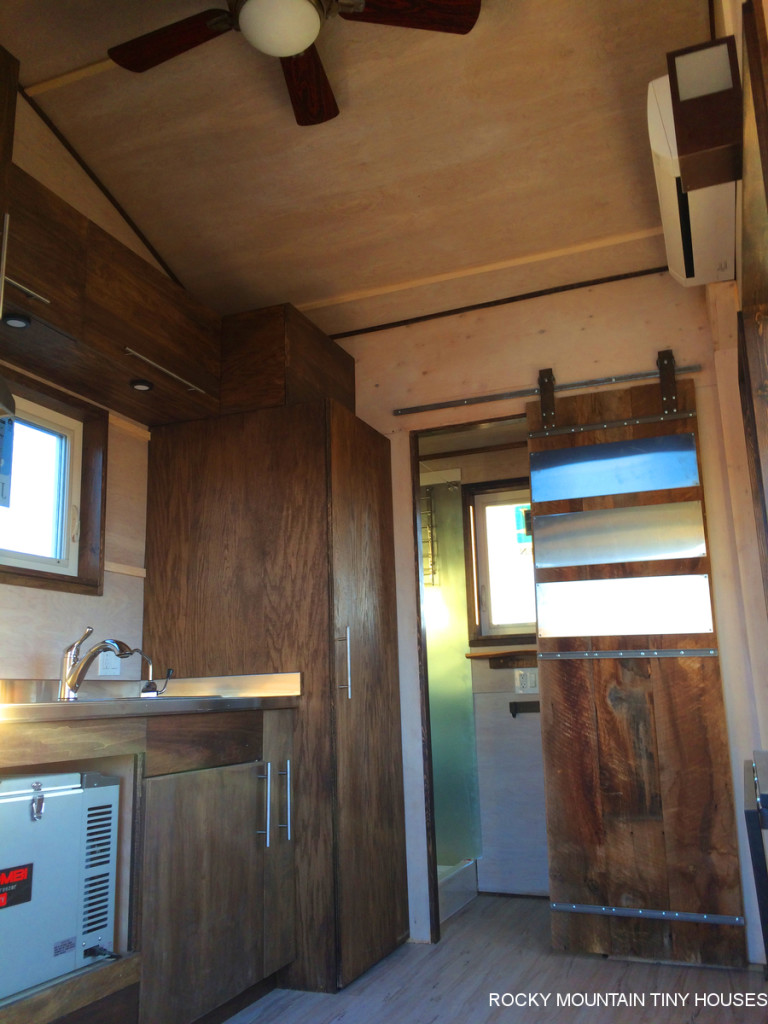
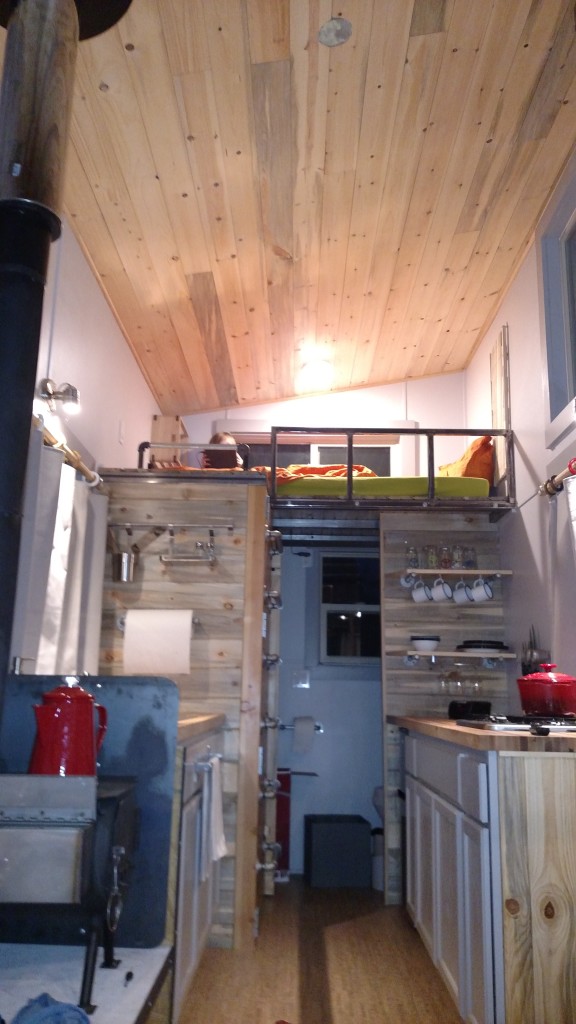
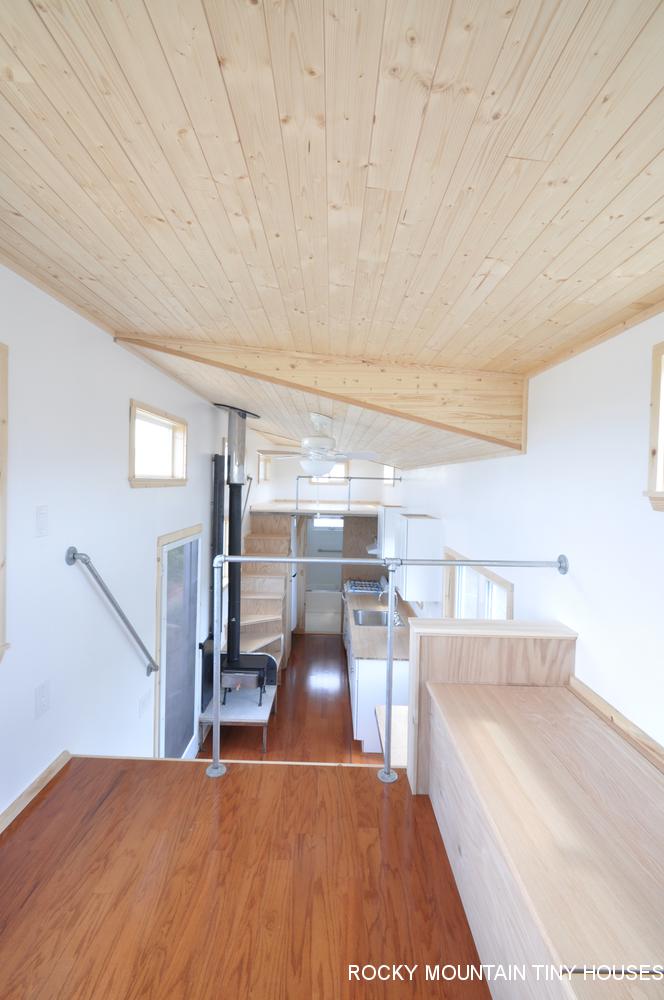
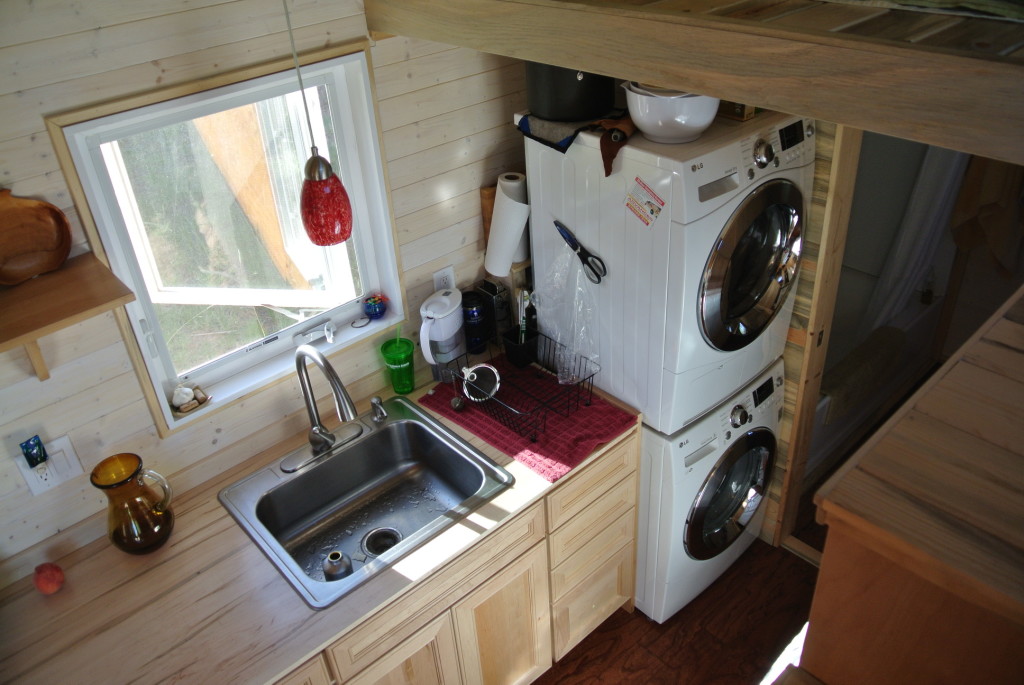
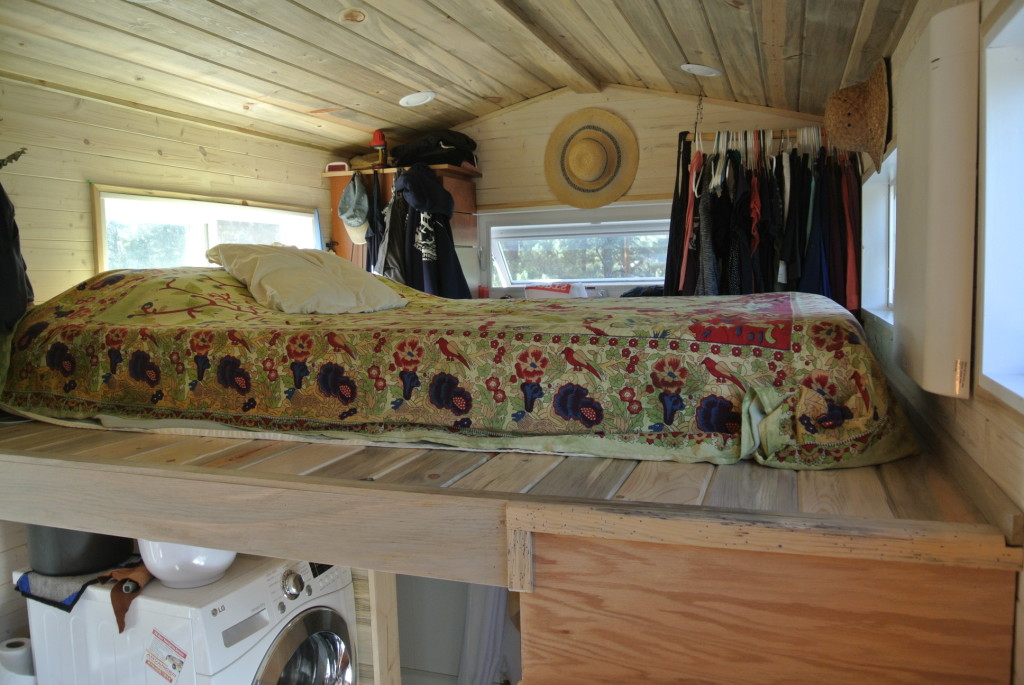
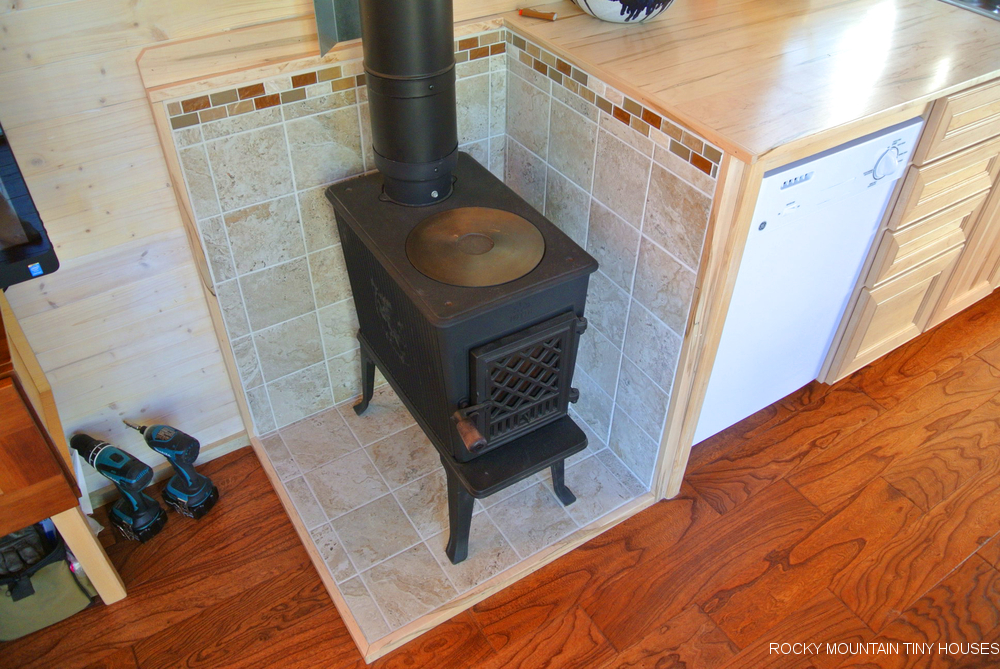
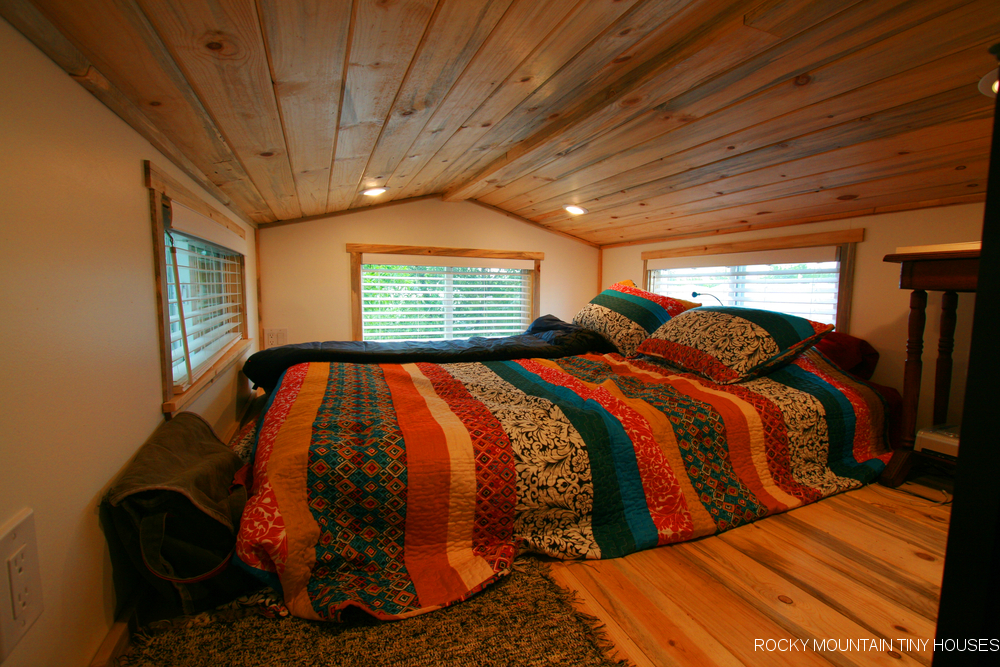
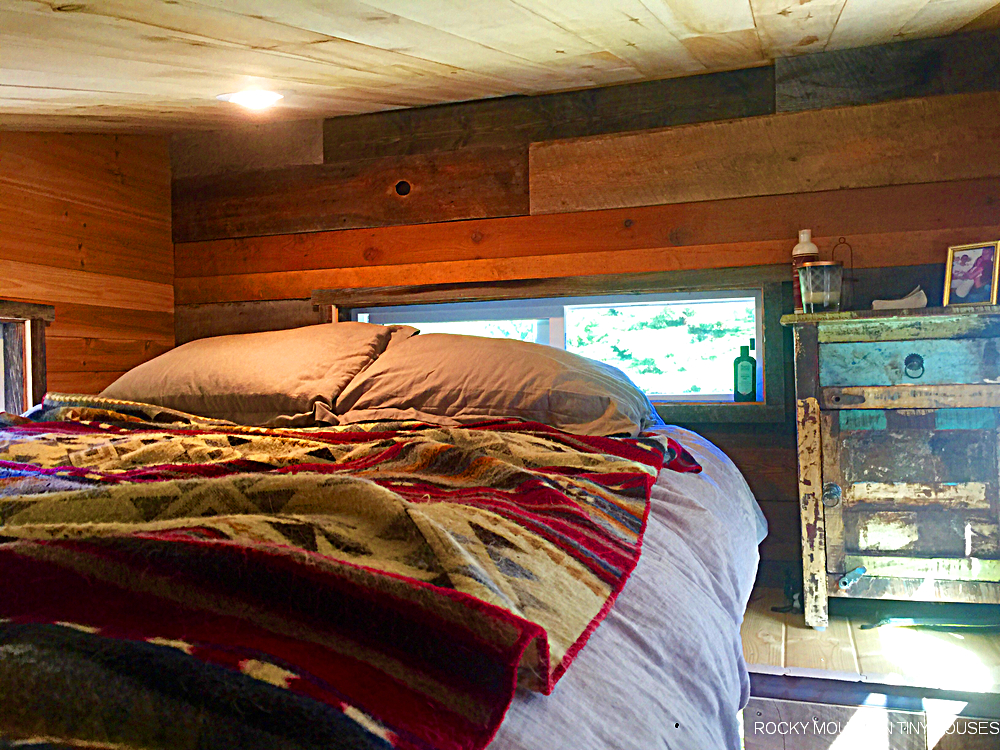
Looking down into the kitchen from the sleeping loft. This loft is large enough to hold a king with extra room at the foot of the bed if needed. Red Oak comprises the flooring, stair treads, kitchen counter, built in dining area, and living room couch. A Colorado Cylinder stove will provide ample primary heat while a propane RV furnace will provide backup heat.

Otsego Gooseneck Tiny House bathroom sliding barn door

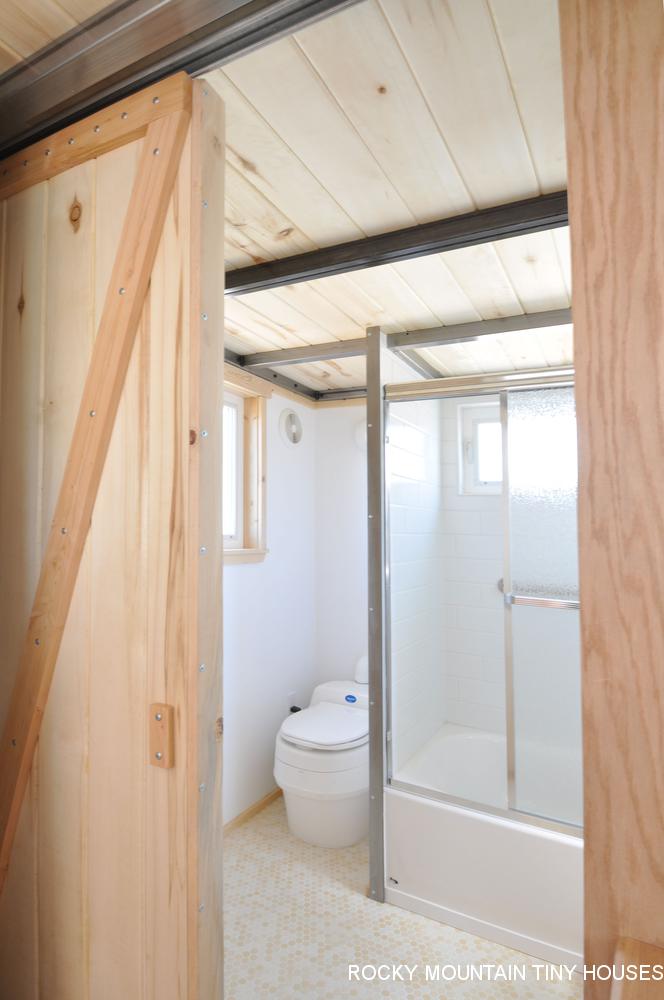
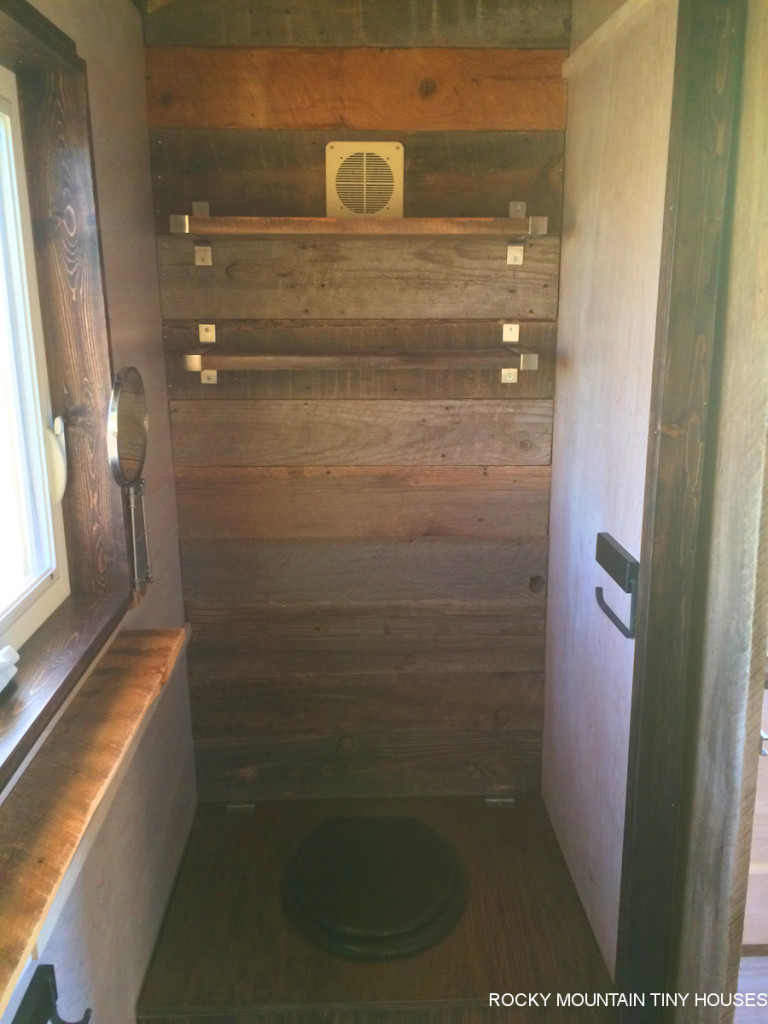
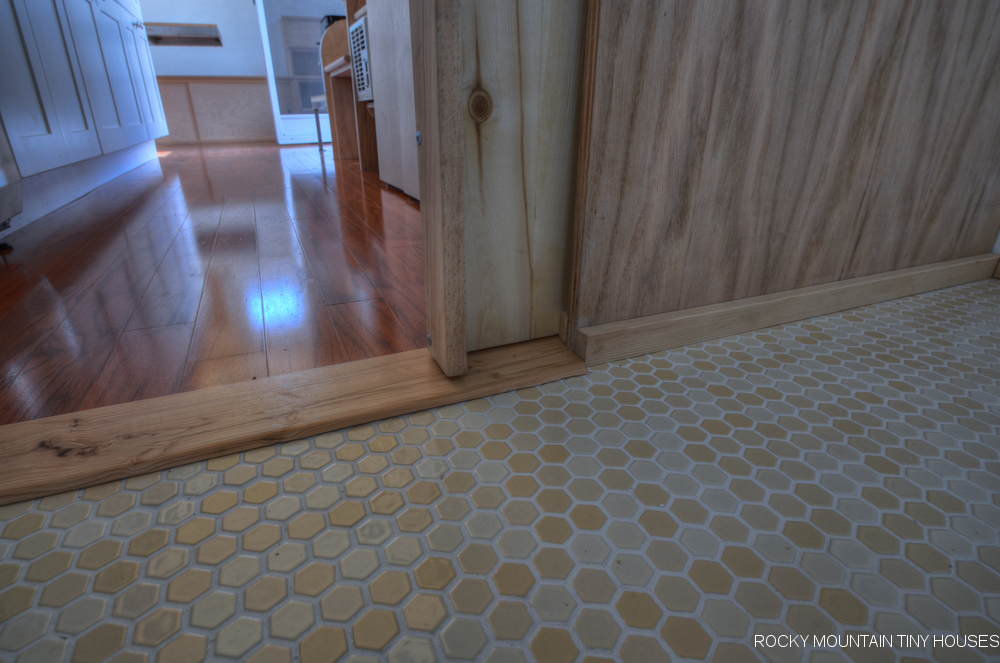
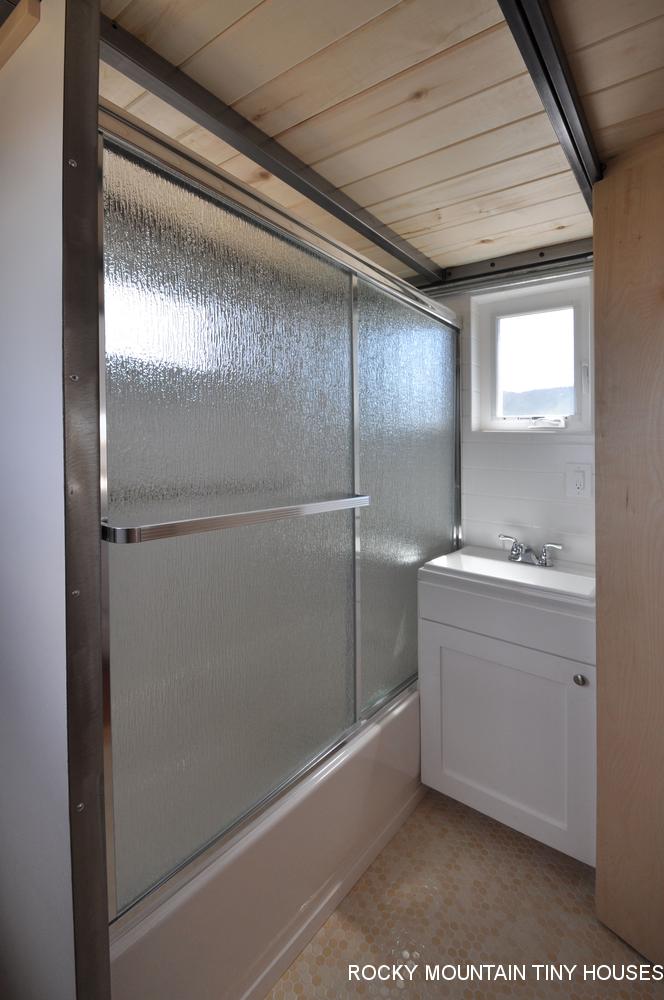
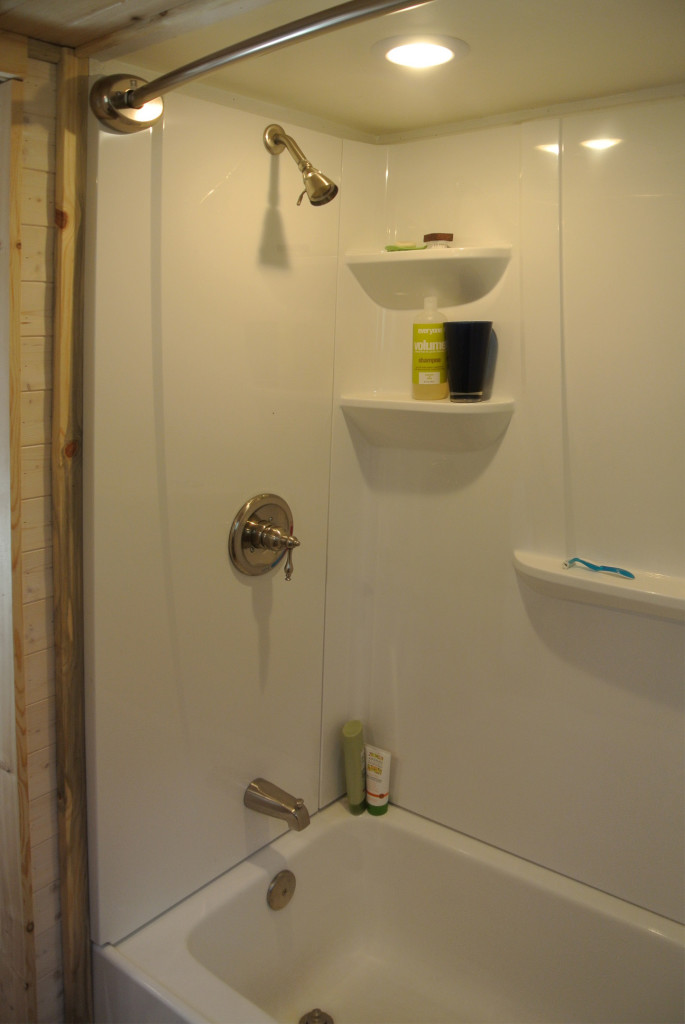
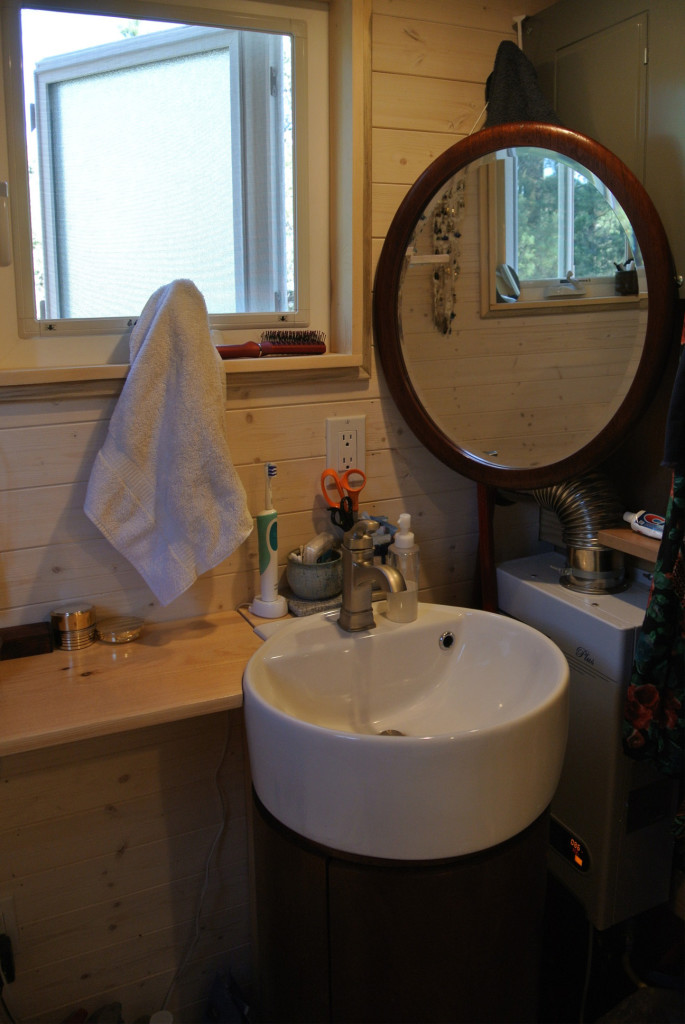
This full size bathroom features the Separett Villa, a full size tub with sliding glass doors, a vanity, and closet with off grid 55 gallon water tank and on demand propane heater. We left room for the customers to add shelving or a closet in front of the toilet area. The sleeping loft above was framed with welded steel for clean lines and to save a few inches of headroom. A gorgeous honeycomb tile comprises the floor while the tub walls were tiled in a very high end subway tile.

Otsego Gooseneck Tiny House bathroom floor tile

Otsego Gooseneck Tiny House full size tub glass doors

Otsego Gooseneck Tiny House dining room

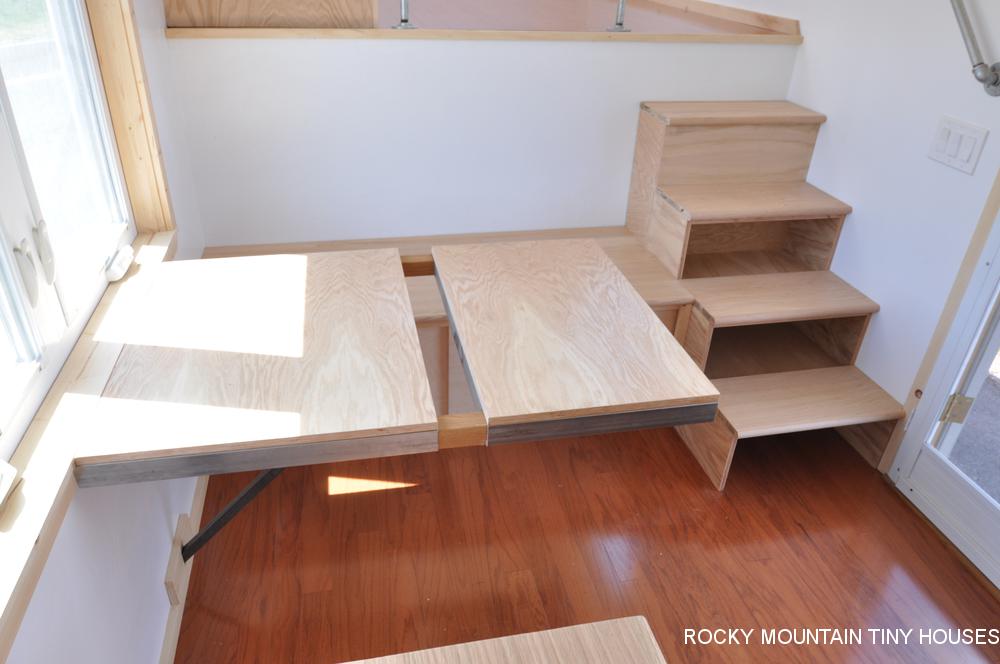
We designed and built the dining table to hold a leaf for bigger dinner parties. It can fit six people around the table! The leaf stores away hidden behind the kitchen cabinets when not needed.  The stairs up to the gooseneck have built in storage and the panels on the dining bench slide back and forth to access storage below as well.

Otsego Gooseneck Tiny House kitchen

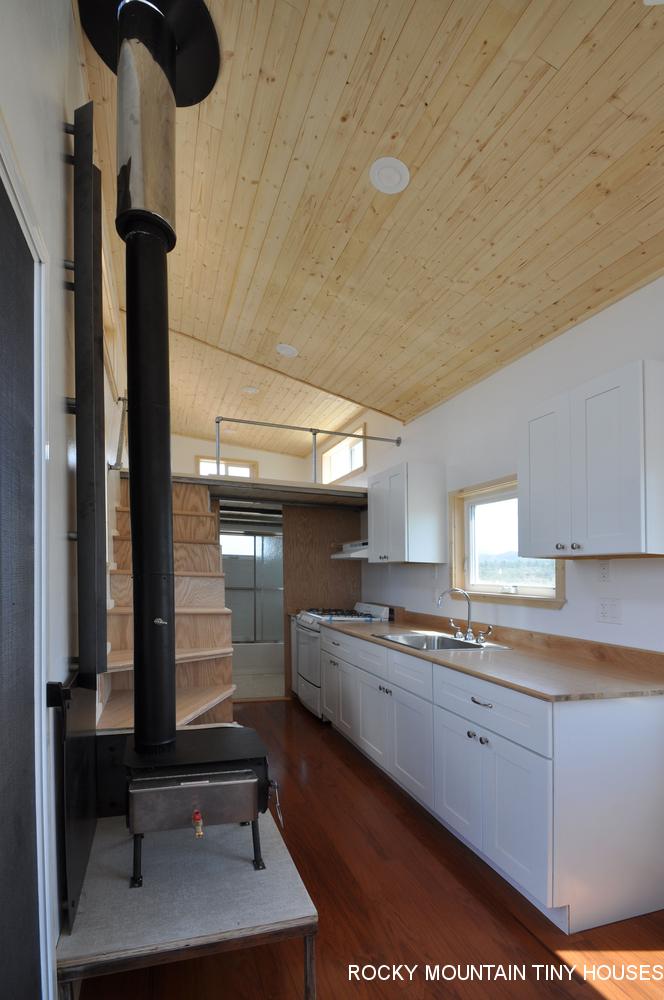
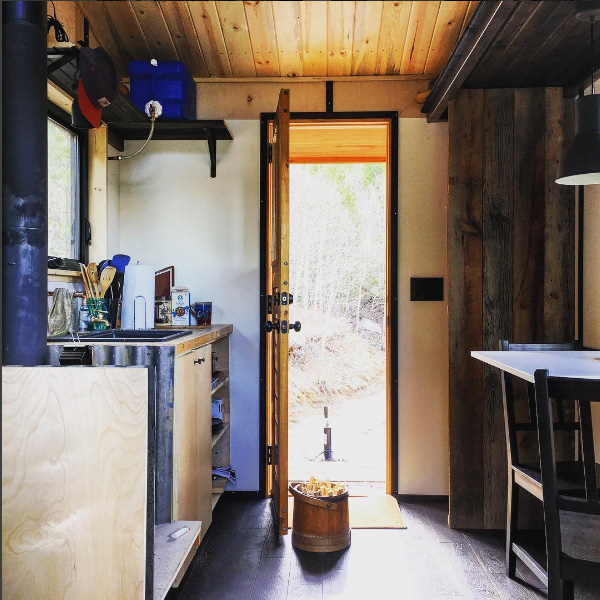
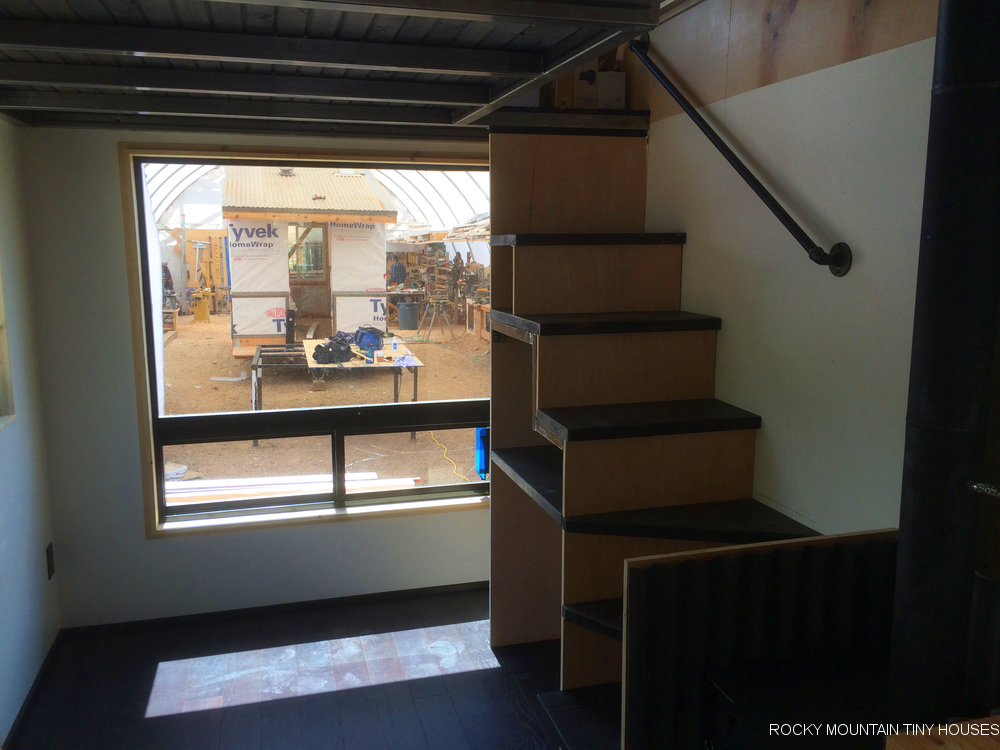
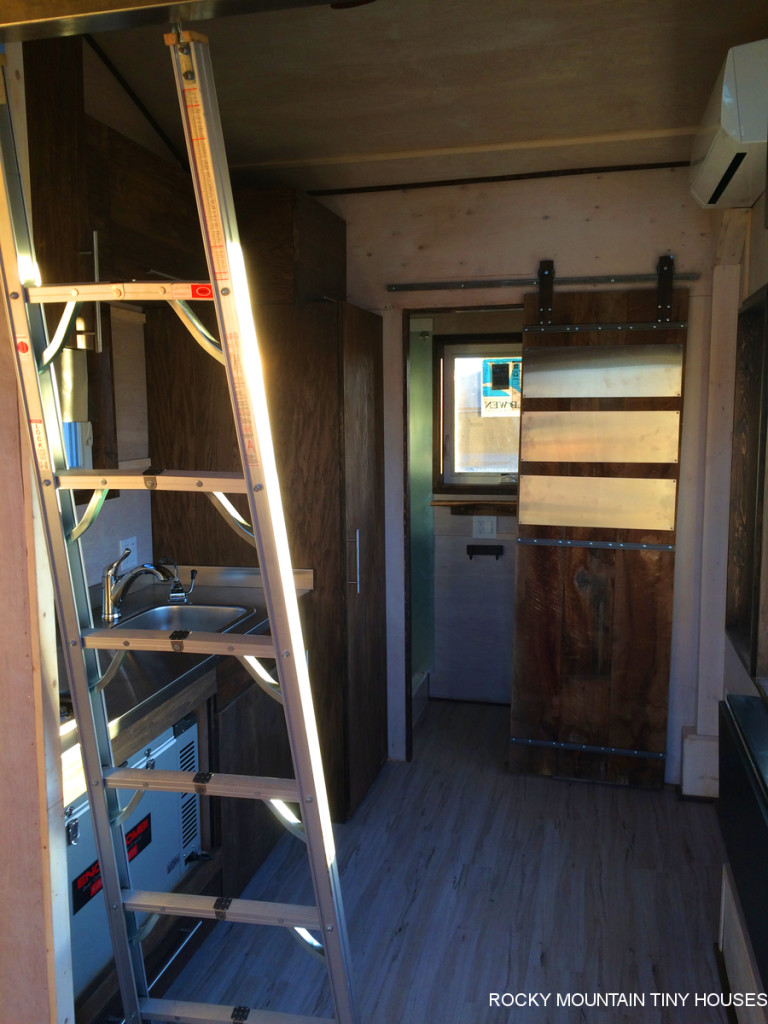
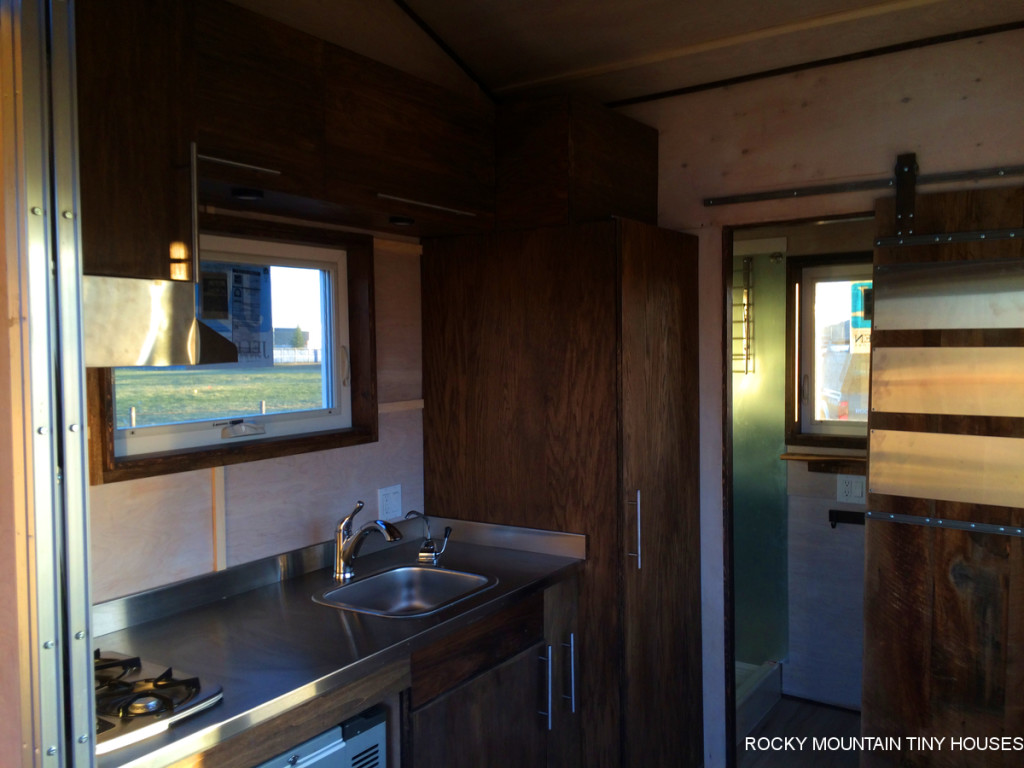
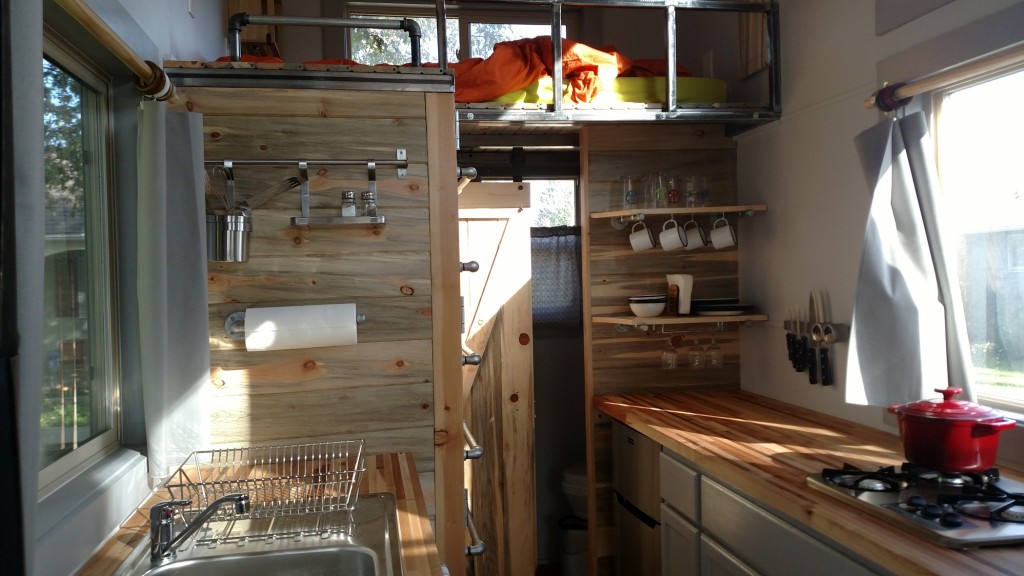
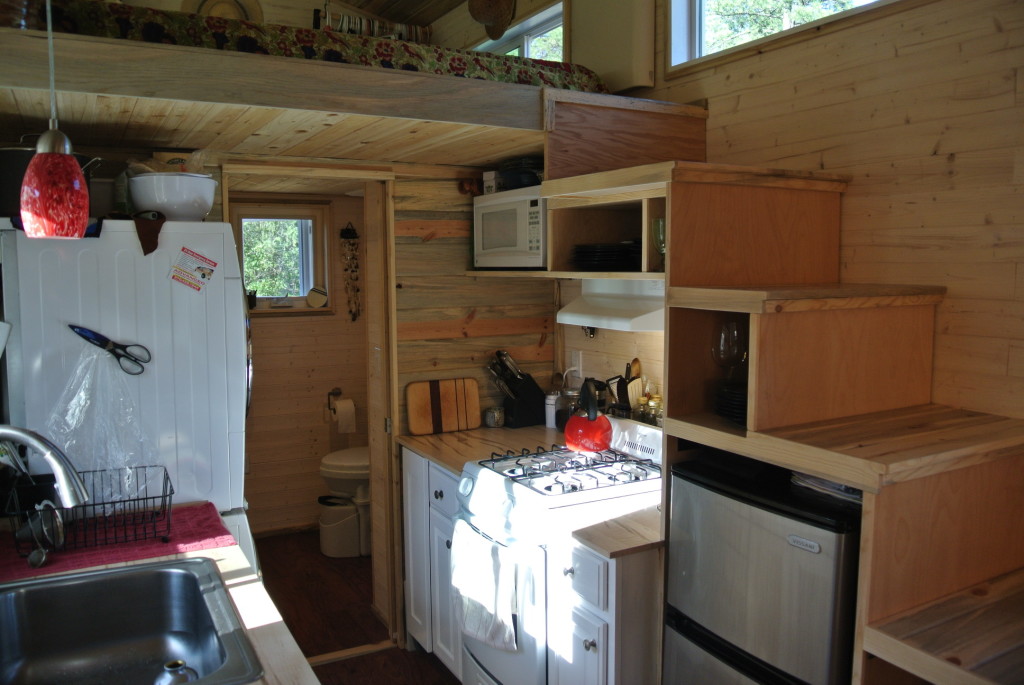
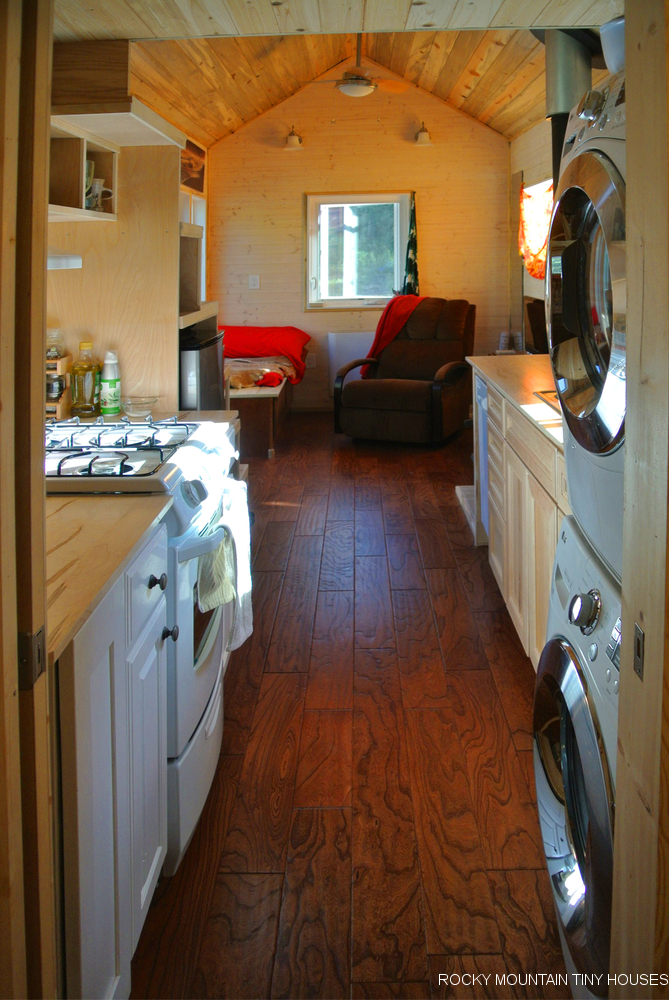
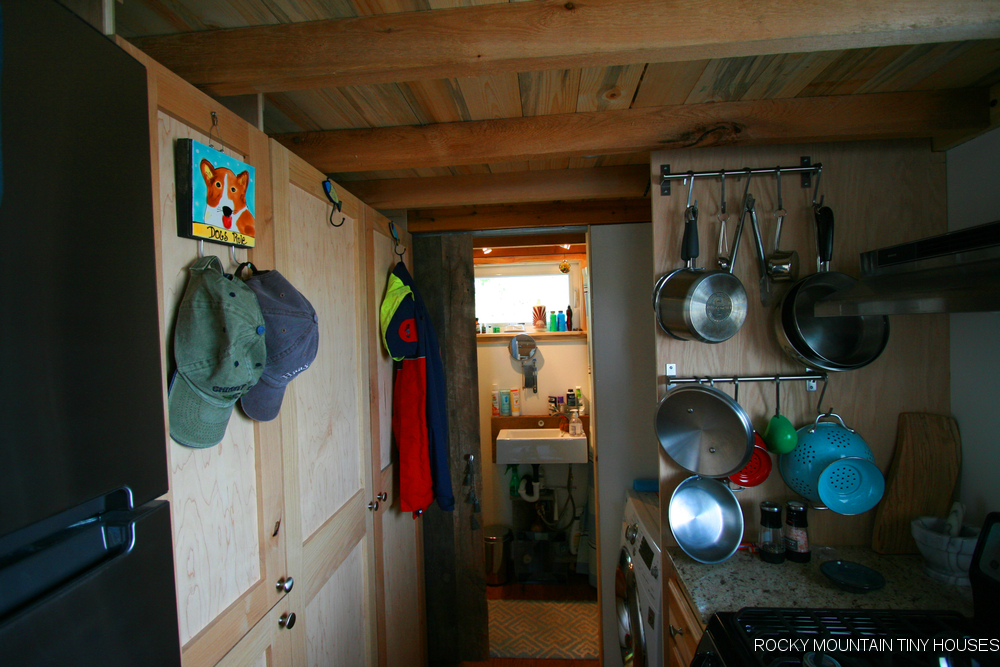
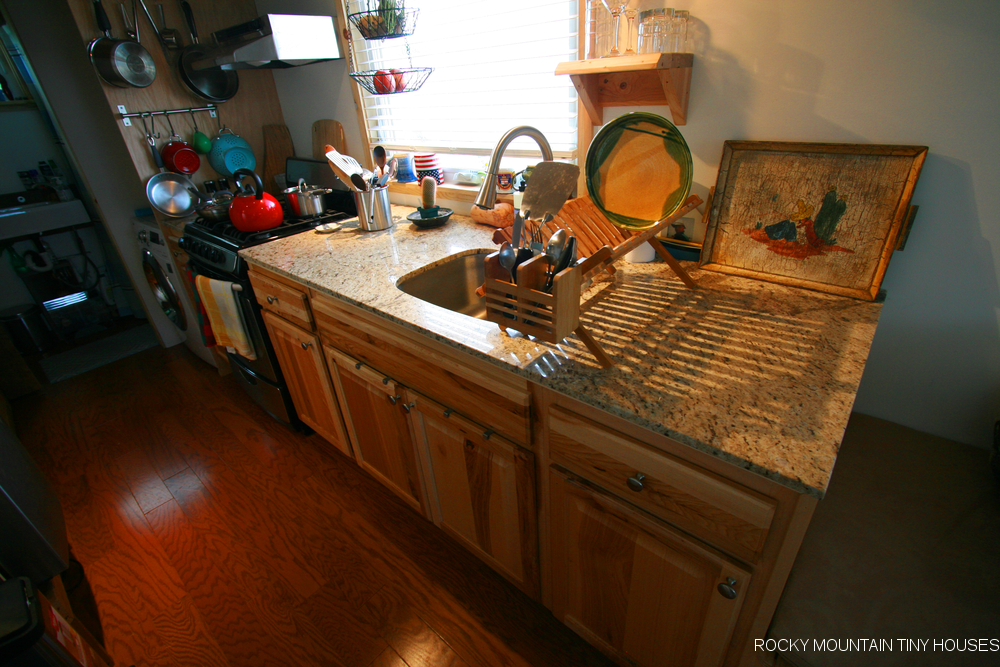
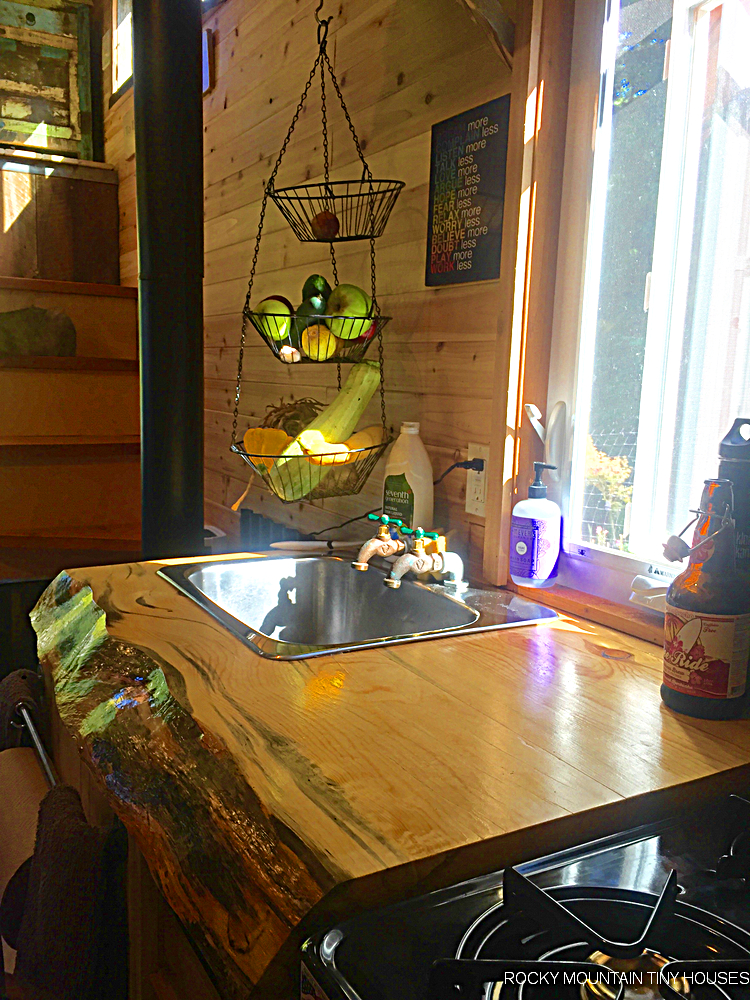
The kitchen is very complete with a large single bowl sink, 24″ range, range hood, 10 cu ft Fridge, and plentiful cabinet storage. Opposite the cabinets are beautifully crafted stairs up the to sleeping loft that also feature a ton of built in storage. We will have a video tour available as soon as we can finish editing.

Not shown in the photos is a 1.4kw Photovoltaic system that was installed at our shop before the house made the long journey to New York state. Complete with all off grid components, drywall finish, abundant oak finishes, and tile in the bathroom, the final weight came in at 15,000 lbs, with about 3,200 of that being on the tongue. You best have a truck that can take this load if you plan on building something similar! As pictured with these high end finishes, this build came in at $85k (not including the off grid solar). We could do a similar design with less expensive finishes for under $75k for those interested.


Filed Under: Tiny House Design

Silverthorne Gooseneck Tiny House

September 14, 2016 By Greg Parham 4 Comments

DSC_4409

This build is one of our most beautiful by far. Its custom designed gooseneck chassis and shed roof design (24 foot deck with an 8 foot neck) make this tiny house feel spacious allowing for standing room on the goose-neck for someone up to 6’10”. This customer chose SIPs for their build.

https://www.instagram.com/p/BFUP59VQqDt/?taken-by=safalls

The exterior of the house features reclaimed corrugated tin wainscotting and a center band of barn wood from an old structure in Montrose, Colorado. The top third siding consists of cedar shakes stained in a Cape Cod grey. The roof is a sage green pro-panel. The entry to the house is full lite outward swing french doors.

https://www.instagram.com/p/BFkg99IwqKR/?taken-by=safalls

This design utilizes the gooseneck area as the master bedroom and although it can fit a king size mattress, we opted for a queen to free up circulation space. The bed frame swings up so you can easily access storage below. The wall finish throughout the house is pine tongue and groove with a pickled white stain. The end wall in the master is drywall, painted with an accent color. The endwall in the opposite loft is recycled pallet strips.

https://www.instagram.com/p/BG5wcGSwqNX/?taken-by=safalls

The stairs leading up to the gooseneck have pull out drawers with custom cabinet faces to match the kitchen. Next to the stairs is a storage cabinet that the customer designed to fit their storage needs and provide a slight barrier between the bedroom and the rest of the house without closing off the space and keeping this house feeling open.

Above the stairs is a LG flat screen 49″ TV on a mount with  sound bar. The TV can be angled left right up and down so you watch from the bed, the secondary guest/storage loft and of course the kitchen and living area.

The living room, although not photographed here, has a twin sleeper sofa from Mayfair.com. It fits perfectly between the wood burning stove and the storage cabinet and allows for a spacious lounge area especially when both doors are open.

https://www.instagram.com/p/BIHGq_fDoiD/?taken-by=safalls

The wood burning stove is centered in the house. This customer was in love with The Hobbit stove by Salamader Stoves because of its glass panel that allows you to see the flame which provides great ambiance, but also because of the ability to have a different color other than black., AND lets be honest-it’s a great stove for any LOTR fan! The customer chose a Victorian tile for the stove heat shield.

https://www.instagram.com/p/BKV6pNVDw4q/?taken-by=safalls

https://www.instagram.com/p/BGNfq7-wqI0/?taken-by=safalls

The kitchen features all custom cabinets made in house. We recycled a butcher block for the stove side and went with the top dollar quartz on the sink side. The butcher block was finished with Waterlox which is great because its long lasting, easy to clean, water and  heat resistant. The quartz counter is not only an eye catcher, but will hold up to a lot of abuse- many consider it the most durable counter top option out there.

One of the neatest features of this house is the walnut dining table that spindles out on a bicycle frame from under the sink side counter tops. It folds out of the way when not needed to free additional living space, can be locked in at 90 degrees to use as additional kitchen prep space, or can be locked in at 180 degrees for use as a dining table for 2 or 3.

https://www.instagram.com/p/BG-qdSaQqEa/?taken-by=safalls

A Freezer bottom fridge sits on a platform that houses a backup propane heater. Across from this is the utility closet with an LG washer/dryer combo, electrical panel, water heater, and off grid water components.

The bathroom features more of the barn wood in the sliding barn door, storage wall and sink cabinet.  A beautiful moss green glass subway tile wall defines the rear wall, and the room is completed with a Separett Villa composting toilet.


The floors are Pergo’s stylish and affordable Outlast flooring.

https://www.instagram.com/p/BG8QUl-wqPQ/?taken-by=safalls

https://www.instagram.com/p/BKV8EB3Dry_/?taken-by=safalls

https://www.instagram.com/p/BGyG93OwqPW/?taken-by=safalls

This house was slated to be our masterpiece display for the 2016 Tiny House Jamboree, but unfortunately circumstances did not allow for us to bring it. Regardless, it’s a fantastic build and we are proud to have designed and constructed this gem at our shop in Durango, CO USA.

The final dry weight as pictured came in at 13,200 lbs. The home owners contributed a significant amount of elbow grease to help keep their costs down, but for those interested in a turn key build for something similar as shown, expect to pay around $90,000.


Filed Under: Tiny House Design

Ponderosa 24′ Tiny House

June 20, 2016 By Greg Parham 17 Comments

Ponderosa 24' Tiny House exterior

A local woman commissioned us to build this spectacular 24′ tiny house. This region of the state, and especially the property where the house is placed is abundant in the mighty pine species. There is quite of bit of pine in this house including white washed tongue and groove walls, beetle kill pine ceilings, and clear pine trim. Jennifer was really interested in providing materials, fixtures, and good ole fashioned elbow grease to help keep the project costs down, and we were happy to help her do so. If we were to replicate this design, turn key costs would be around $70k on our end, Jenny only spent around $55k after factoring in all of her contributions. Little known fact that in some circumstances, we do allow customers to provide their own materials and labor!

Ponderosa 24' Tiny House interior1

Since we knew for certain this house was not ever going to be parked at an RV park, we placed the door on the driver side, along with most of the glazing to maximize passive solar and views to the south.  The first thing one sees upon entry is a Jotul 602 woodstove framed by stunning tile work for the heat shield. Towards the front of the trailer is lounging space.

Ponderosa 24' Tiny House living room

The middle of the trailer is occupied by storage stairs and the kitchen which features a slim dishwasher, 20″ propane range, microwave, 20″ sink, small fridge, and beautiful rustic maple countertops. Jennifer opted for stackable high efficiency washer and dryer units in lieu of the combo unit.

Ponderosa 24' Tiny House kitchen sink

Ponderosa 24' Tiny House storage stairs

In the rear of the trailer lives the bathroom. This design allowed for a full size tub/shower, a composting toilet, a small round vanity, and room to spare for the utility area.

Ponderosa 24' Tiny House tub

Ponderosa 24' Tiny House bath vanity

An easy climb up the stairs leads to a bright and airy sleeping loft with even more storage for clothing and belongings.

Ponderosa 24' Tiny House sleeping loft

Some quick facts for the curious:

Dry weight is about 10,000 lbs. This is a stick frame build with spray foam insulation,roughly R-24 in the floor/walls and R-38 in the ceiling. Primary heat is woodstove, Envi electric backup heat. Ceiling fan air conditioning (and 7,200 feet elevation!) 50A electric service, propane water heater and range.

For those interested, you can watch the video tour here on youtube. We’re also sharing a few more images we took of this beautiful house below the video.

Ponderosa 24' Tiny House woodstove

Ponderosa 24' Tiny House kitchen view

Filed Under: Uncategorized

Turkey Flats 24′ Tiny House

June 15, 2016 By Greg Parham 8 Comments

Turkey Flats tiny house mountains
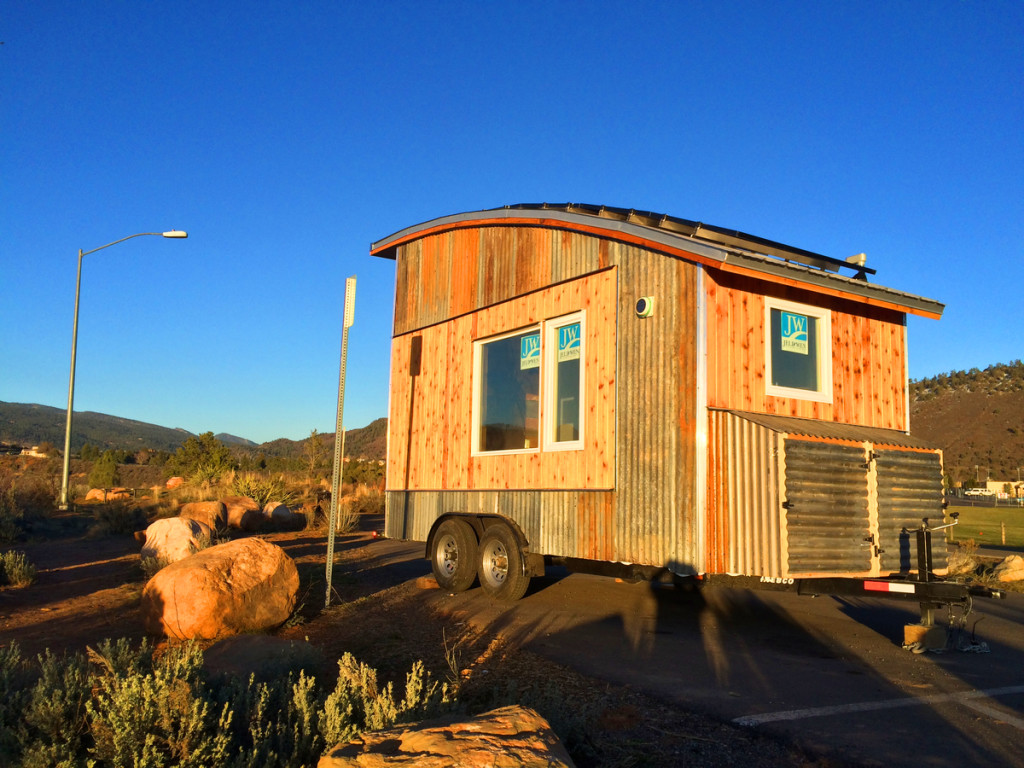
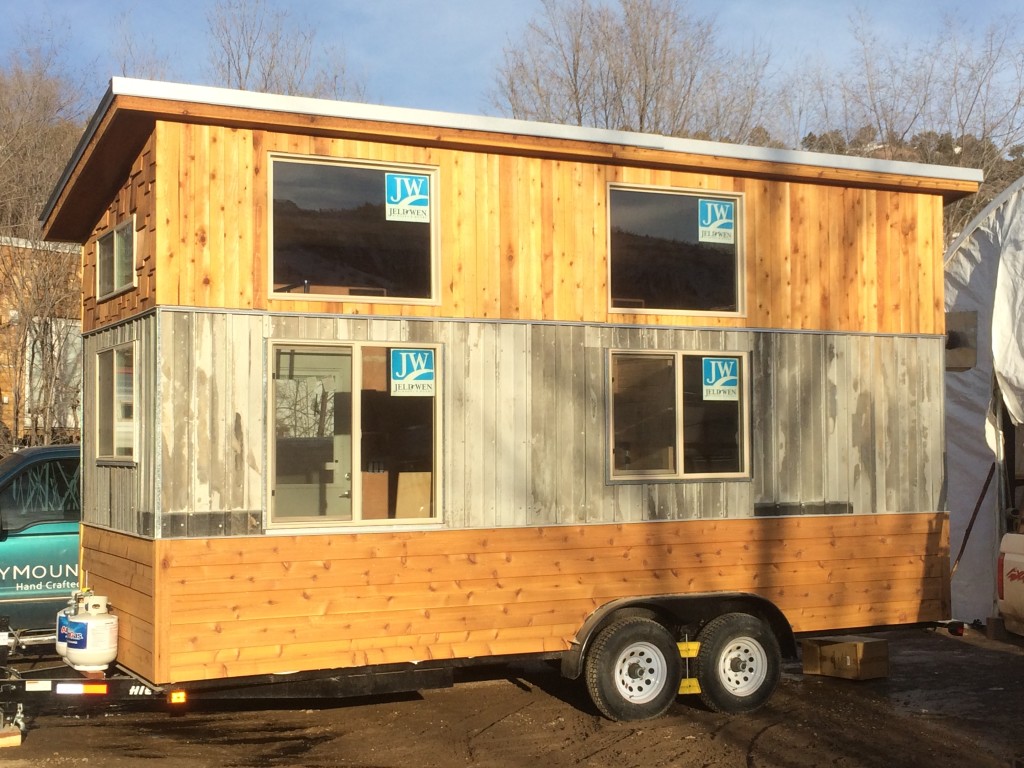
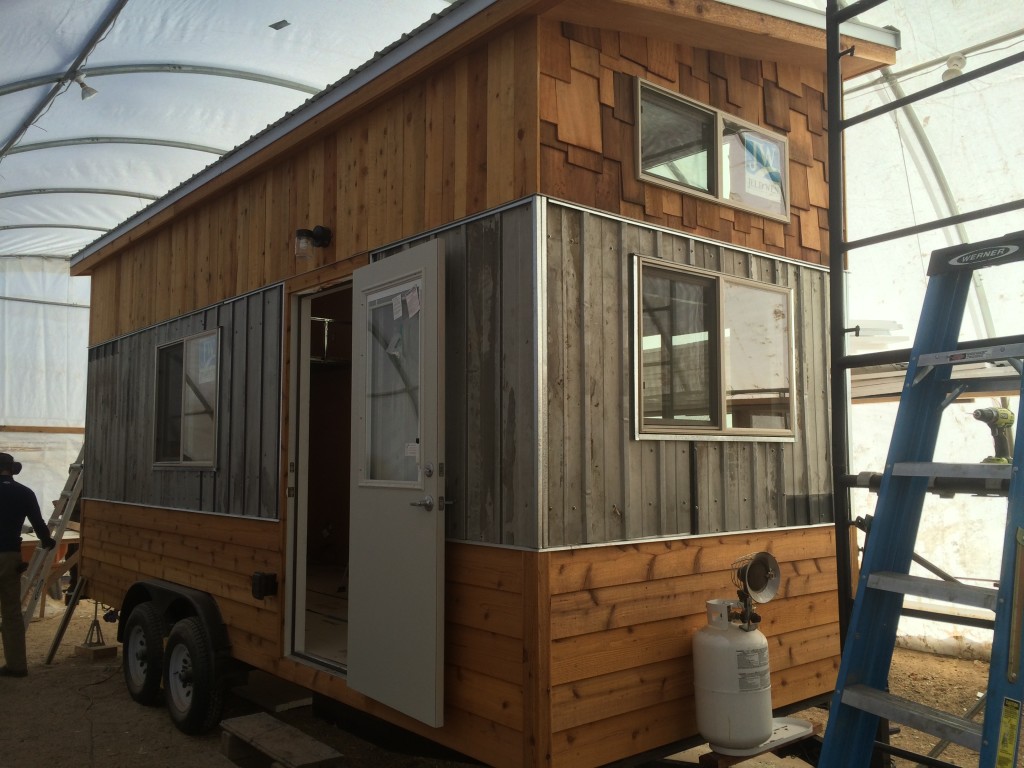
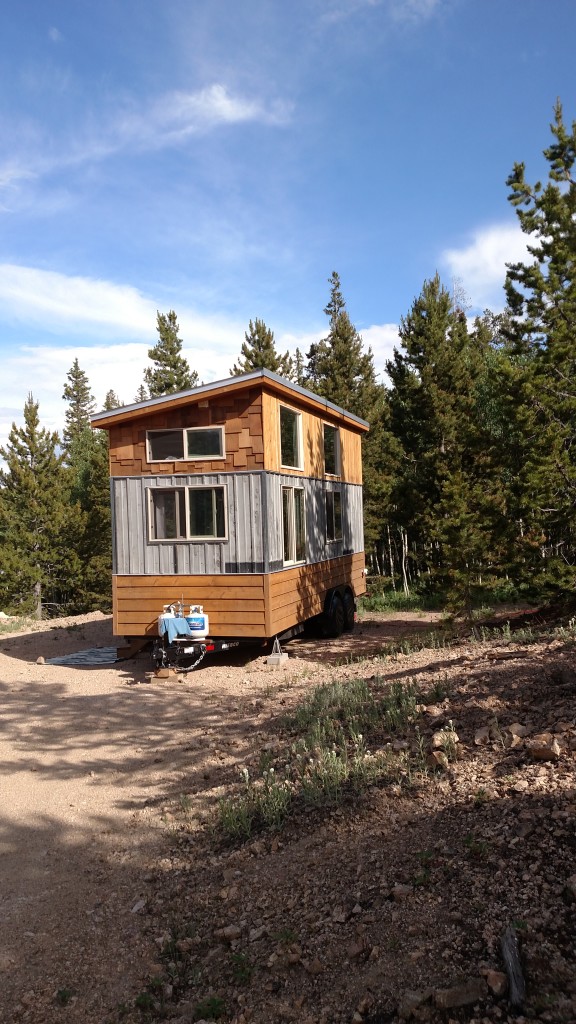
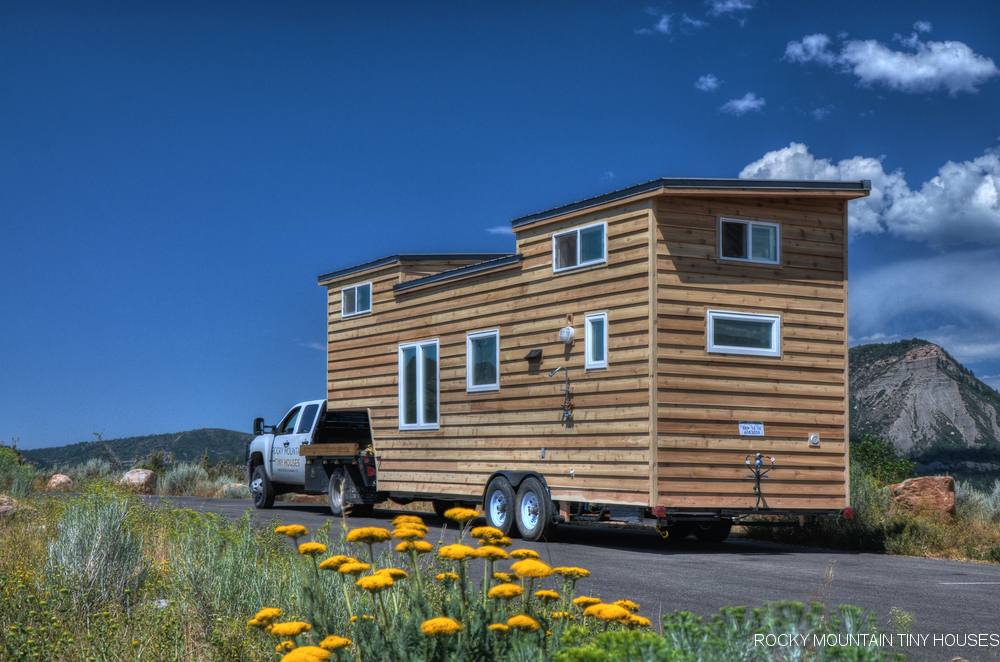
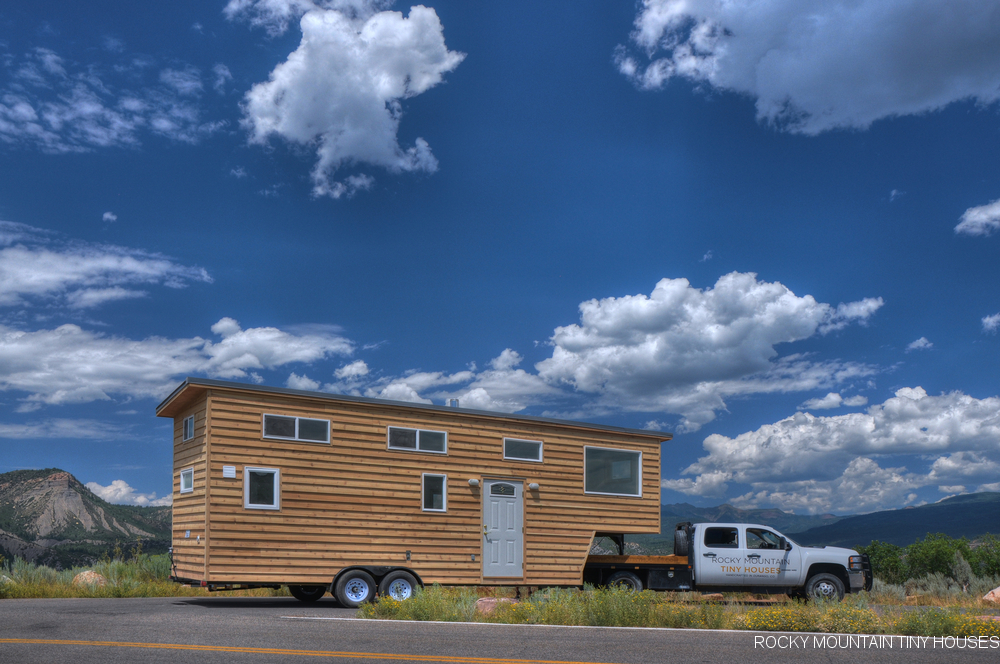
An awesome gentleman in Grand Junction approached us about building this dream tiny home. He was having trouble finding a builder that could customize the house to his needs and stay within budget, until he found us of course! It’s a simple, yet effective layout with some very nice touches thrown in.  Turkey Flats is the name of Jon’s favorite hiking trail!

We started with a 24′ trailer chassis and stick framed a main 10/12 gable roof with a 3/13 dormer pitch above the sleeping loft. A side entry door leads into the large living space where there is an L-shaped couch that convert into a queen size bed for guests or daytime lounging. There is fully accessible storage below the couch.

TURKEY FLATS PLAN

From the living space you can go up the storage stairs into a large and bright sleeping loft, or walk into the kitchen space which features a long granite countertop with undermount sink, a 24″ gas range, and ample wall space for shelf/upper cabinet customization. Opposite the counter is a 10 cubic foot fridge with a pantry space and a large closet. There is a combo washer/dryer on your right before heading into the bathroom.

In the washroom is a simple 32″ shower, a Nature’s Head compost toilet, and a small wall mount sink trimmed out with barn wood. The bathroom is closed off with a sliding barn door. Jon opted for clean white walls, a beetle kill ceiling, and red oak flooring, stairs, and built ins. The cabinets are stock Hampton Bay Hickory with the sand colored granite being hand selected from a local stone yard.

This tiny house weighs approximately 10,000 lbs dry and pricing starts at $64k for those wanting something similar.

While we have some nice exterior photos, we are waiting for interior photos to come in. In the meantime, please enjoy some videos we put together, one of the delivery of the house over the world famous Red Mountain Pass, and the other a short tour.


Turkey Flats 24 tiny house exterior mountains

Turkey Flats 24 tiny house couch

Turkey Flats 24 tiny house kitchen 1

Turkey Flats 24 tiny house granite countertops

Turkey Flats 24 tiny house loft


Filed Under: Tiny House Design Tagged With: 24 foot tiny house, custom tiny house, Rocky Mountain Tiny Houses, tiny house red mountain, turkey flats tiny house

The Mac Shack

May 28, 2016 By Greg Parham 6 Comments

Plans can be purchased for this design HERE

There is a super cool chica living in McKinleyville, CA with the last name of McDermott. This is her Mac Shack!

The Mac Shack Tiny House exterior

Based on the same 14′ foundation of the Upslope, we included a bathroom in this build and personalized it to meet her needs. It weighed in at 4600 lbs dry on a single 7k axle. Costs for this build as pictured came in at $31k.

Notable features are rusty corrugated wainscot on the exterior, cedar t&g main interior walls, handscraped engineered flooring, barnwood accent walls and shelving, a thick live edge countertop, 20″ slide in range, loft storage above the bathroom, stairs to access the loft, a Hobbit woodstove, a sheltered fold down porch, and a handcrafted Dutch door.

The Mac Shack tiny house living room

The Mac Shack tiny house kitchen

The Mac Shack tiny house spice rack

Mac Shack tiny house hammock

The Mac Shack Sleeping Loft

Filed Under: Tiny House Design Tagged With: 14 foot tiny house, 14' tiny house, california tiny house, custom tiny house, Rocky Mountain Tiny Houses, rustic tiny house, single axle tiny house

The Upslope Tiny House

May 15, 2016 By Greg Parham 13 Comments

The Upslope Tiny House
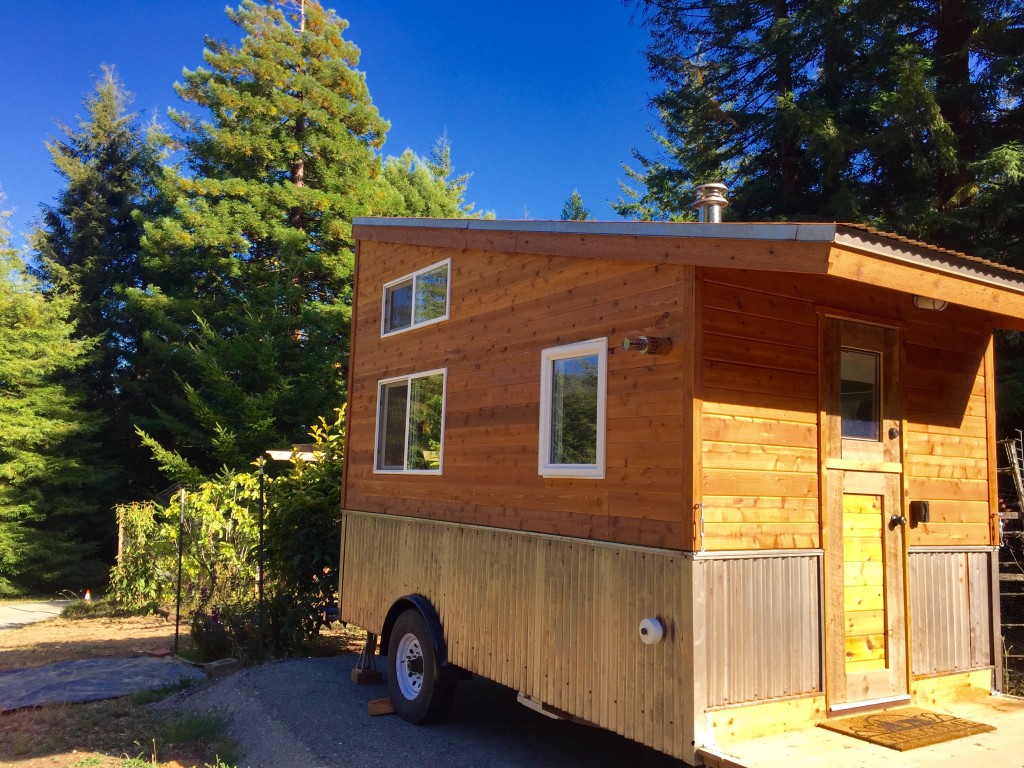
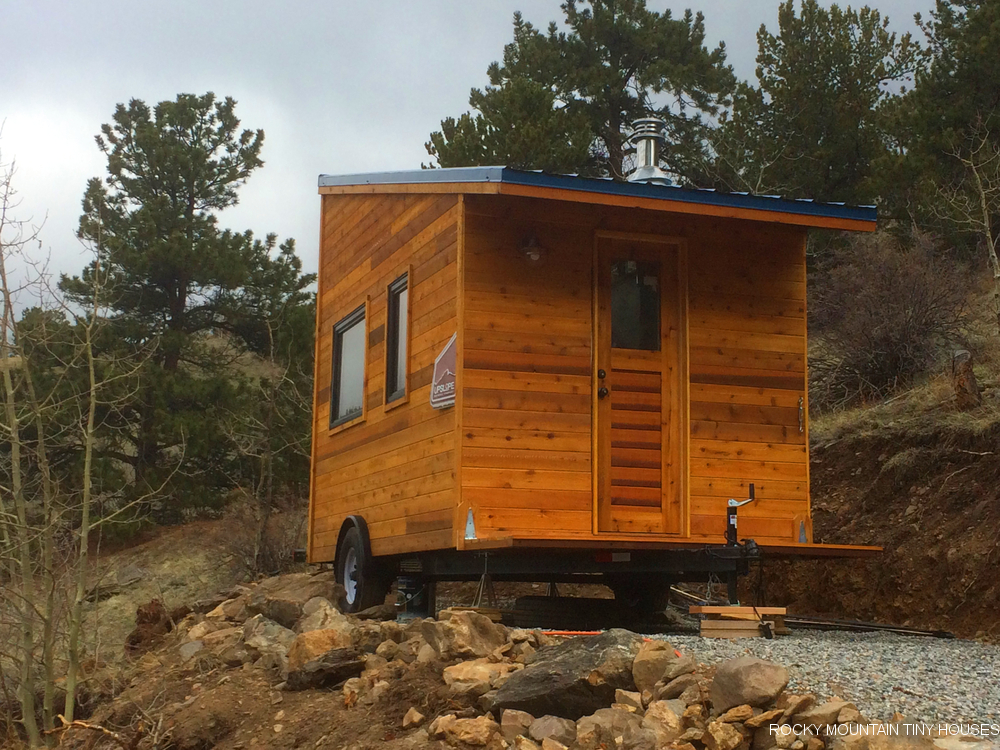
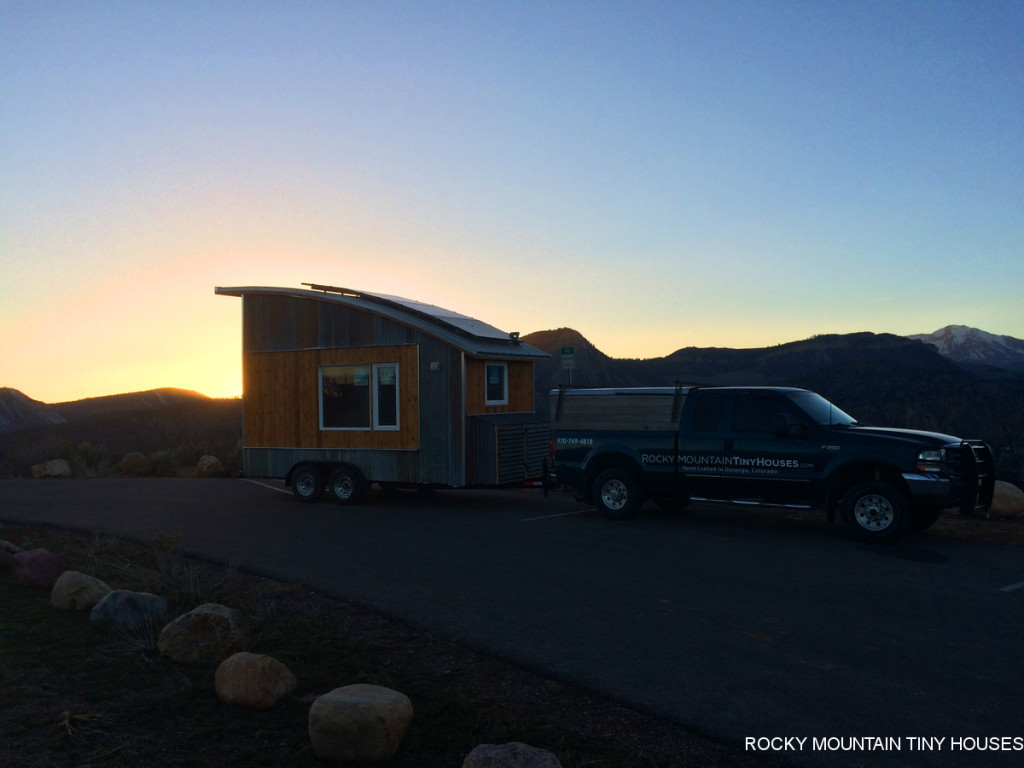
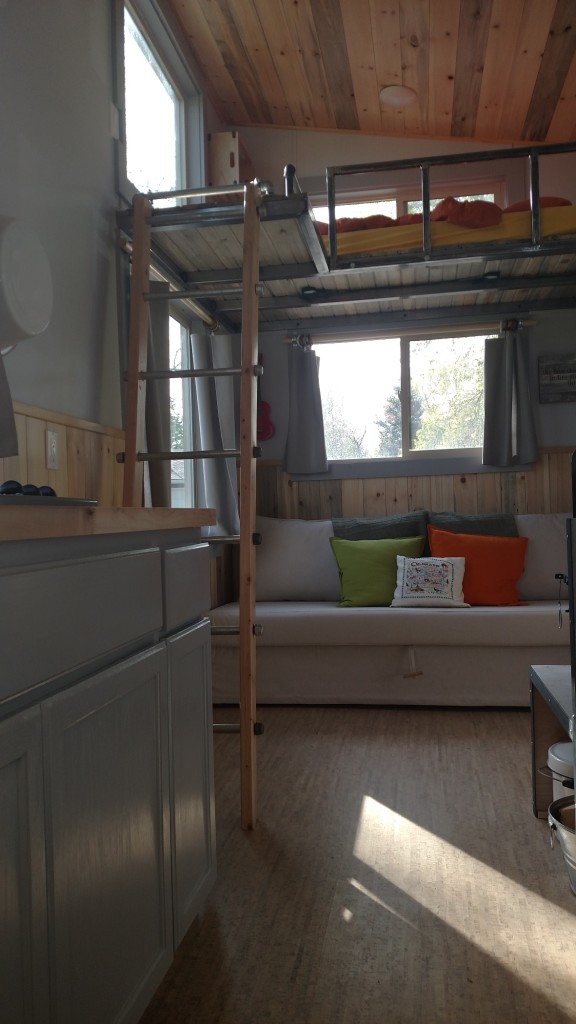
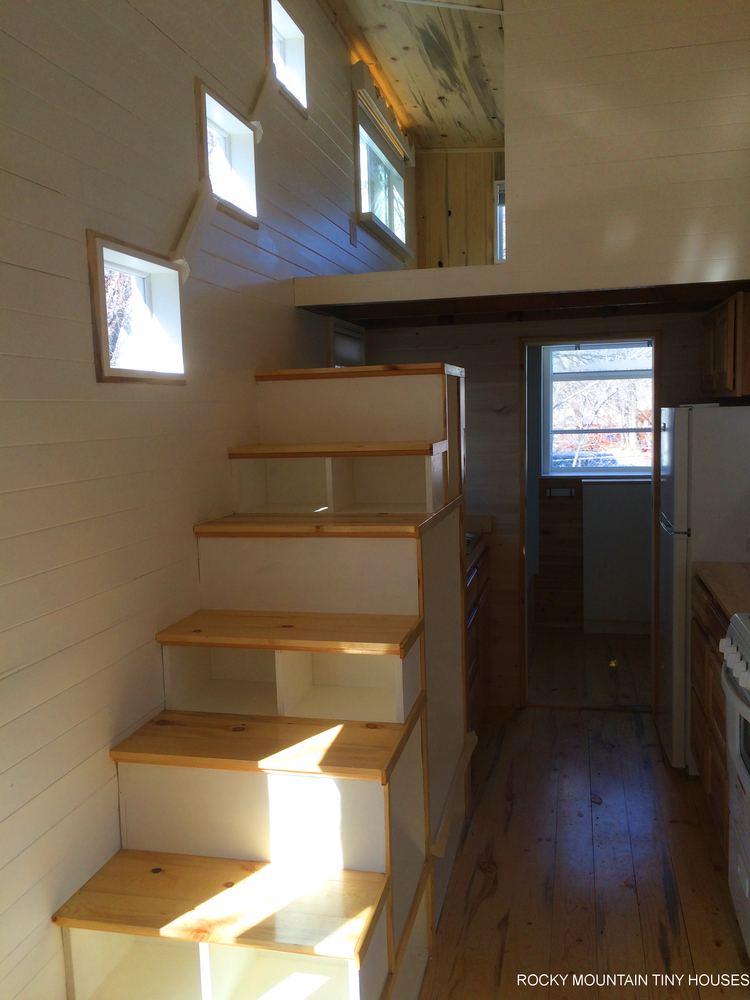
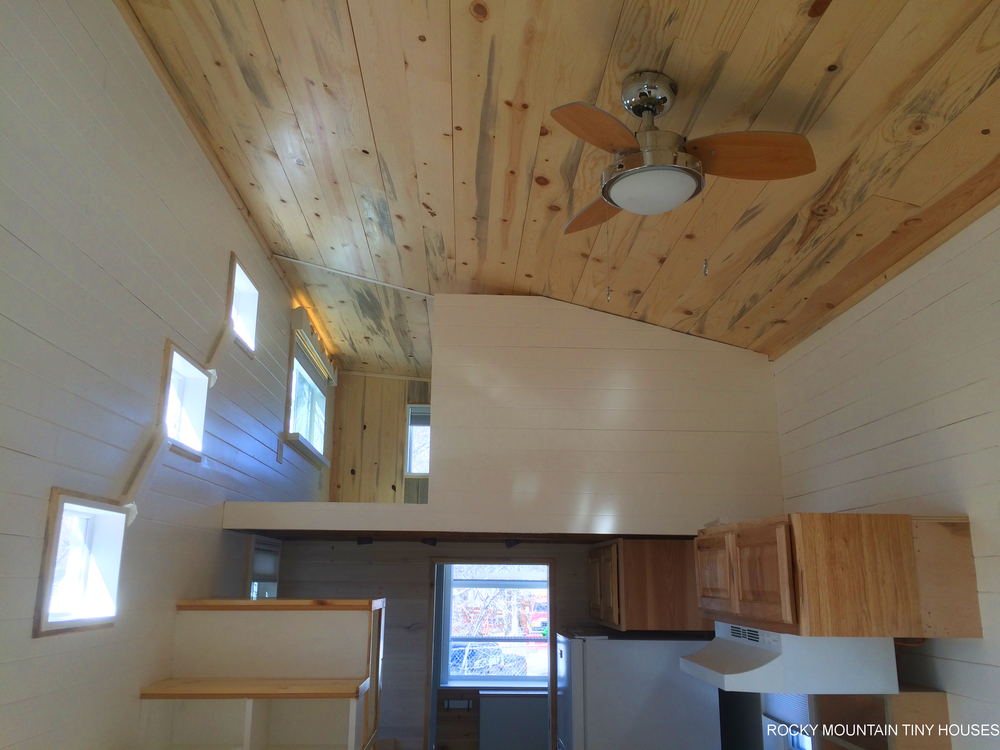
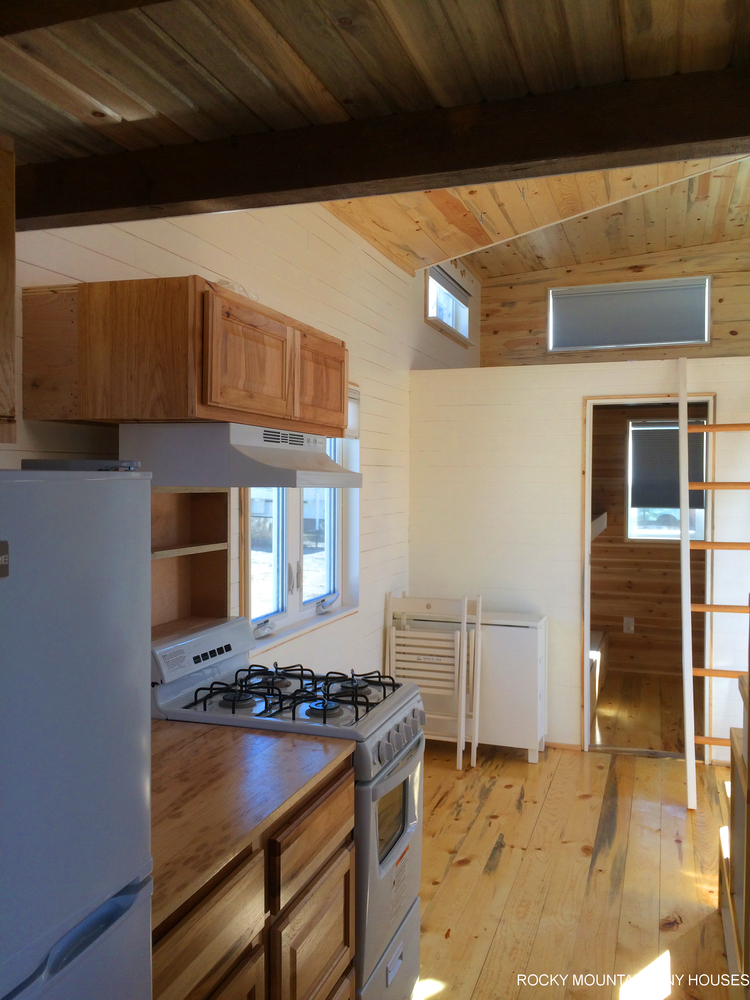
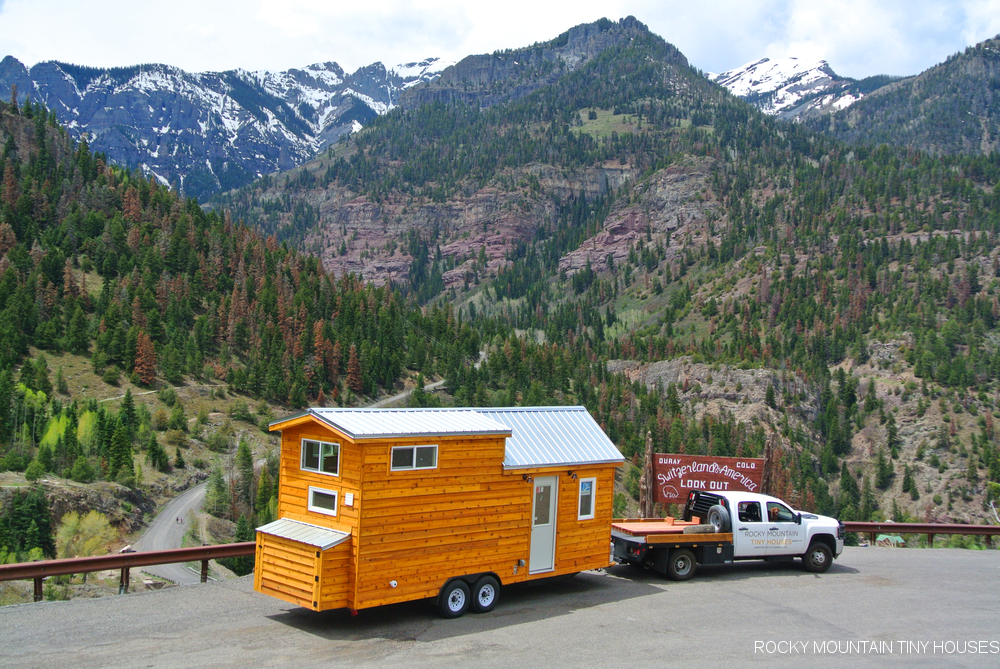
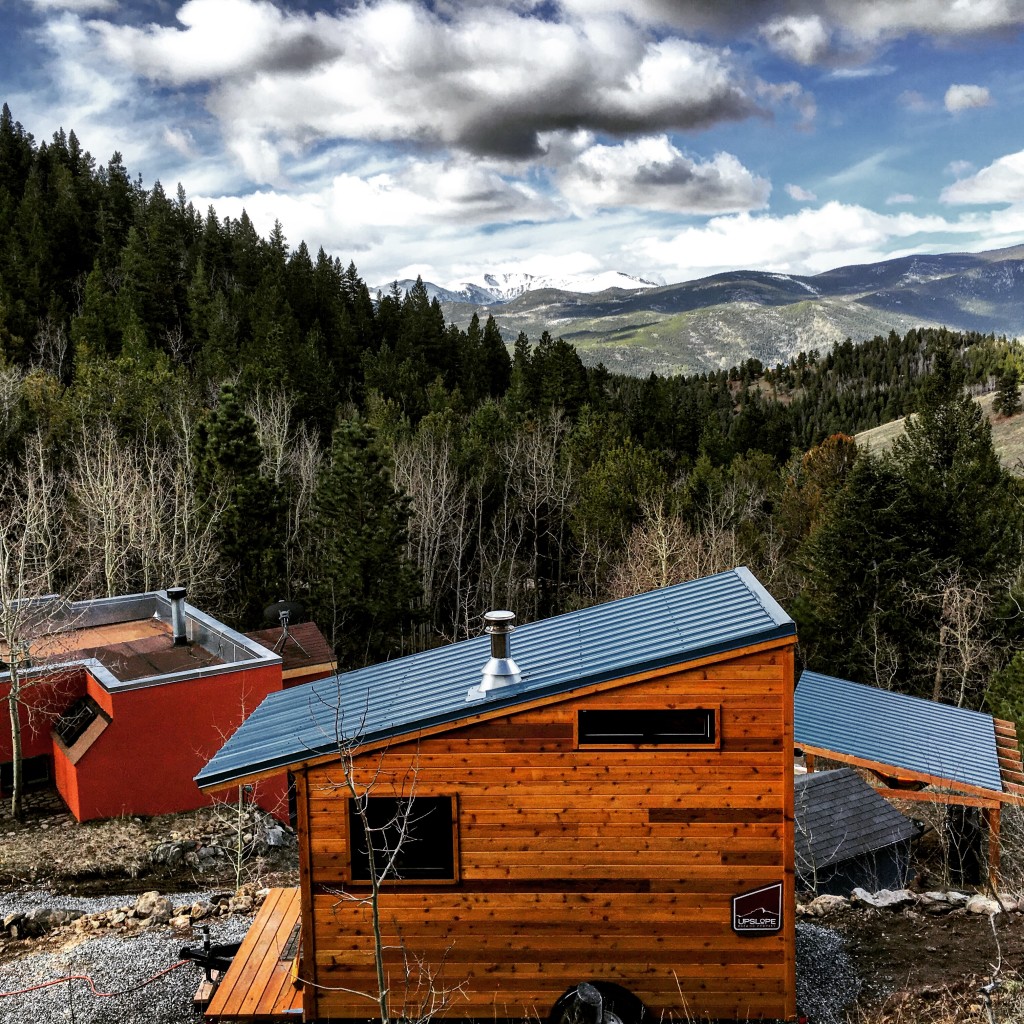
A hotshot firefighter living in Idaho Springs, CO ordered this very tiny, yet suave bachelor pad to live in on his property up at 9,200 feet. He owns a main house and just wanted to live simply in this small unit while renting out the larger house. Because the main house had bathroom facilities, Nick opted to save money and space by eliminating the bathroom in this tiny house.

The Upslope Tiny House interior

He was very drawn to our East Austin rental, and also the Salsa Box by Shelterwise but being a man of good stature, needed a little bit more room, but still had a tight budget. We began playing around with a 14′ model, a little larger than the 12′, but still small enough for a single axle trailer to help keep costs down. Also small enough to utilize some different construction methods that would further reduce weight and labor costs. In the end, we were left with a house that weighed in at 4,400 lbs (single axle trailer is rated for 7,000#) and sold for around $25,500.

the Upslope tiny house entry

The exterior is defined by the simple shed roof, the Up Slope, if you will. Cedar tongue and groove comprise the siding while strategically sized and placed black vinyl windows offer light, view, and ventilation. A large portion of the rear of trailer is glazing, a 60×60 window to be exact. The views on the property are spectacular, and we aimed to take full advantage of them.

The Upslope Tiny House view

Other notable features include winding stairs to access the sleeping loft, a woodstove, a small closet partitioned off by barnwood, a simple kitchen with a cooktop and gravity fed water system using exposed pipes, and a fold down porch that is protected by a cantilevered roof. The Upslope brand of beer out of Boulder, CO also happens to be Nick’s favorite imbibement. We have no relation to Upslope other than we enjoy their beer as well, and it’s my understanding they like the house!

The Upslope tiny house stairs

The Upslope tiny house porch

While we don’t have plans for this exact layout, you can purchase plans for the Crestone design which is very very similar.

Filed Under: Tiny House Design Tagged With: 14 foot tiny house, mountain tiny house, Rocky Mountain Tiny Houses, shed roof tiny house, Upslope tiny house

16′ Foot Curved Roof Tiny House

May 8, 2016 By Greg Parham 23 Comments

curved roof tiny house exterior

A lovely young woman from Georgia commissioned us to design and build this unique tiny house. Having seen and admired the features found in our Boulder and Front Range models, but also being really attracted to the curved roof line of the Leaf Version III tiny house, and of course wanting to customize the house to meet her needs, she put her trust in us to deliver a fantastic product.

We start out with a custom 16′ heavy duty trailer chassis and stick frame the superstructure using advancing 2×4 framing methods. The curved top plate is easily attainable by laminating thin strips of wood together at precise geometric constraints. We applied a very similar reclaimed tin and cedar siding motif in rainscreen fashion. The radius of the curved roof was gentle enough to carefully bend standard pro panel roofing along the surface. Windows were strategically located to take advantage of our advanced framing methodology, optimize light and view, and coordinate with the floor plan.

tiny house curved roof framing

Speaking of floor plan, this house is unique, at least for a 16′ length, in that primary sleeping quarters is intended to be on the ground floor. The customer was able to do extensive research and locate a sofa bed that would not only double as a sofa and a comfortable bed, and easily convert from one to the other, but fit our tight space constraints and not break the bank. This single piece of furniture is the key to making this whole plan work!

The bathroom with a 32″ shower and a composting toilet occupies the front of the trailer. It is accessed via a sliding barn door. Next to the bathroom wall is a built in closet, with a stainless steel counter space for the small but efficient kitchen area. The customer provided a unique three way chest refrigerator (12v dc, 110v AC 220v AC) that we mounted to a heavy duty slide out base for easy access under the countertop. A side pantry and ample upper cabinets, all dark stained, provide plenty of storage. Across from the kitchen is a large picture window with a narrow casement for airflow. This space is accentuated with a dining table that can be folded down to free up extra room.

The house is outfitted with a 1400 watt solar system to enable it to be off grid ready. The Outback Flex power management system allows it to plug into the grid to charge the batteries and energize the house should the panels have insufficient sunlight or encounter other problems. All of the solar equipment lives inside a utility closet mounted on the tongue of the trailer, as well as the propane tanks that provide fuel for a two burner cooktop and on demand water heater. A 9k btu mini split system provides cooling and heating for the house.

curved roof tiny house interior

We installed 3 strips of stainless steel on the barn door to house the extensive magnet collection that the owner has. A collapsible aluminum ladder provides access to a storage/guest loft and hangs completely out of the way when not needed.

curved roof tiny house kitchen

curved roof tiny house barn door

curved roof tiny house bathroom

curved roof tiny house living room

curved roof tiny house sunset

curved roof tiny house profile

curved roof tiny house solar panels

Filed Under: Company News, Tiny House Design, Tiny House Plans

20′ Front Range Shell Build

March 15, 2016 By Greg Parham 7 Comments

An awesome family in Fort Collins commissioned us to build this 20′ Front Range model (aptly named!) to use as a vacation home up on some land they owned in the mountains. They had a limited budget, but were ready to put in some sweat equity to finish the house on their own, so we focused on what we could get complete within their budget and skill level. The result was a very well crafted and comfortable shell that they have since completed and could not be happier with.

The level of completion on our end is what I would call a 3/4 shell. We stick framed the structure on top of a custom trailer,  installed windows, metal roofing, siding, and an exterior door. The structure was then wired and spray foamed before receiving 1/4″ paint grade plywood walls. Cork flooring and beetle kill ceiling as well as a beetle kill wainscot round out the major interior materials. We fabricated and installed two L-shaped lofts from steel tubing and decked those with more beetle kill t&g. A small woodstove was installed for a heat source. The final step left in the budget was to install a closet and partitions for the bathroom area. Here are some photos of the house right before delivery.

Front Range tiny house shell

Front Range 20' shell

The customer was gracious enough to share some nearly finished photos of the house after a few months of working on it themselves:


20' Front Range Shell interior1

20' Front Range Shell int2

20' Front Range Shell int3

20' Front Range Shell woods

Filed Under: Tiny House Design Tagged With: 20' tiny house, colorado tiny house, colorado tiny house builder, custom tiny house, Front Range tiny house, Rocky Mountain Tiny Houses, Tiny House, tiny house shell

Wasatch 28′ Tiny House

March 1, 2016 By Greg Parham 43 Comments

Wasatch 28' tiny house exterior

We now have plans available for this design here!

Introducing the Wasatch, a custom 28′ tiny house for a family of four. The Wasatch Range in Utah extends from the Idaho border into central Utah, forming the western edge of the Rocky Mountains. Most of Utah’s population lives in the valley to the west of the range.

This is a stick framed structure with spray foam insulation built on a 18,000 GVW custom trailer. The house itself weighs 11,700 lbs dry. Wall framing is set at 8′ in width, it is almost maxed out on height at 13′-5″ .

Notable features of this house include beetle kill pine flooring and ceiling, a bedroom with bunk beds on the first level, a full size bathroom, a good sized kitchen, a large master loft with built in storage that doubles as privacy, a second loft to act as storage or lounge space, abundant light, and a few other clever details.

My photos didn’t come out very well, but there are a few at the bottom.  The video tour quality is decent. This build came in at about $76k with all the features included.

Wasatch 28' tiny house stairs

Wasatch 28' tiny house beetle kill


Wasatch 28' tiny house interior

Filed Under: Tiny House Design

SIPs vs Stick Framing For Tiny Houses

February 21, 2016 By Greg Parham 17 Comments

SIP tiny house

As one of the few builders capable of offering SIPs (structural insulated panels) as a construction method for tiny houses, I naturally get asked a lot of questions about the differences between SIPs and traditional stick frame. At long last, I found some time to sit down and write this post! I will say up front that either method, properly executed, will yield a well crafted, well insulated, sturdy tiny house that will serve its intended purpose for years to come. What ultimately drives our decision on which route to go will depend on timing of the project, anticipated climate where the house will be parked, and the shape of the tiny house. Major factors to consider are strength, weight, fabrication, insulative value,  design flexibility, electrical, plumbing, finish out, freight, and overall cost. For reference, we use EPS (expanded polystyrene) SIP’s and are comparing them to optimum value 2×4 framing with spray foam insulation.

Strength

SIP’s are hands down the strongest most rigid method of construction. So strong, in fact, that we typically use less steel in our trailers since after the walls are bolted to the trailer, the whole house becomes a composite part of the trailer structure. We can not only save a little weight in the trailer, but increase our head height a little since in shorter trailers we can use 4″ tall main frame members instead of 6″, or 6″ members instead of 8″ for longer trailers. Stick framing with a properly installed spray foam is also quite strong. Not far behind SIP’s if you ask me. If you are comparing to batt insulation or even hand stuffed rigid board, SIP’s are way stronger. As far as weight, it is a wide misconception that SIPs are lighter than stick frame. Compared to advanced framing methods that minimize framing lumber, we are finding SIPs to be about 5% heavier. Despite the absence of internal studs in SIPs, the fact that there is 7/16″ OSB on both sides contributes to the extra weight. I will say that some SIP manufacturers can use a MgO skin that can be finished like drywall, eliminating the need for a finish layer on the inside, which might make weight more even, but in the end, the 5% added weight on standard builds is not noticeable.

Insulation

The EPS foam used in SIP’s typically rates at about R5.5 per inch. Better than a lot of other products, but not as high as some of the spray foam products that can reach 7.1 per inch. The main difference is the lack of thermal bridging though. 2x lumber is normally rated at R1 per inch, so anywhere you have a framing member is a potential spot for heat transfer. In stick framing, you can negate this issue by adding a layer of 1/2″ or 3/4″ foam over you sheathing, but you are increasing your wall thickness and adding cost, time, and complexity to your build to the point where SIP’s would be a more cost effective option. The SIP industry likes to use a term called effective R-value, or overall R-value. This measures the R-value of the envelope as a whole, not just the per inch characteristics of the foam. By these measures, SIPs  clearly out-perform stick framing. I will point out that we are talking about tiny houses here, not large 2500 sq ft houses where energy efficiency is more important. Smaller spaces are easier to heat and cool by their very nature. I will say that SIPs make a lot of sense for people going to be parked in very cold climates, and by this I’m talking about Montana, Minnesota, Canada, Alaska, places in Colorado parked above 10,000 feet, and perhaps some place like the Adirondacks where nightime lows can reach -40F or lower. In milder climates, either system will perform great. In warmer climates such as the south, you will find SIP’s help keep the house a little cooler, but it’s my opinion the difference is small.

Fabrication/Erection

DSC_3065cSIPs are manufactured in a facility and shipped to site. All of the panels are cut to size and shape including all rough openings. Those with little experience cutting complicated roof shapes will find this attractive. Additionally, the panels are very straight, and as long as care is taken to layout sill plates square and parallel, you will have a structure that is very straight and easy to finish out. A good framer picks straight studs and rafters, but the reality is lumber is still a variable product and you inevitably end up with small variations that need to be accounted for in the finish out stage. With a good crew of 3 people, a typical SIP shell fully insulated can be erected in three days or less. By comparison, stick framing can take 5-10 days to get an insulated shell. I will note that use of a crane or forklift is not absolutely needed, but is very helpful in placing the roof panels when using SIPs. Otherwise you will need lots of manpower to hoist them up. We have access to a forklift and can lift large unbroken panels up easily. For those without this capability, you can request to have panels cut in smaller sections but this adds to the complexity when splicing the panels together. One good benefit of SIPs is that you will have a solid substrate to attach interior siding, cabinets, shelves, built-ins, tv mounts, you name it. You will not be searching for or be limited by studs spaced 24″ apart.

Flexibility

Its always best to have a very clear plan and remain with it whether you are using SIPs or stick framing, but there is some flexibility built into SIPs if you need to make changes down the road, such as enlarging, shrinking, or even relocating rough openings. There are some rules you cannot break when it comes to making cuts across splines, cutting openings more than 4′ wide, or cutting openings that are within 12″ of the top plate height. These are all things the manufacturer can educate you on should you need to make modifications. One other thing to consider is tiny house shape. SIPs are flat panels, they cannot be bent or rounded, although you can cut curves out of them. If you have a design that incorporates any kind of warp, twist, or spherical aspect, it will need to be stick framed. You can do hybrid versions such as we did on the Pequod design. The walls were pre-cut to the wavy shape and we stick framed the roof on top of them.

Pequod tiny house SIP

Electrical

Running wires in stick framing is a bit easier and allows for a little more flexibility when placing boxes and routing wire, but with the proper skills and tools one can still fish wires in SIPs without too much hassle. The trick is knowing how to utilize the grid of chases that are pre-cut into the panels. Chases are typically cut 12″ and 44″ horizontally above the floor and every 48″ vertically. Custom chases can be specified ahead of time if you know your electrical plan to a T. If you don’t, it’s ok. Using a hot ball and hot rod you can create your own runs to intersect with the chases. One of the trickiest parts to wire is transitioning from wall to ceiling. Proper prep work drilling holes in the right spots and making sure panels align correctly goes a long way in aiding this nuance, but you are allowed to hack the panels up a bit if need be and spray foam over the holes you cut out as long as wire is deep in the foam and not close to either surface.

Plumbing

Unlike electrical wires, plumbing pipes cannot be easily run through chases. We run all plumbing on the inside of the walls. This means you have to get creative in hiding pipes behind cabinetry and built ins, and sometimes building a baseboard chase to run them in. Or, if you don’t care, leaving them exposed. This does have the added benefit of having full access to your fittings should one ever fail. Of course, you can do this with stick framing as well, but given the choice most people will run pipes in the walls to avoid hiding them. It does help if you can clump all your plumbing fixtures close together, but we have successfully hidden pipes on 28′ builds where the kitchen is on one end and the bathroom is on the other.

Freight and Overall Cost

Because the SIPs we use come from another part of the country (Michigan to be exact), freight is a huge expense to factor in. Some other factories closer to Durango are starting to come online, but for the time being we are sticking with Porter SIPs because their product holds the most certifications and guarantees in the industry currently. This is where timing comes into play. A typical truckload can transport about 6 tiny house packages. If we can get at least three customers lined up for an order, then freight costs are manageable and make sense when compared to the cost of stick framing. Otherwise, one or two projects on one truck is going to be a bit pricey and we are going to be biased towards stick framing unless the customer is really just wanting to use SIPs. From a builder perspective, assuming we can keep freight down, the cost to erect a SIP tiny house is about the same as it is to stick frame and spray foam one. The product itself cost more upfront, but this is canceled out in labor savings. For a DIYer not placing a value on their time, SIPs are going to cost more.

Fresh Air

If you choose to build with SIPs or go the spray foam route, it is important to provide fresh air for you tiny house because it is going to be sealed very tight. This can be as simple as keeping windows open, or as complex as installing a heat recovery ventilator (HRV). You might even consider doing these things if you are building a tiny house that is not very tight and “breathes” well. Fresh air is critical for the health of the house and its inhabitants.


Filed Under: Tiny House Components, Tiny House Design Tagged With: SIP tiny house, SIPs, SIPs vs stick frame, structural insulated panels, tiny house construction

« Previous Page
Next Page »
  • Facebook
  • LinkedIn
  • Pinterest
  • YouTube
Rocky Mountain Tiny Houses 18' Boulder
FRONT RANGE TINY HOUSE
Pequod tiny house exterior
Pequod tiny house countertop
Pequod tiny house catwalk
custom hOMe build exterior1
custom hOMe tiny kitchen
log cabin tiny house kitchen
Custom Tiny House Plans
Colorado Tiny House
Colorado Tiny House
tiny house custom wood countertop
tiny house towing
tiny house towing
steampunk light fixture
Mandy Harris
Austin Tiny House Kitchen
Mandy Harris
Tiny House barn door
Mandy Harris
Funk East Austin Tiny House
Mandy Harris
Austin Tiny House interior
East Austin Funky Tiny House Exterior
Mandy Harris
Boulder Interior
Boulder Interior
Boulder Tiny House front
Boulder custom light
Boulder tiny house porch lights
Rocky Mountain Tiny Houses Boulder side
Durango tiny house in winter
Durango Office
Durango Office
Durango Bookshelf
Durango Bookshelf
Durango Detail
Durango Detail
Shower Detail
Shower Detail

Tiny House Updates

  • Fall 2025 Update
  • 28′ Bandelier
  • 20′ Hermosa Tiny House
  • The Beatle 22′ Tiny House
  • 10×32 Hill Tiny House
  • Emerald Lake 10×32
  • Spring ’24 Update

Tiny House Magazine

RMTH was recently featured as "Builder of the Month" in issue 32. You can purchase this issue, or any other issue, by clicking here

Oh Yeah

Advertisements